Updated Problems Tab User Guide
The updated Problems tab in iKnowMed Generation 2 makes charting easier and more accurate, improving problem data capture to support care plan development.
New and Updated Features
Listed below are some of the features we have added or updated in the updated Problems tab for improved readability and usability.
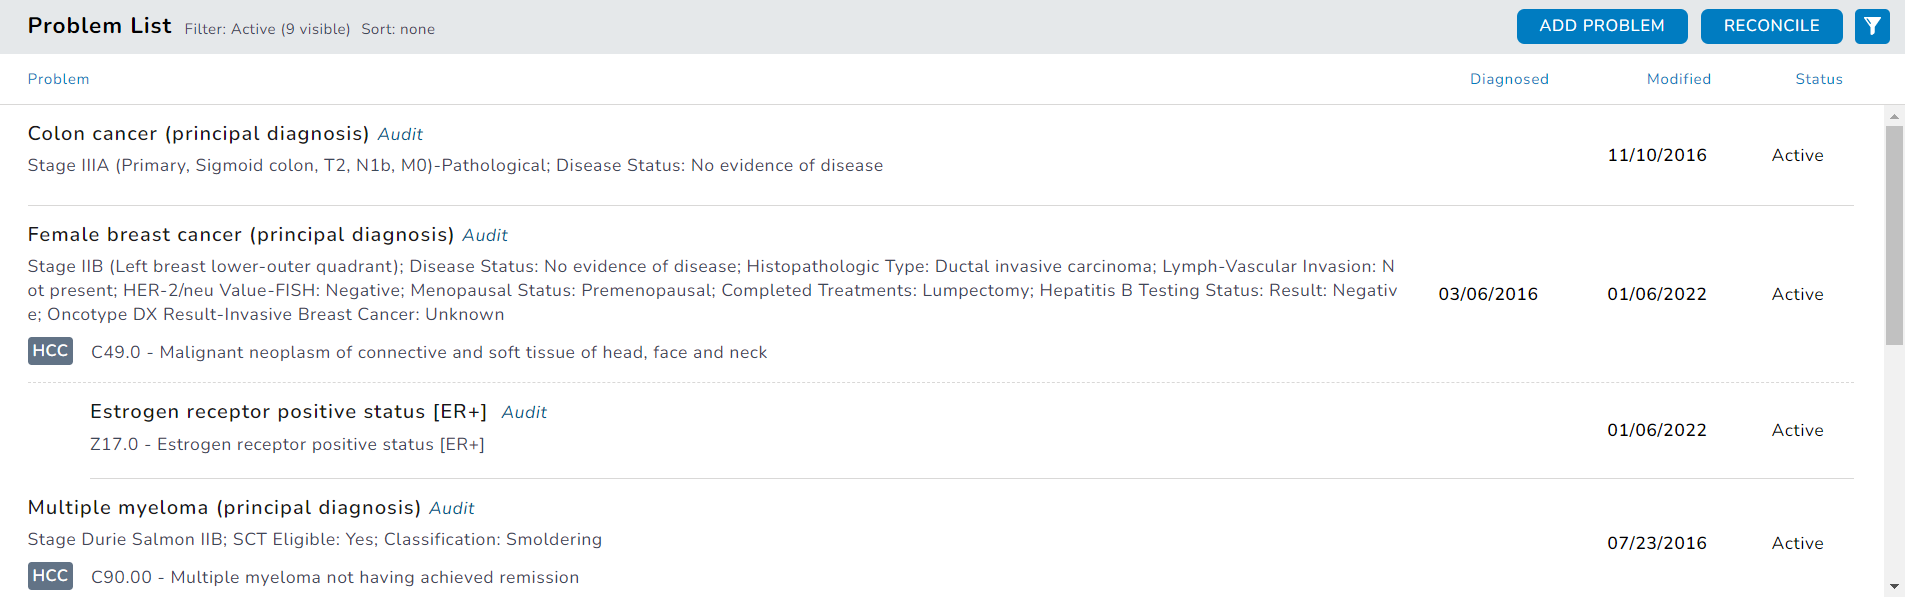
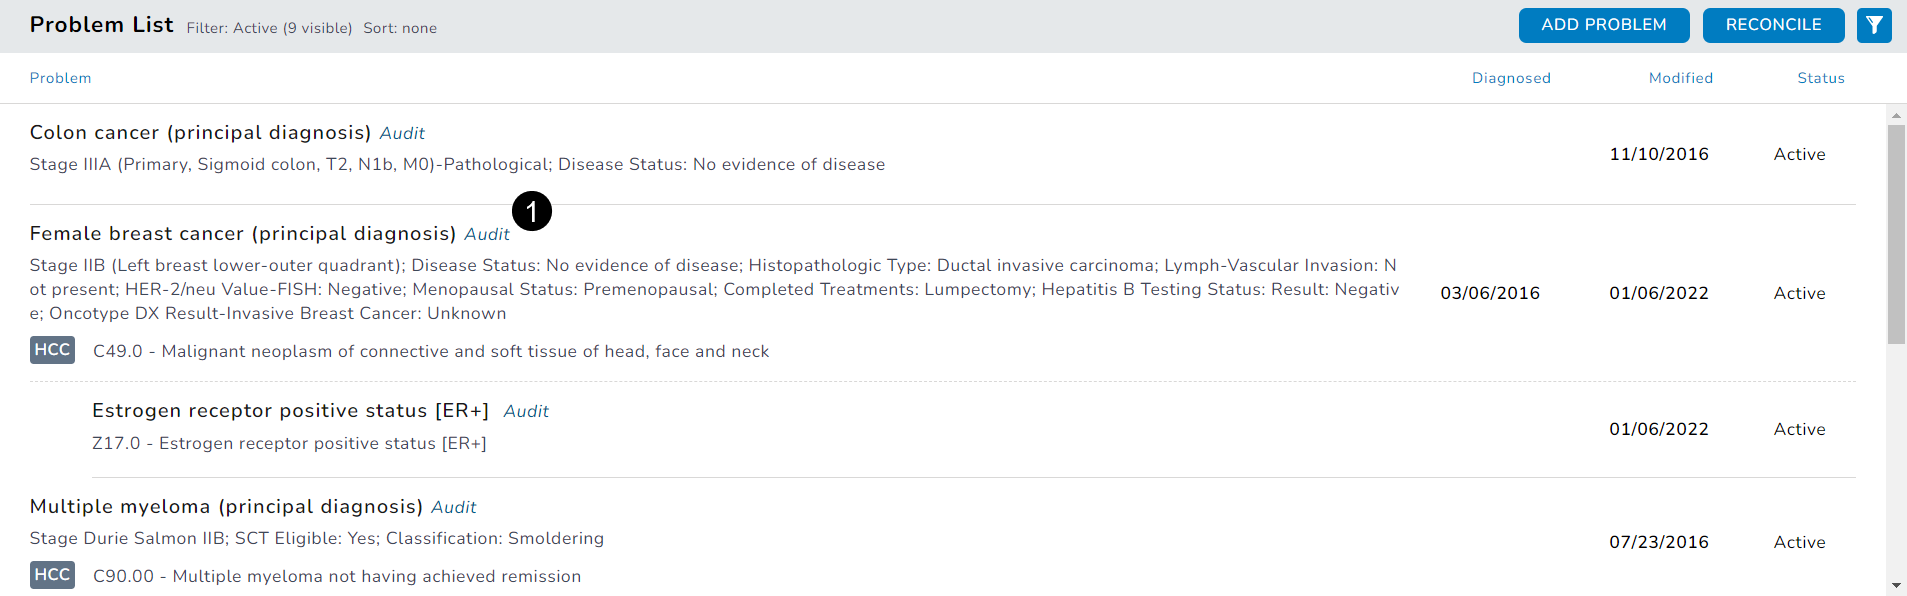
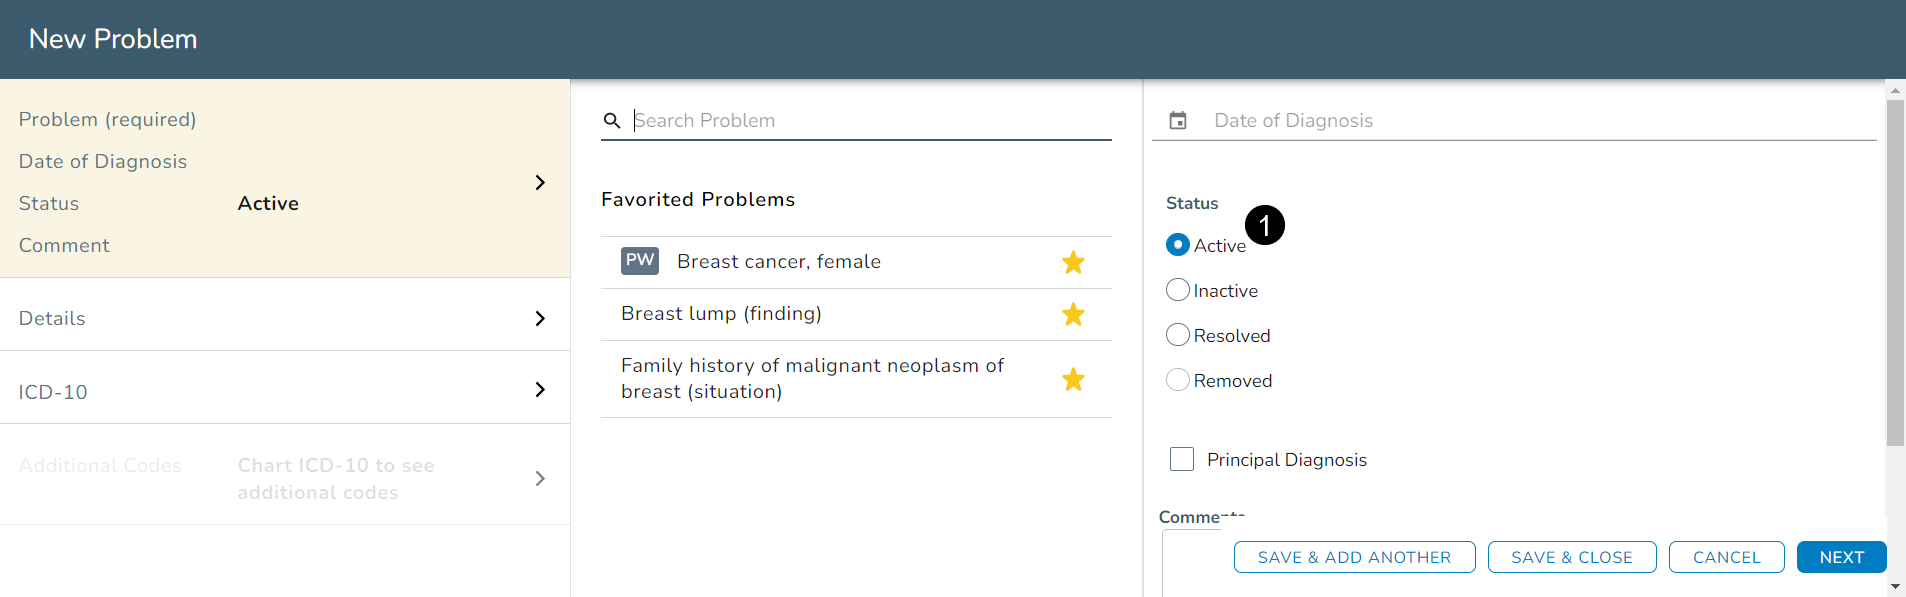
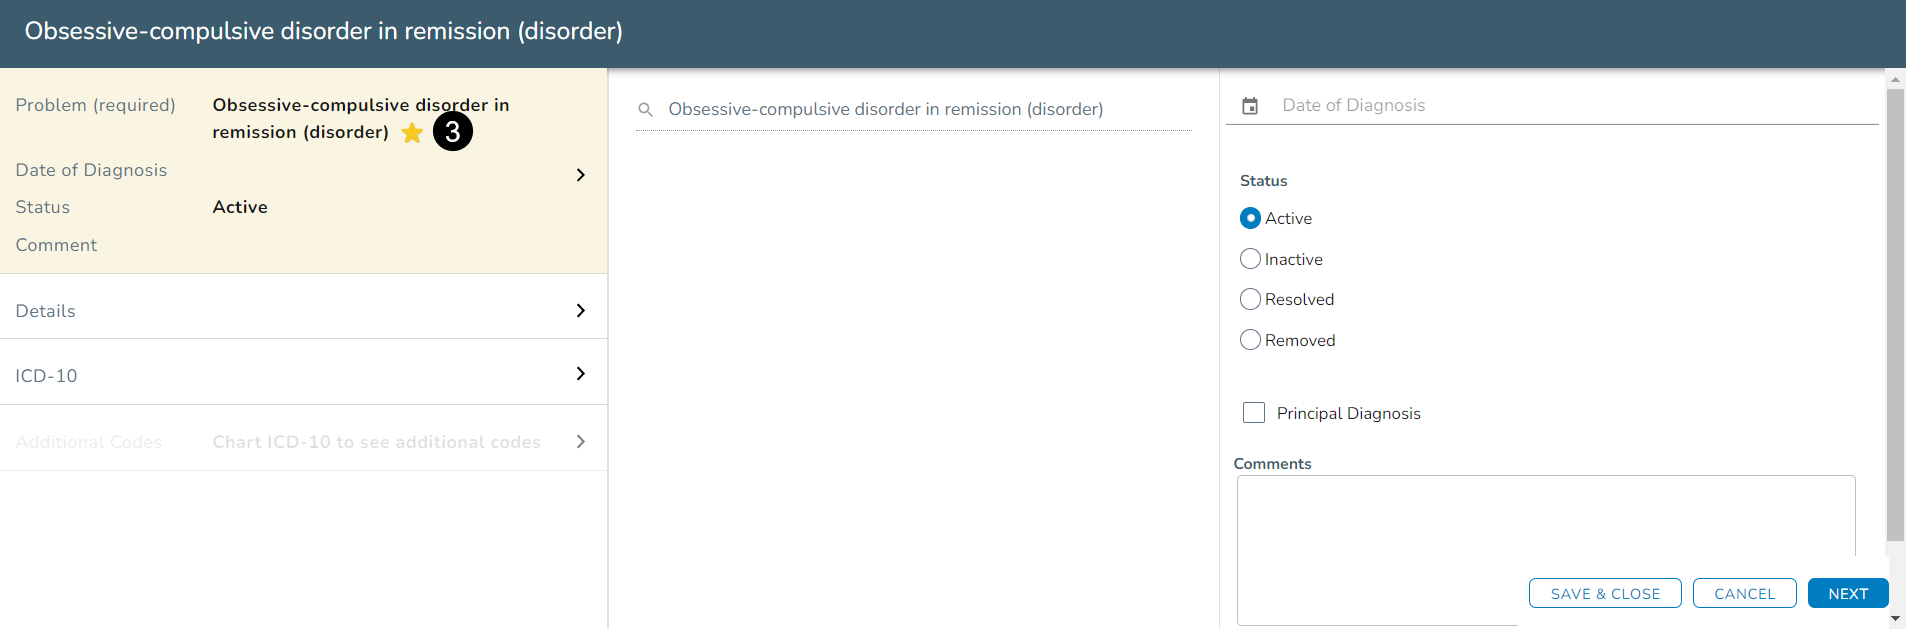
Principal Diagnosis label
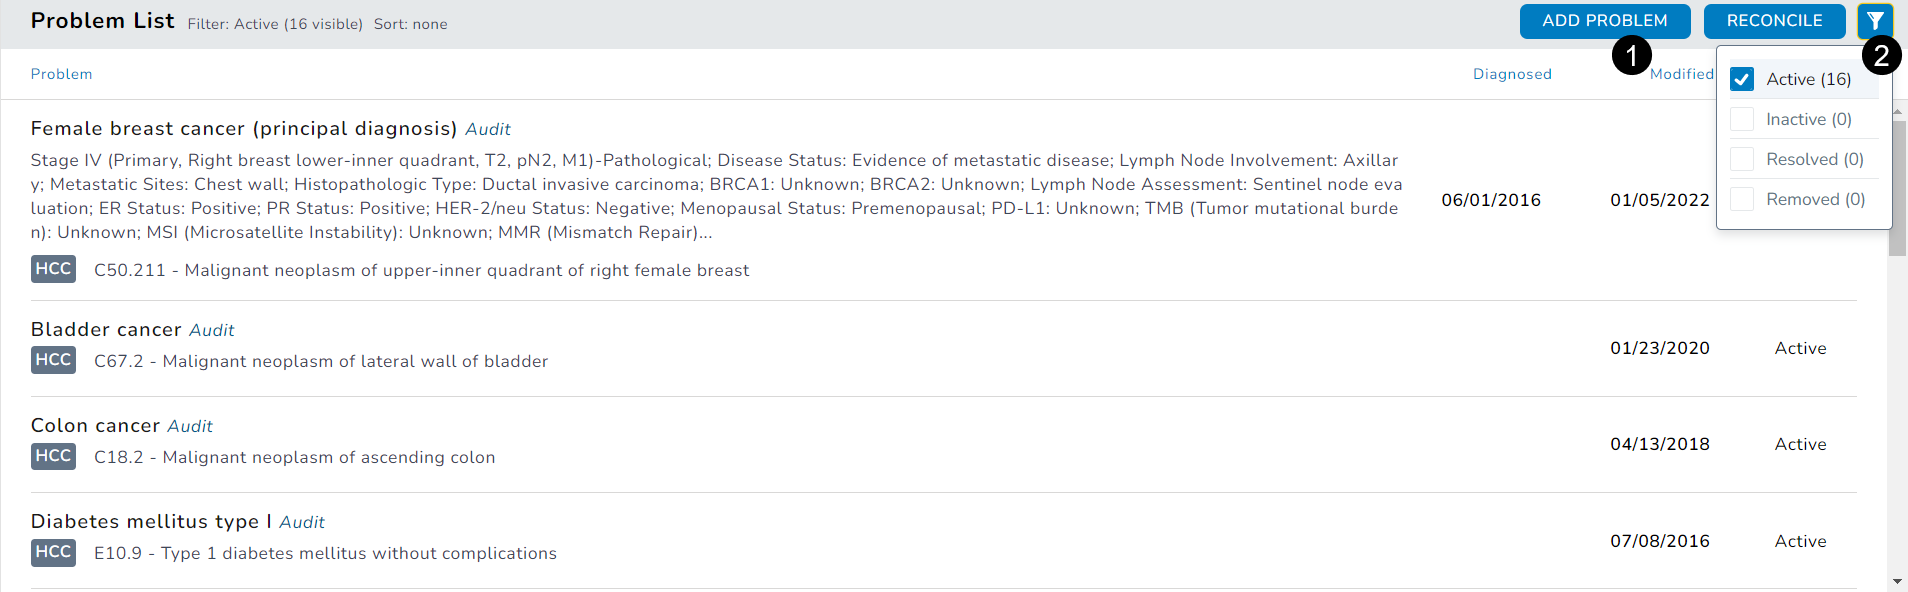
New label clearly identifies diagnosis, instead of an asterisk (see callout 1).
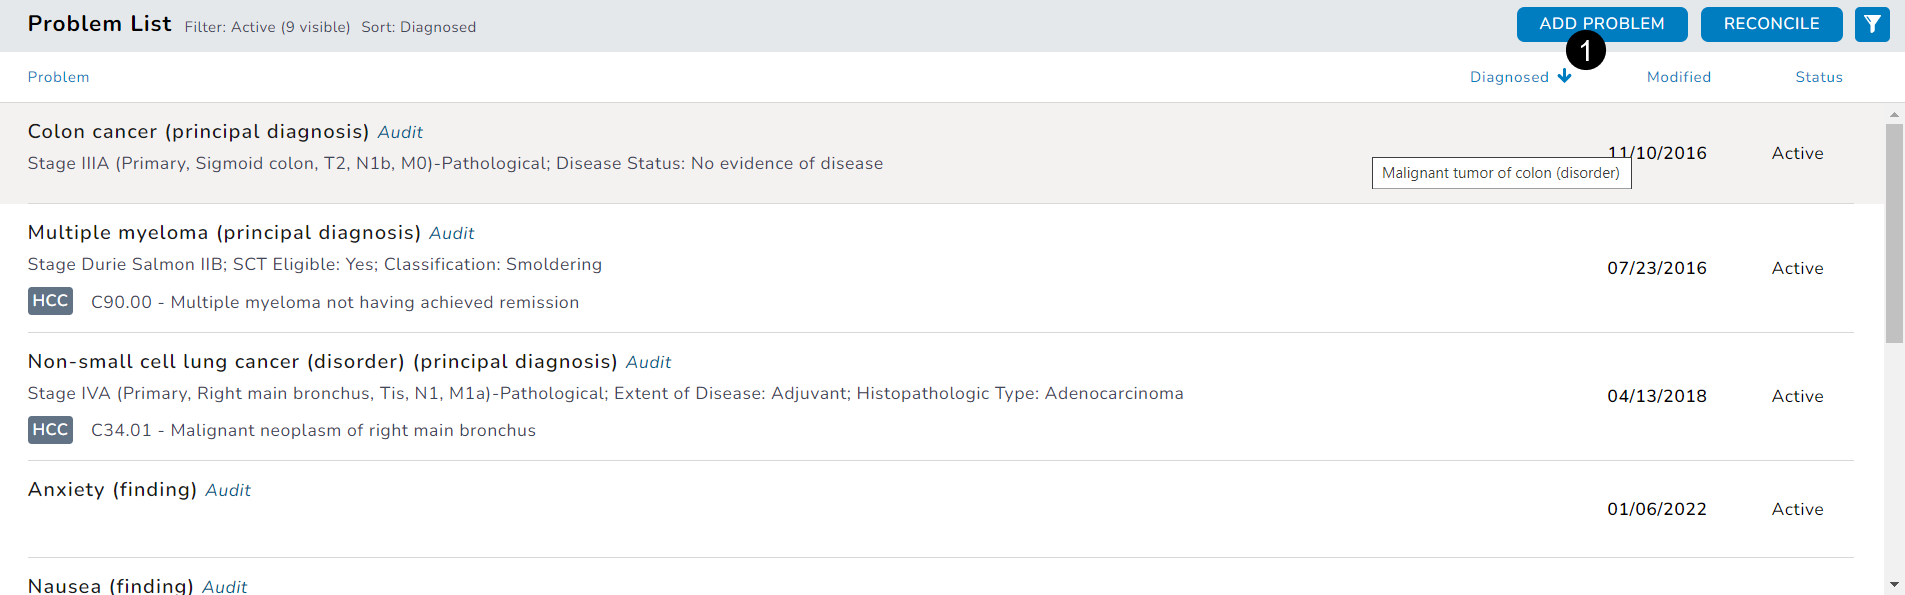
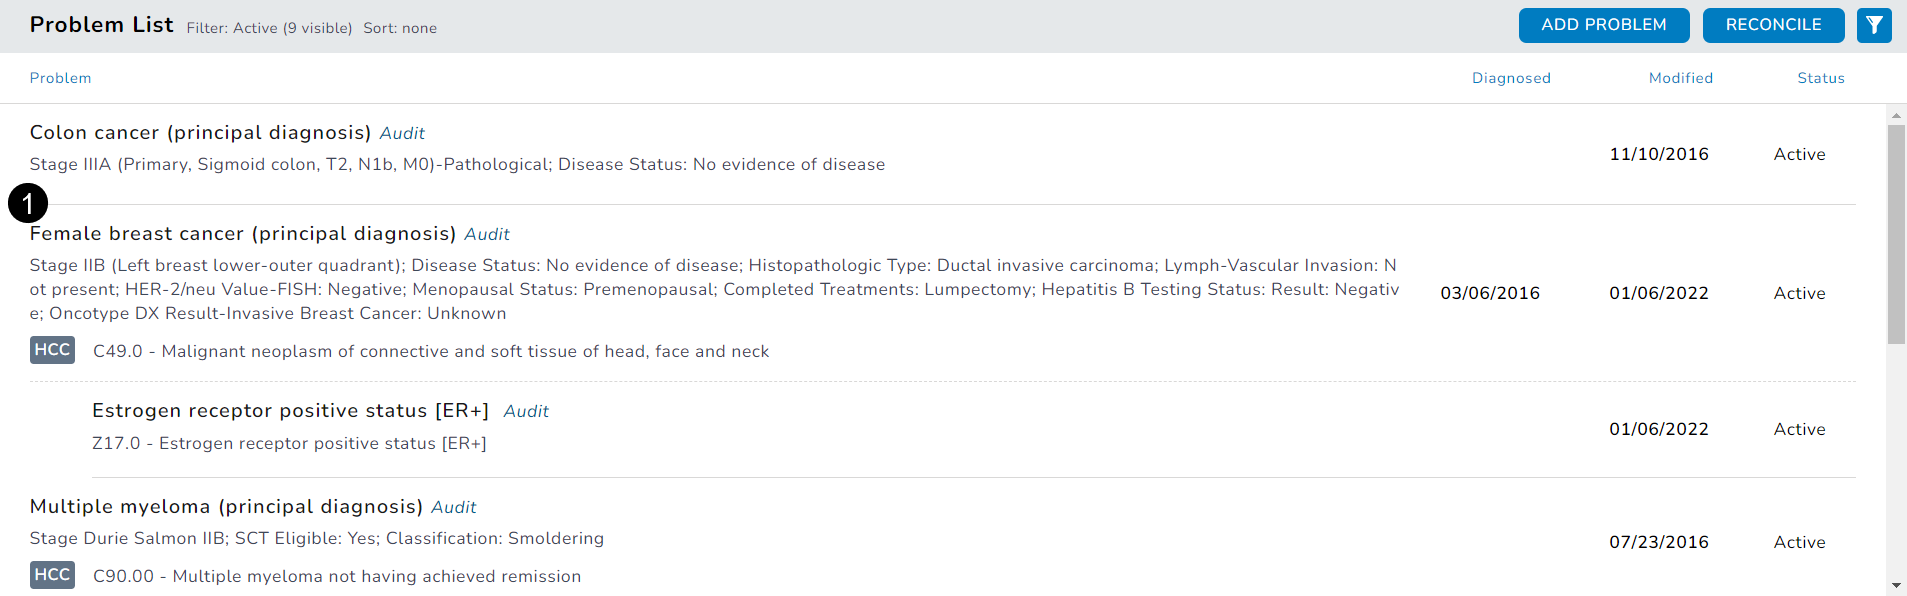
Sort
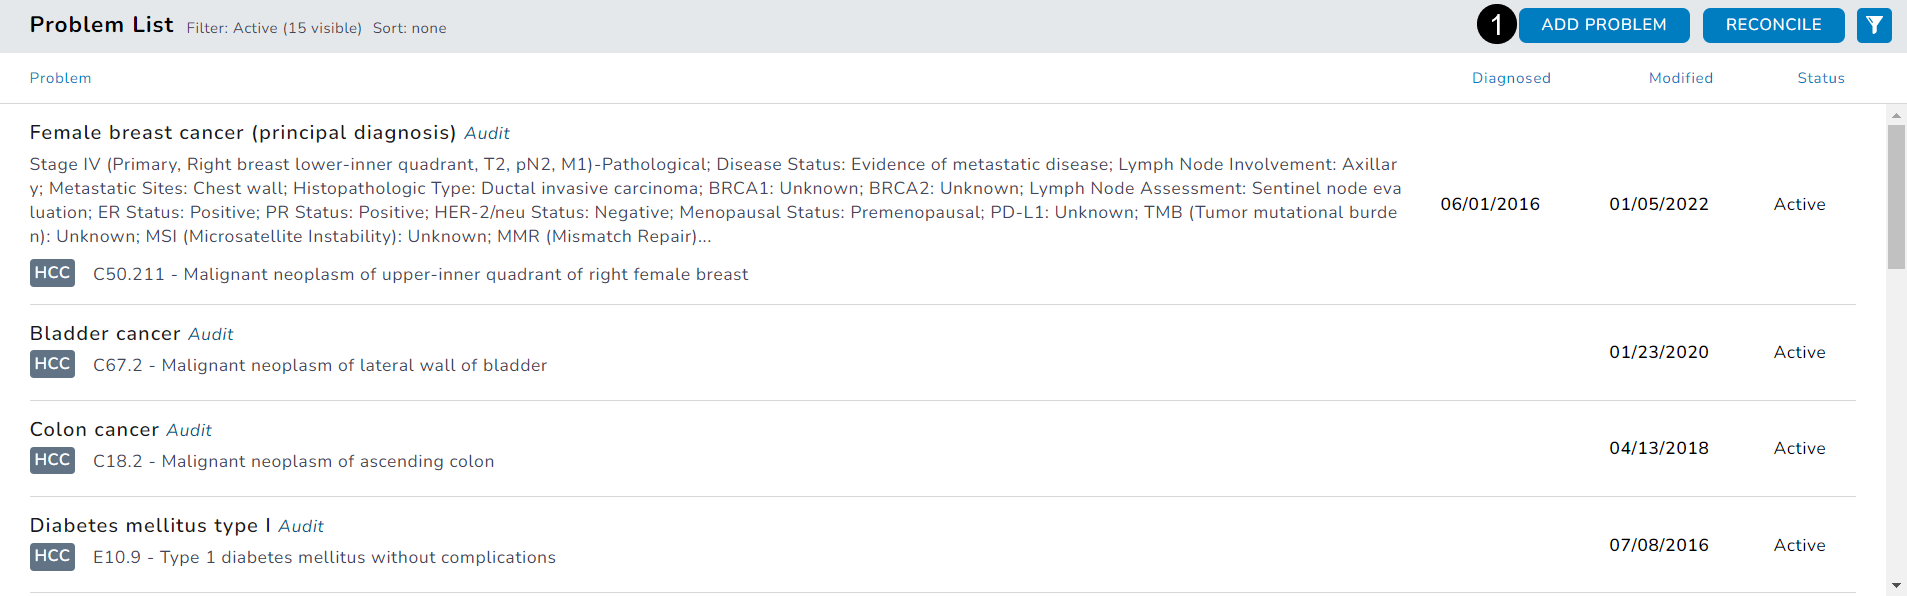
The Problems List is now sorted by the most recent principal diagnoses and will show previously entered information including stage, staging details, and ICD-10 code.
-
All principal diagnoses will be grouped together by the most recent diagnosis date followed by all other documented problems.
-
Clicking on the name of each column will sort the information in descending/ascending order (see callout 1).
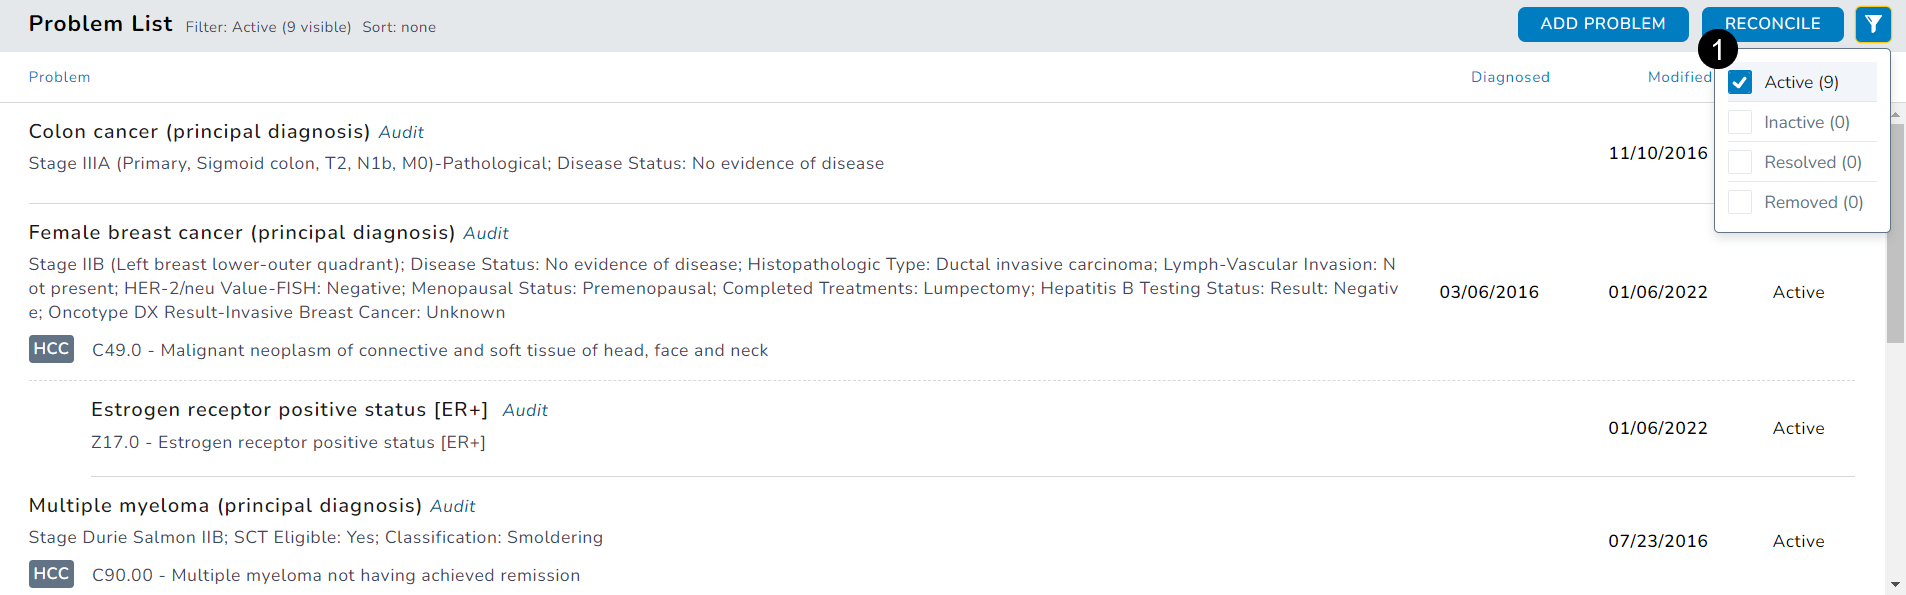
Filter
The default list includes all Active problems, but you can further customize the list using the filter option in the upper right corner to include Inactive, Resolved, and Removed problems (see callout 1).
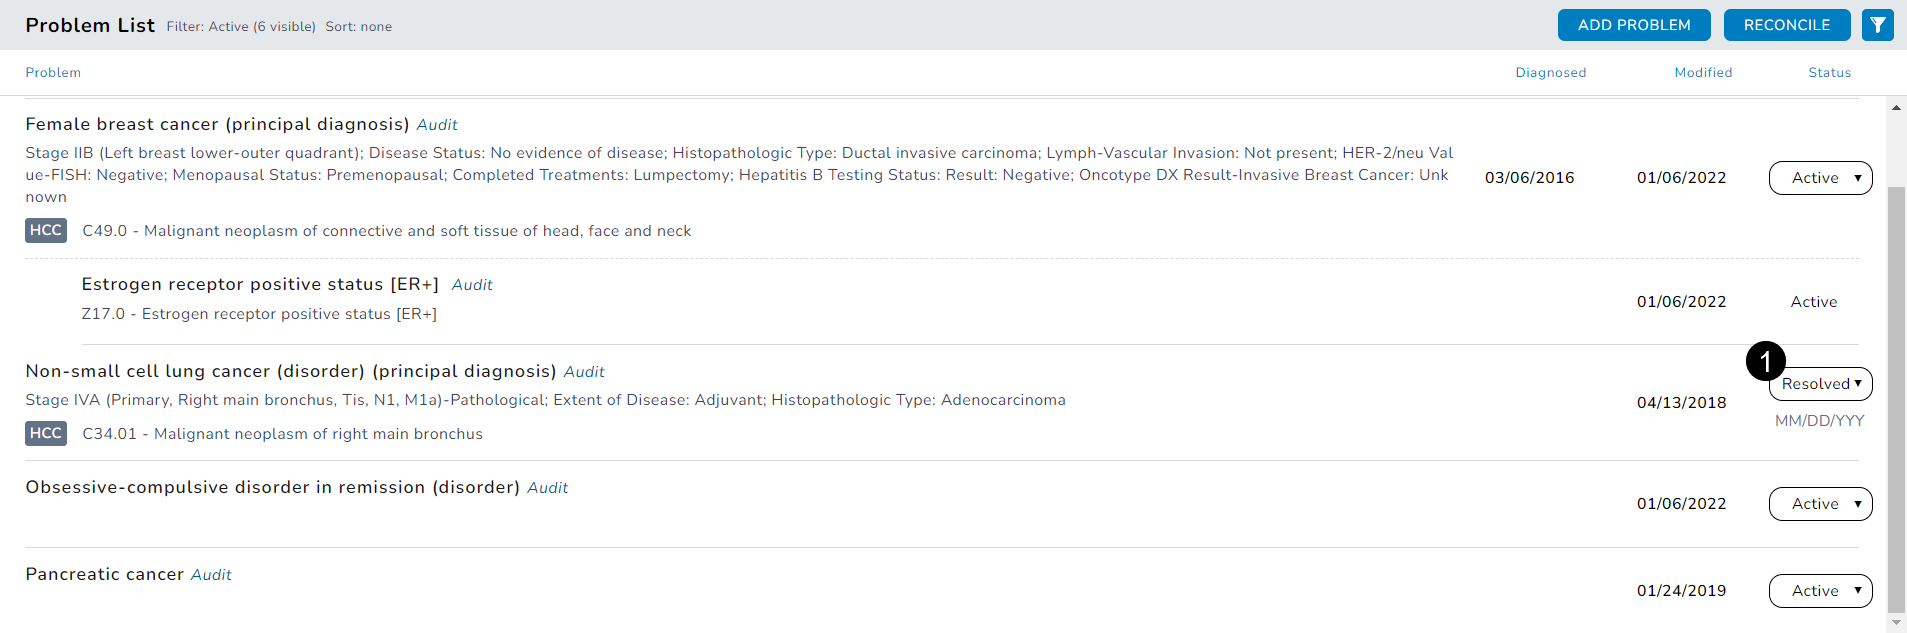
Status
Easily view and change the status of a problem using the drop-down feature in the Status column. The status can be set to active, inactive, resolved, and removed. If a problem is set to resolved, users can enter the date of resolution. Any changes made to a problem using this feature will display in the audit history.
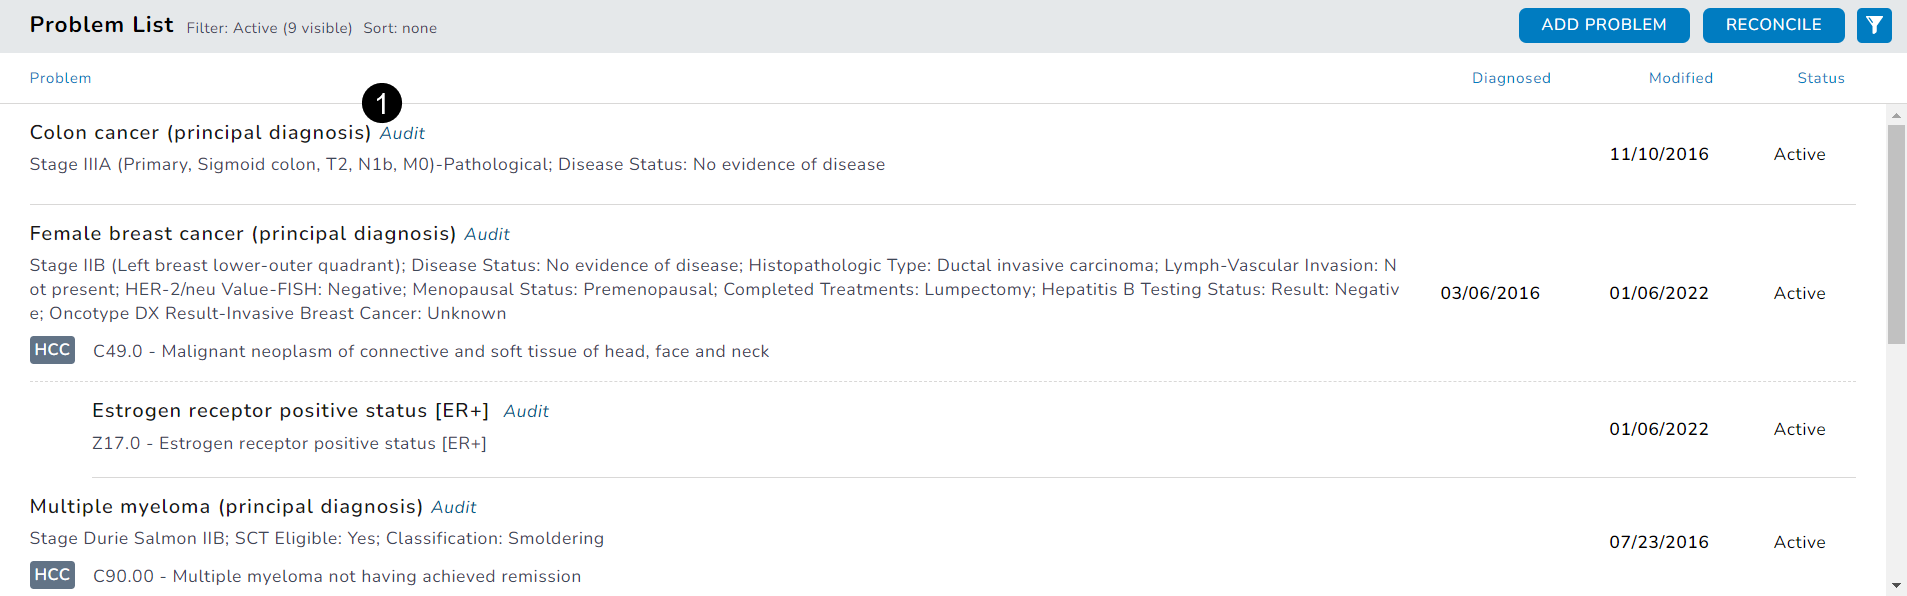
Audit
Next to each diagnosis's name is an Audit link (see callout 1). When clicked, this link will open a window showing the history of the diagnosis, including any changes made to the problem, who made them, and when.
View/edit details
Clicking on the name of the diagnosis displays the diagnosis details and allows editing (see callout 1).
Throughout the Problems workflow there are buttons in the lower right corner of the last column (see callout 1).
-
NEXT will move you onto the next section to review or complete.
-
CANCEL will return you back to the previous step.
-
SAVE & CLOSE will save any changes you have made and return you to the Problems List.
-
SAVE & ADD ANOTHER will only display when adding a new problem. It allows you to save a problem before automatically presenting a clean screen for you to add another.
Adding details
There are several options for how information is included in the Details section of the problem.
-
Radio buttons (see callout 1)
Certain areas will be presented as radio buttons when only one selection is allowed. Once a selection is made, you will be rolled to the next staging details screen. This is how the system documents conditional information.
-
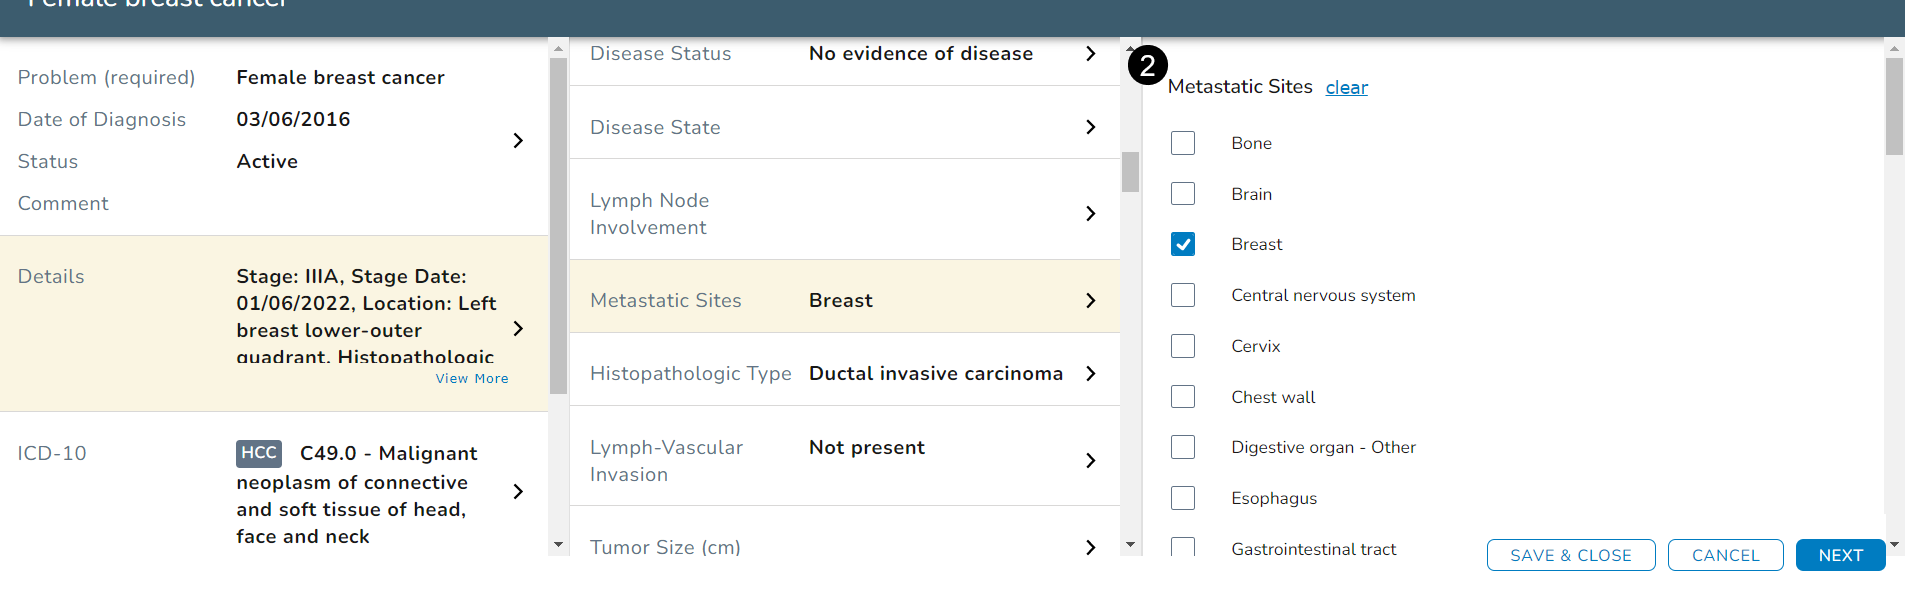
Check boxes (see callout 2)
Some areas will be presented as checkboxes when you can make more than one selection.
Adding favorites
You now have the option to mark a problem, or an ICD-10 code as a favorite by clicking the star icon that appears after its name, making it easier for you to select them in the future. No more searching for the same problems and codes over and over. Just be sure to click the SAVE & CLOSE button at the bottom of the screen after each change.
-
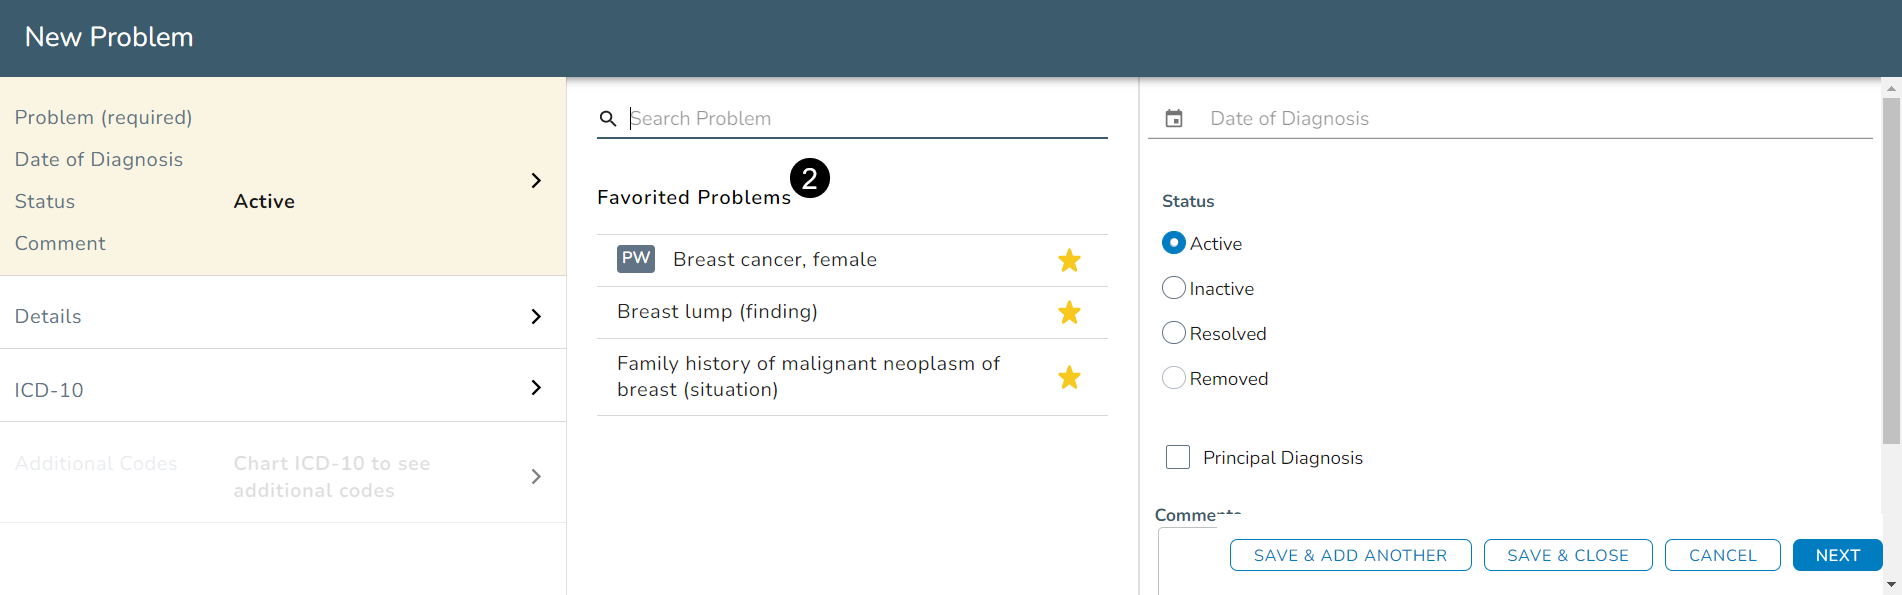
Problems
To favorite a problem, use the middle column to search for it. Click the star icon after its name and notice that the diagnosis moves to the Favorited Problems section (see callouts 1 and 2). You can reorder this section by dragging and dropping a diagnosis to move it higher up or lower down in the list or remove it by clicking the yellow star next to it. You can also favorite a problem after adding it to the Problems List by clicking the gray star next to its name in the left-hand column (see callout 3).
-
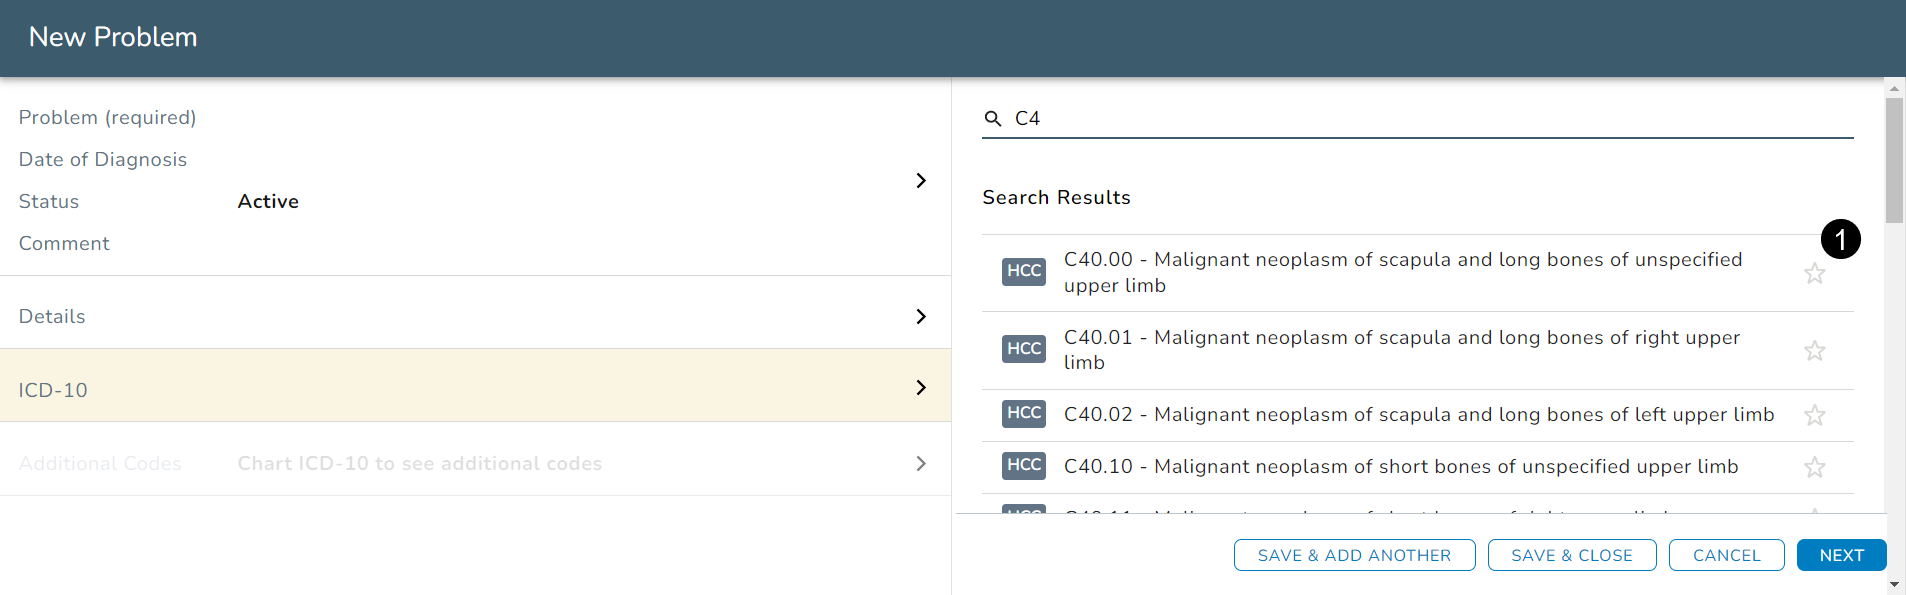
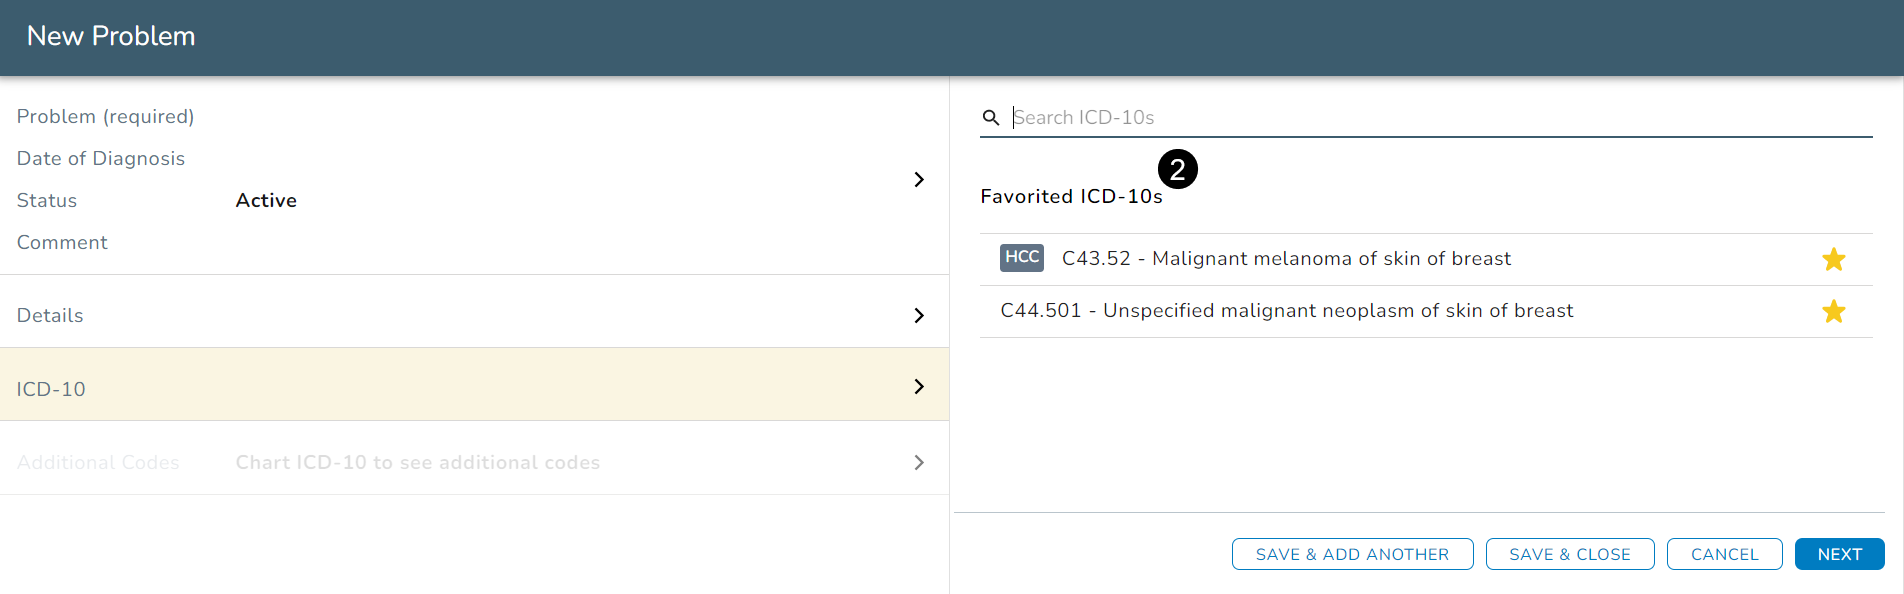
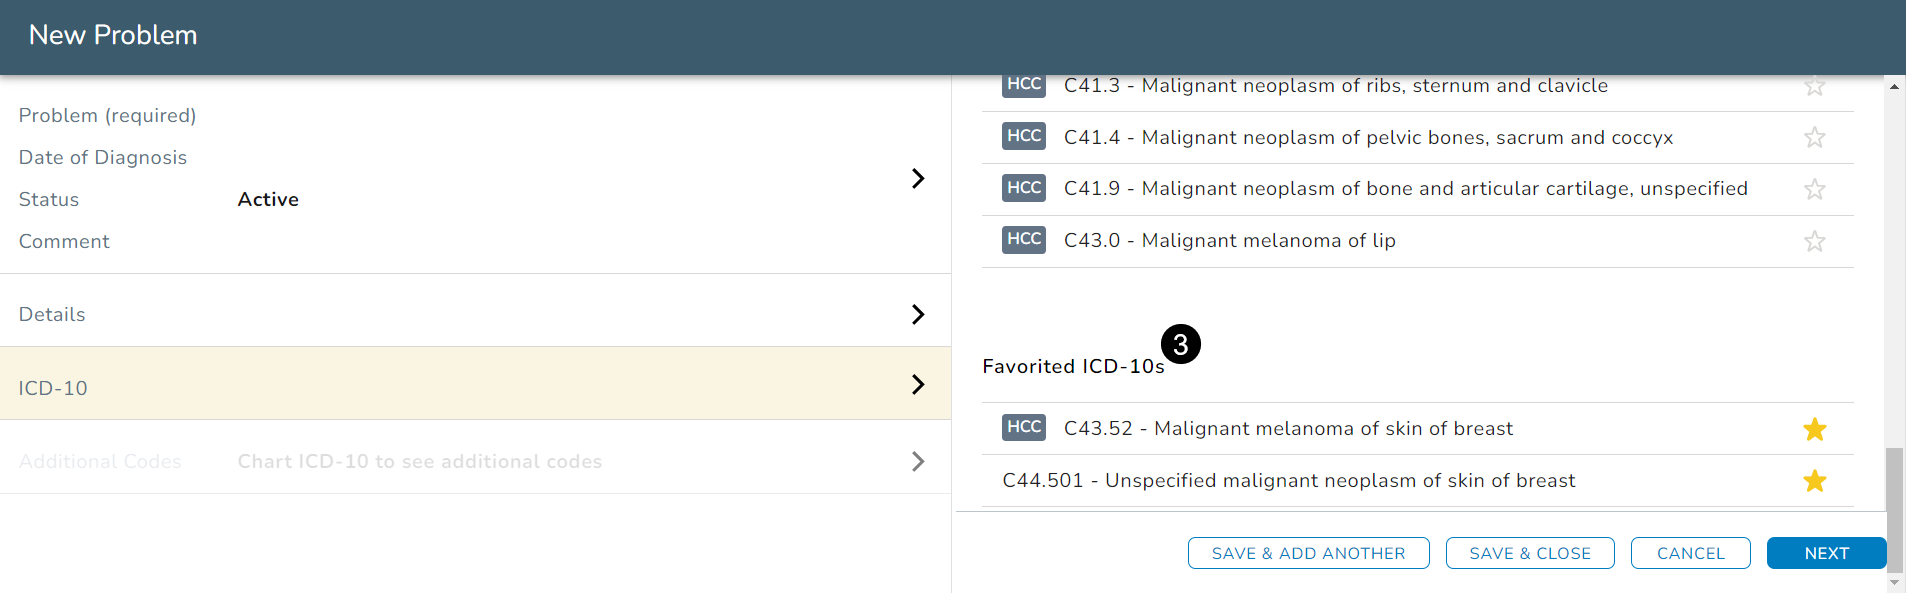
ICD-10 Codes
To favorite an ICD-10 code, click on the ICD-10 section in the first column. This will open a second column where you can search for or add a code. Click the star icon after the name of code that you want to mark as a favorite (see callout 1). You can view all your favorite ICD-10 codes in the Favorited ICD-10s section at the bottom of the column (see callout 2). To remove an ICD-10 code from this list, simply click the yellow star next to it.
Adding a New Problem
When adding a problem, not every field is required. You have the option to enter as much information as desired. However, it is best practice to enter as much data as is available to assist with Clear Value Plus regimen selection.
Add new problem by diagnosis
-
Navigate to the patient’s Problems List.
-
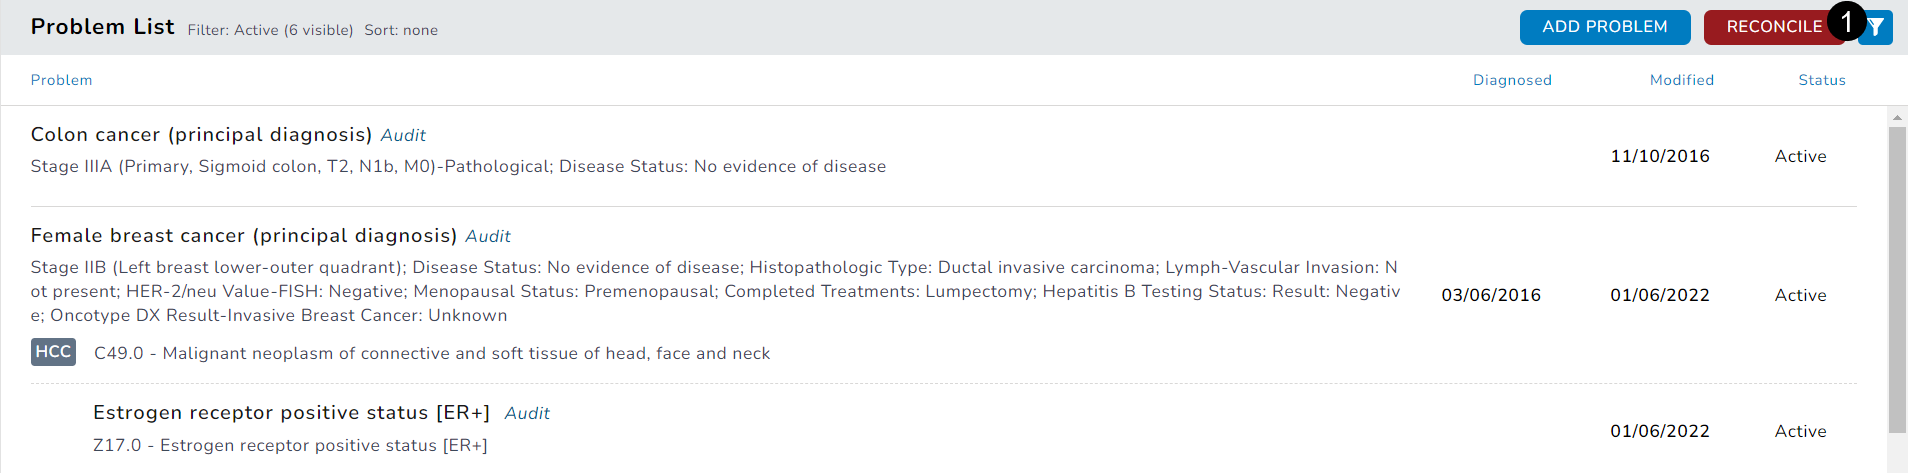
Click ADD PROBLEM in the upper-right corner (see callout 1).
-
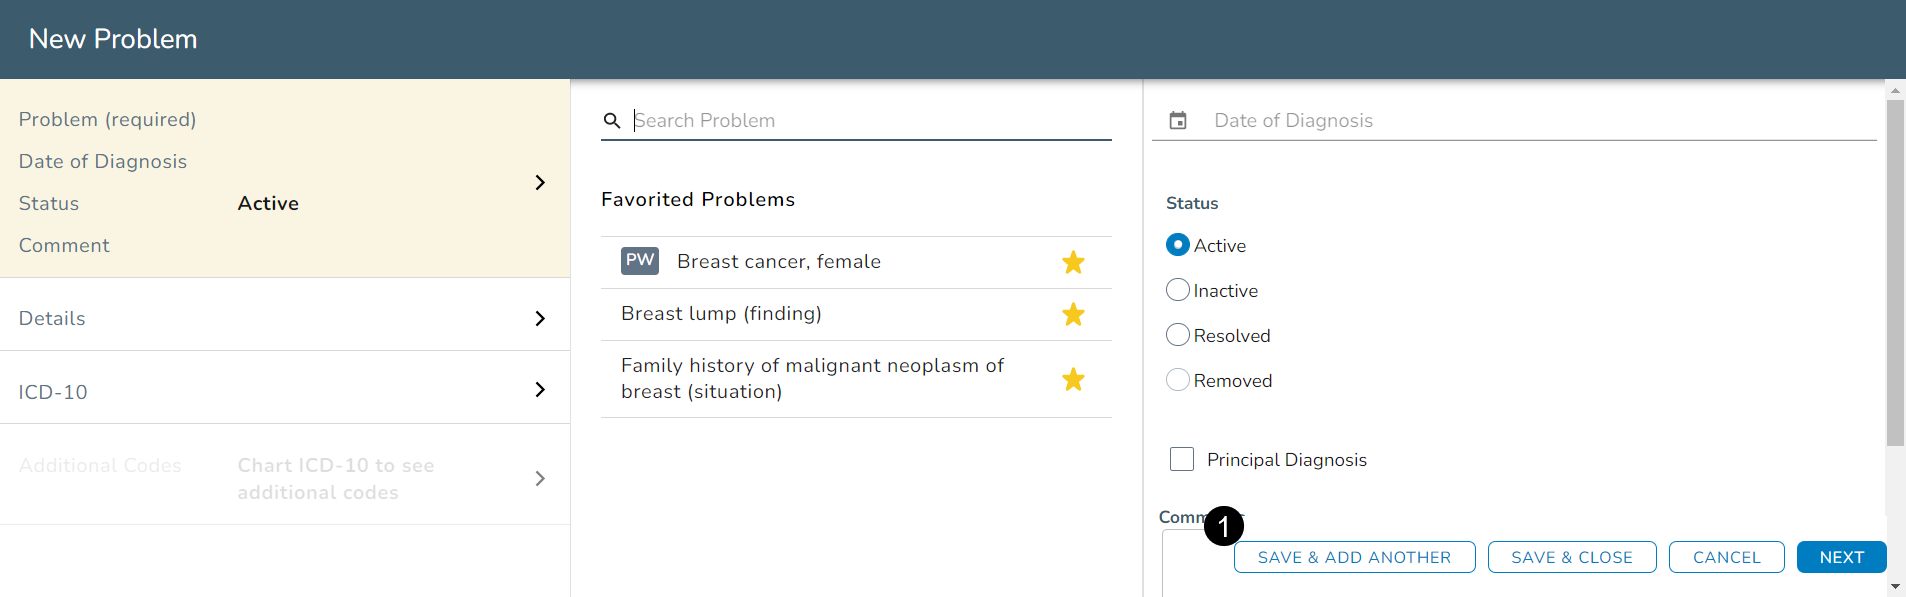
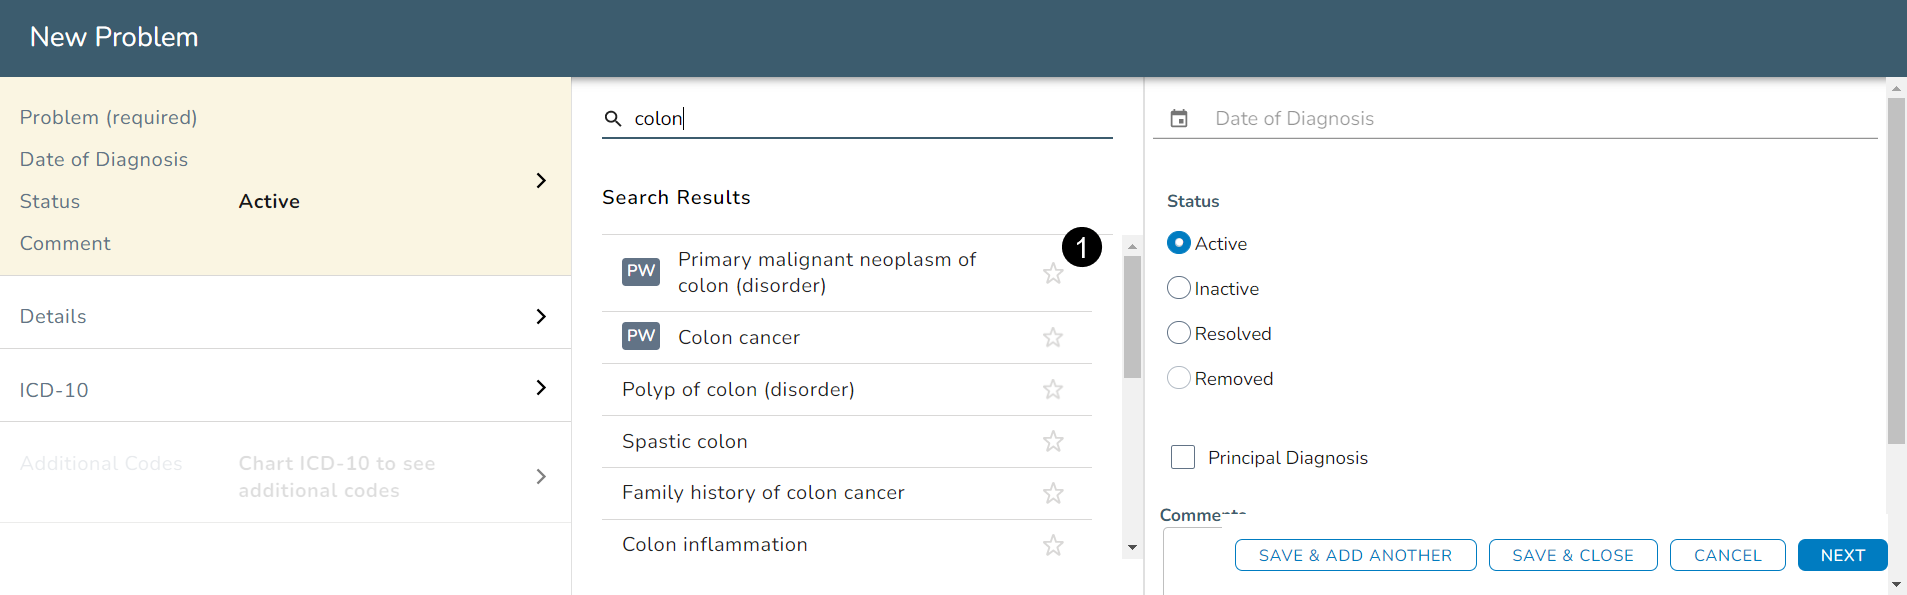
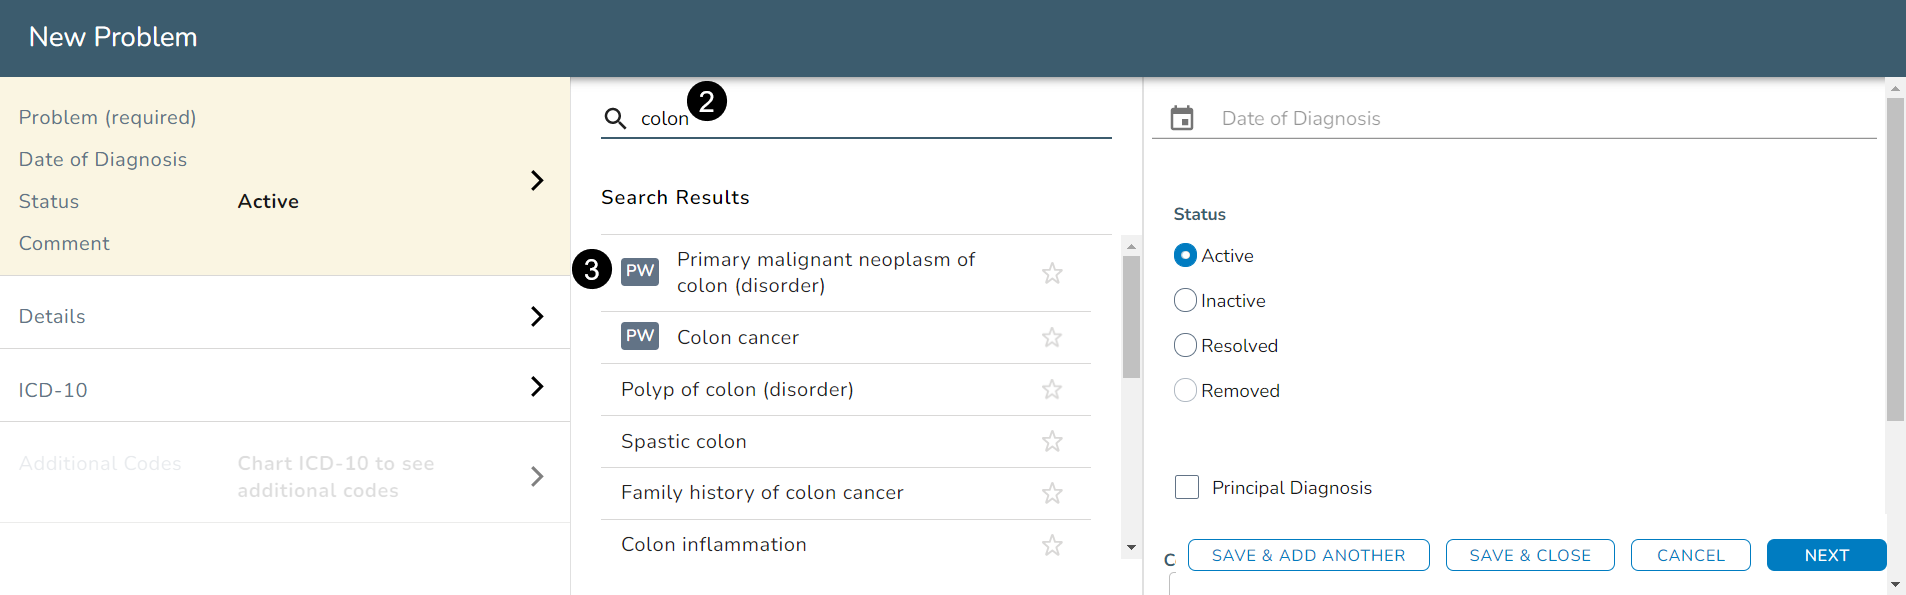
Begin with the middle column and search for a diagnosis to add (see callout 2).
-
Notice that as you fill in the search bar, suggestions will be made on what diagnosis to choose. Diagnoses with a PW icon indicate a match to Clear Value PlusSM clinical pathways (see callout 3).
-
Be sure to choose a Status for the problem and whether this is the Principal Diagnosis.
-
To add more information for the problem, select the NEXT button.
-
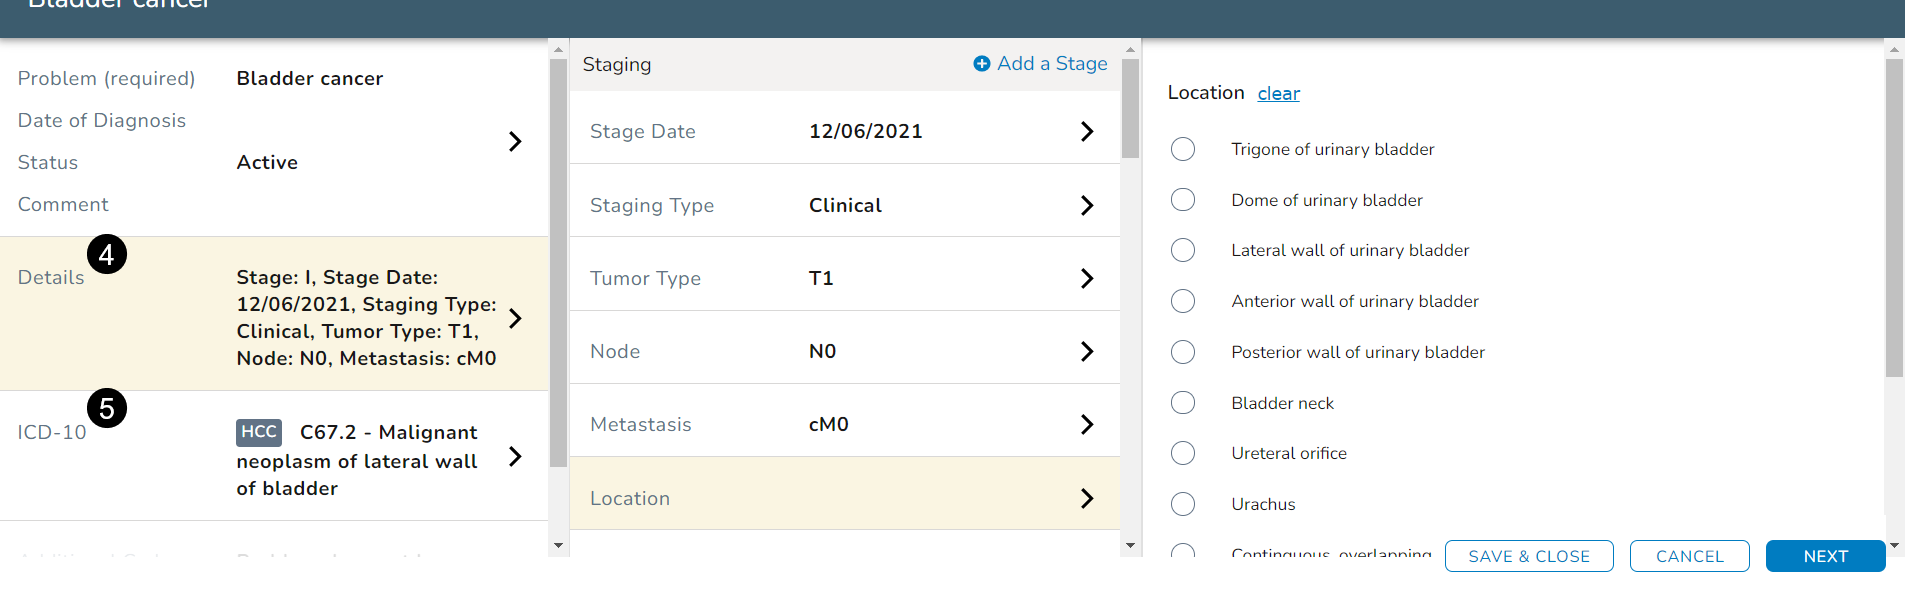
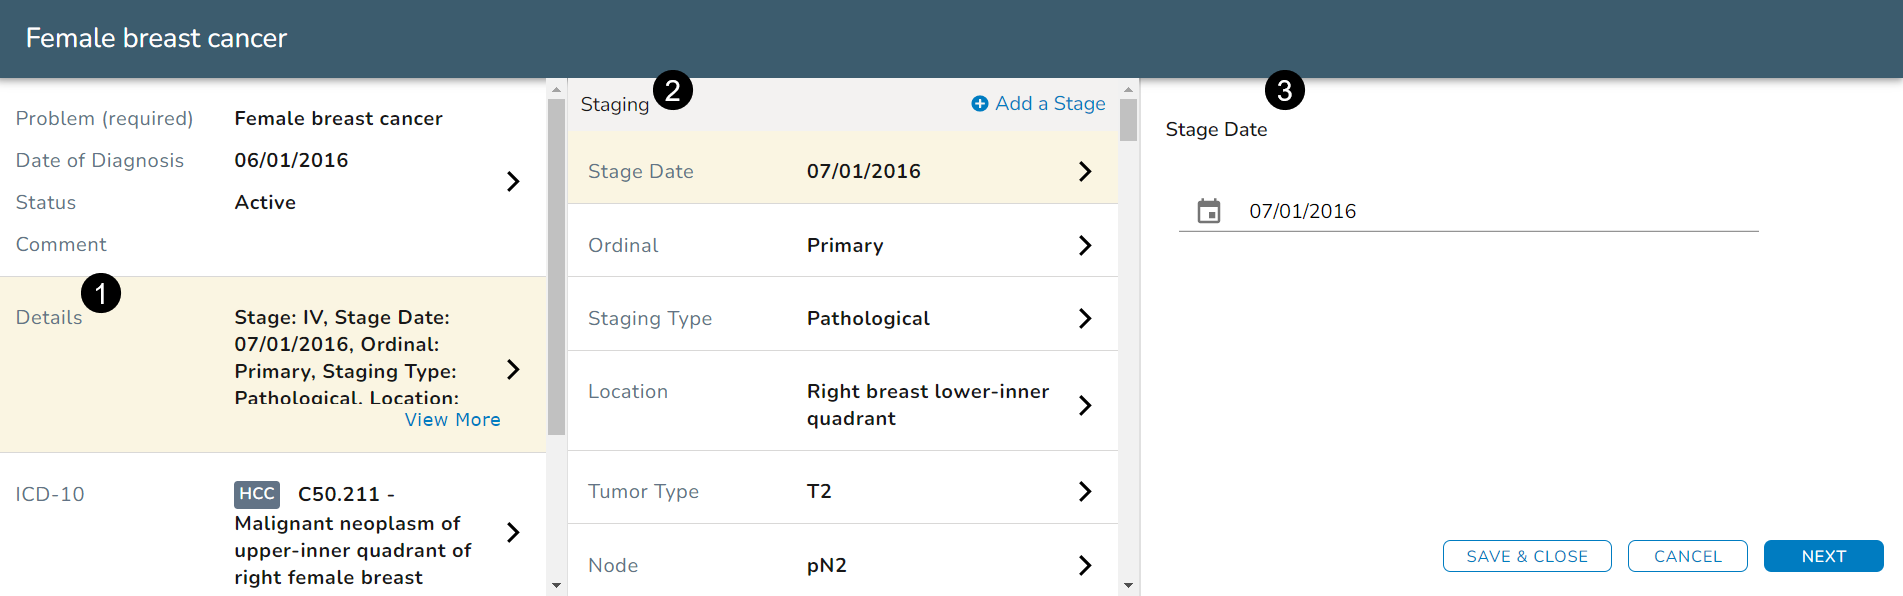
Add as much or as little information as needed in the Details section for this problem (see callout 4).
NOTE: For most of the solid tumors, choosing a Location in the this section will automatically supply the ICD-10 code (see callout 5).
-
Users can choose to keep this code or change it by clicking the ICD-10 section in the left column and manually searching for and adding a different code.
-
After making your selections, click the SAVE & CLOSE or SAVE & ADD ANOTHER button.
-
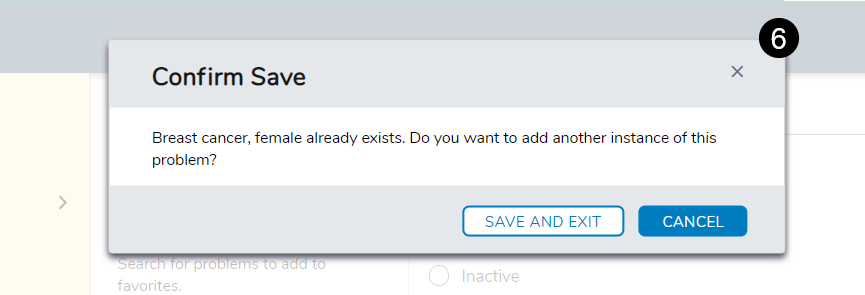
Please note that an alert will be displayed if you try to add a problem to the patient's chart that already exists.
-
This alert will tell you the problem is duplicate but will still allow you to add it if needed (see callout 6).
Add new problem by ICD-10 code
-
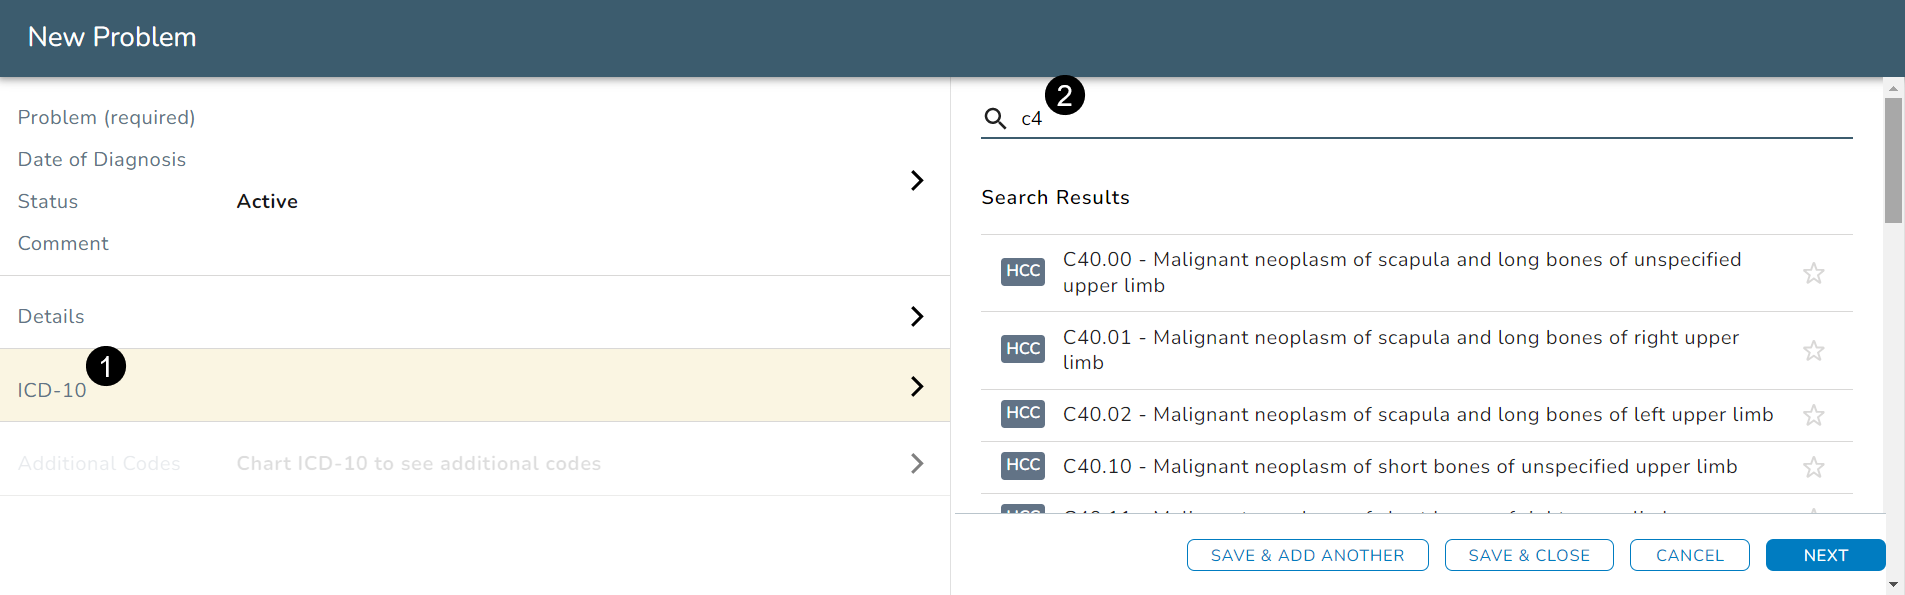
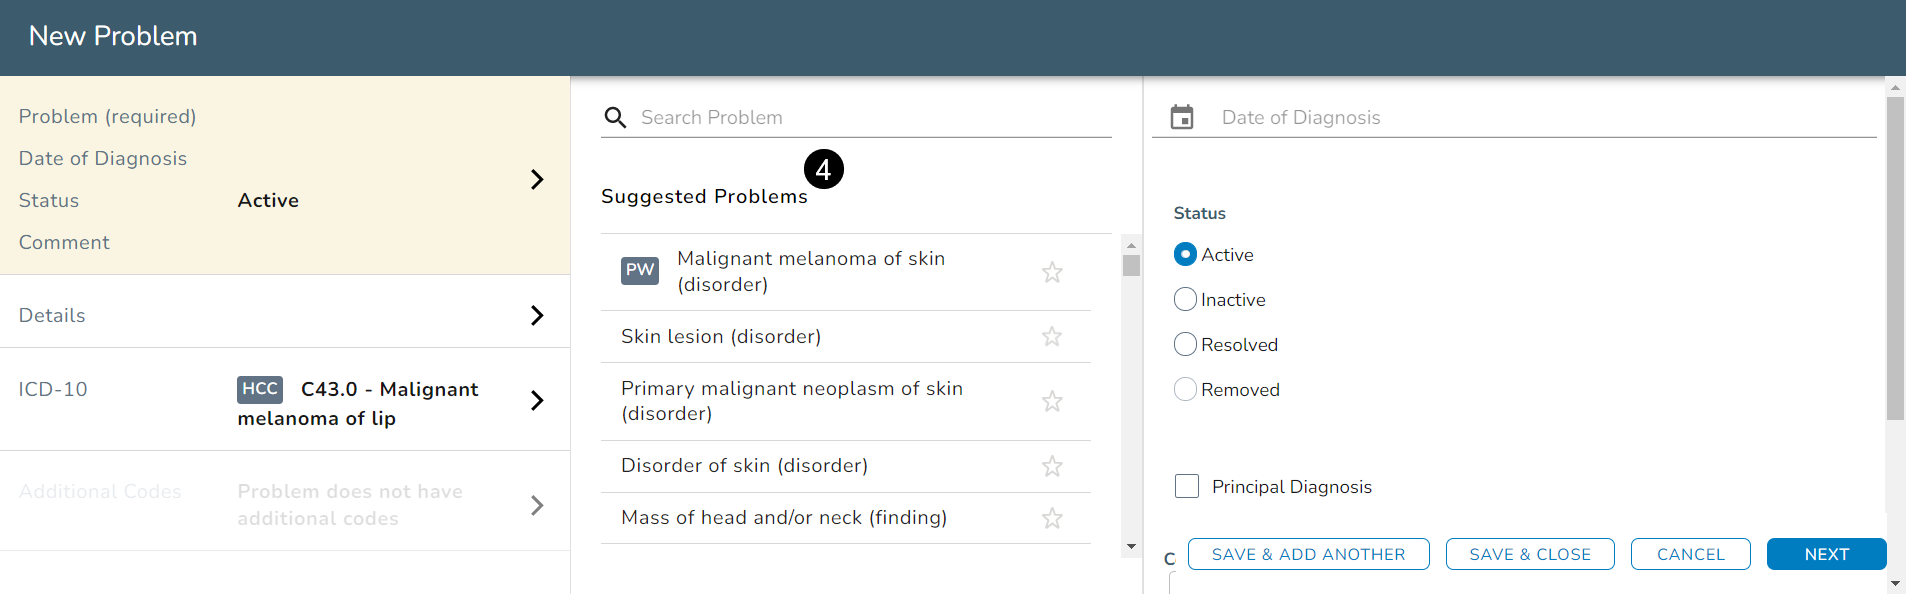
You can also begin by entering an ICD code in the ICD-10 section first (see callout 1).
-
Search for a code using the search field or choose a code from your Favorited ICD-10s (see callouts 2 and 3).
-
This will assign your code to the problem and bring you back to the top section of the left column to begin populating the problem's details.
-
Notice the second column lists Suggested Problems for you to choose from based on the assigned ICD-10 code (see callout 4).
-
Follow the same steps listed above to add as much or as little information as needed for this problem.
-
After making your selections, click the SAVE & CLOSE or SAVE & ADD ANOTHER button.
Additional codes for new problems
If any of the problems added require additional ICD-10 codes for appropriate diagnosis and billing, the Additional Codes section in the left column will activate.
This section notifies users when they must document certain information as part of the problem. The section will auto-populate with the appropriate ICD-10 code once users chart that information.
Head, neck, or GI cancer
-
Click the ADD PROBLEM button in a patient’s Problem List.
-
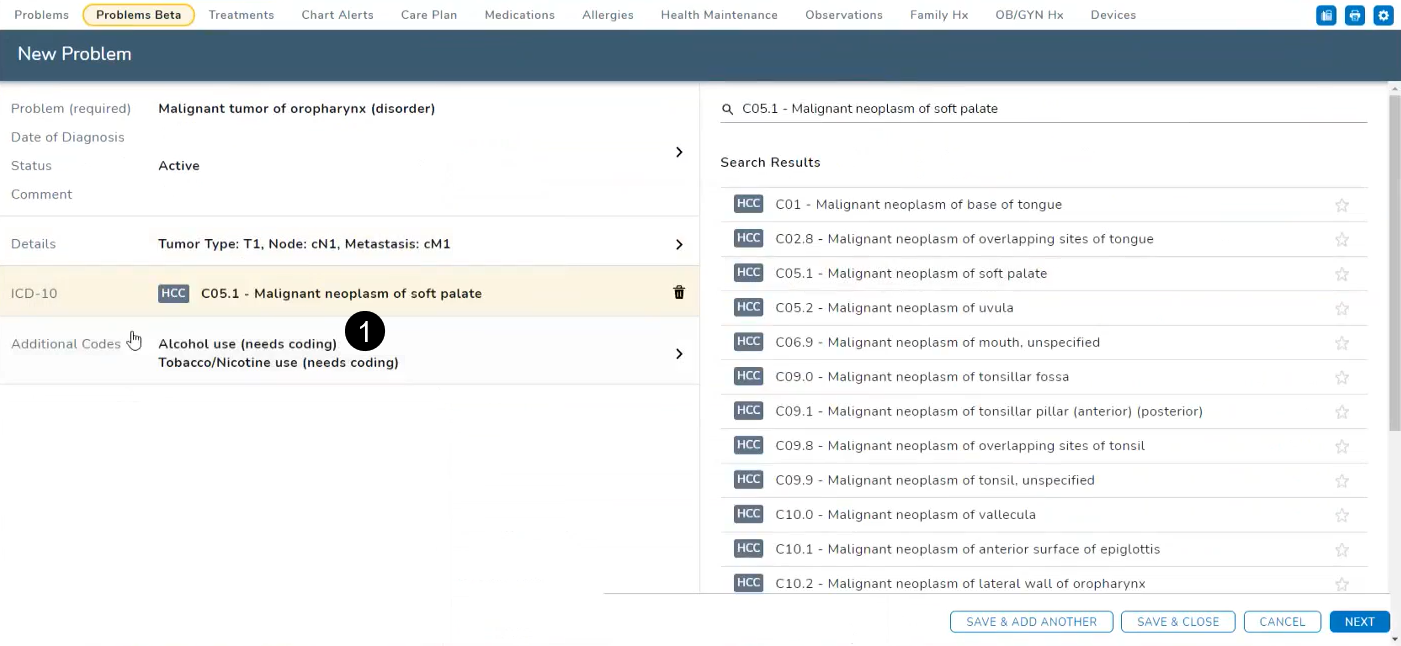
Search for and select an appropriate problem in the middle column (i.e., malignant tumor of oropharynx).
-
Choose an appropriate code from the ICD-10 section in the left-hand panel.
-
Notice the Additional Codes section now displays a notice that Alcohol use and Tobacco/Nicotine use must also be charted for this problem (see callout 1).
-
Click the Additional Codes section to jump to the Alcohol use and Tobacco/Nicotine use options in the middle column to document the information.
-
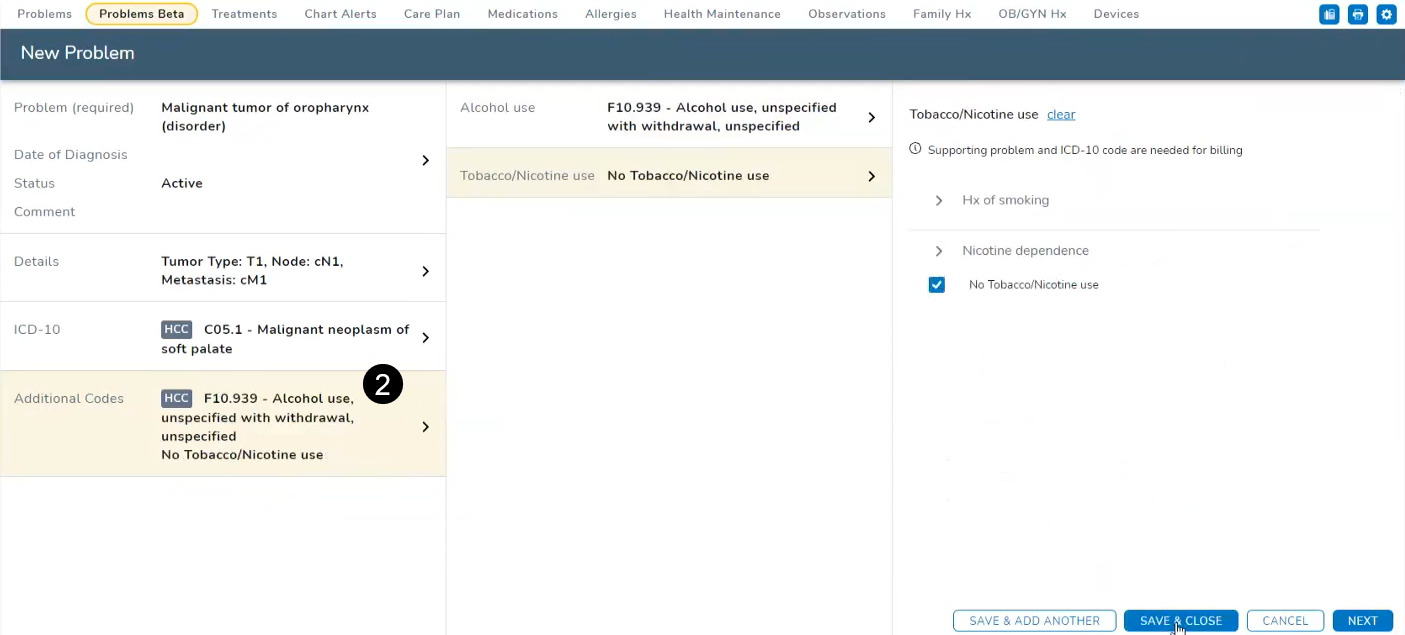
Note that users can now document that there is No Alcohol use for the patient.
-
After the choices are selected, the Additional Codes section will auto populate with the appropriate ICD-10 code (see callout 2).
-
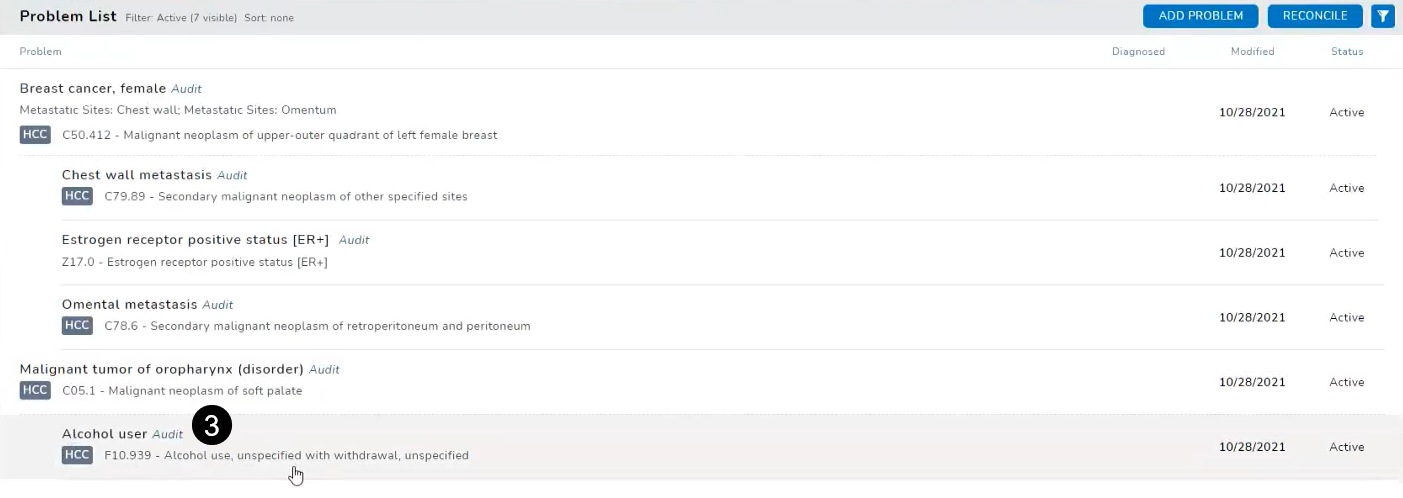
When this problem is saved and closed, users will now see the primary problem listed for the patient with the additional codes nested beneath it (see callout 3).
-
If the required tobacco or alcohol diagnosis / ICD-10 code is not added, users will see an alert on the Problems List, prompting users to record the information (see callout 4).

Breast cancer
-
Click the ADD PROBLEM button in a patient’s Problem List.
-
Search for and select breast cancer in the middle column.
-
Begin entering information in the Details section.
-
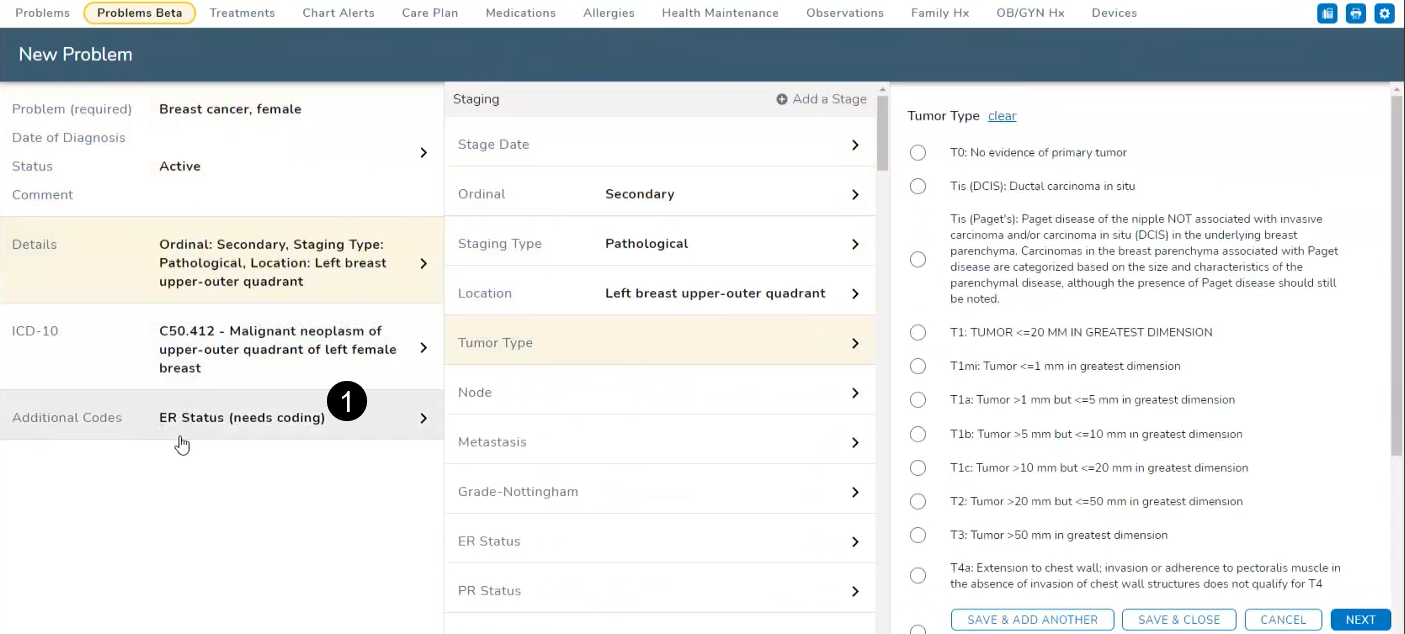
Notice that after entering Location information, the new Additional Codes section includes a notice that ER Status must also be charted for this problem (see callout 1).
-
Users can click the Additional Codes section to jump to the ER Status option in the middle column, and document the information, or they can continue to flow through the middle column and document that status once they reach it.
-
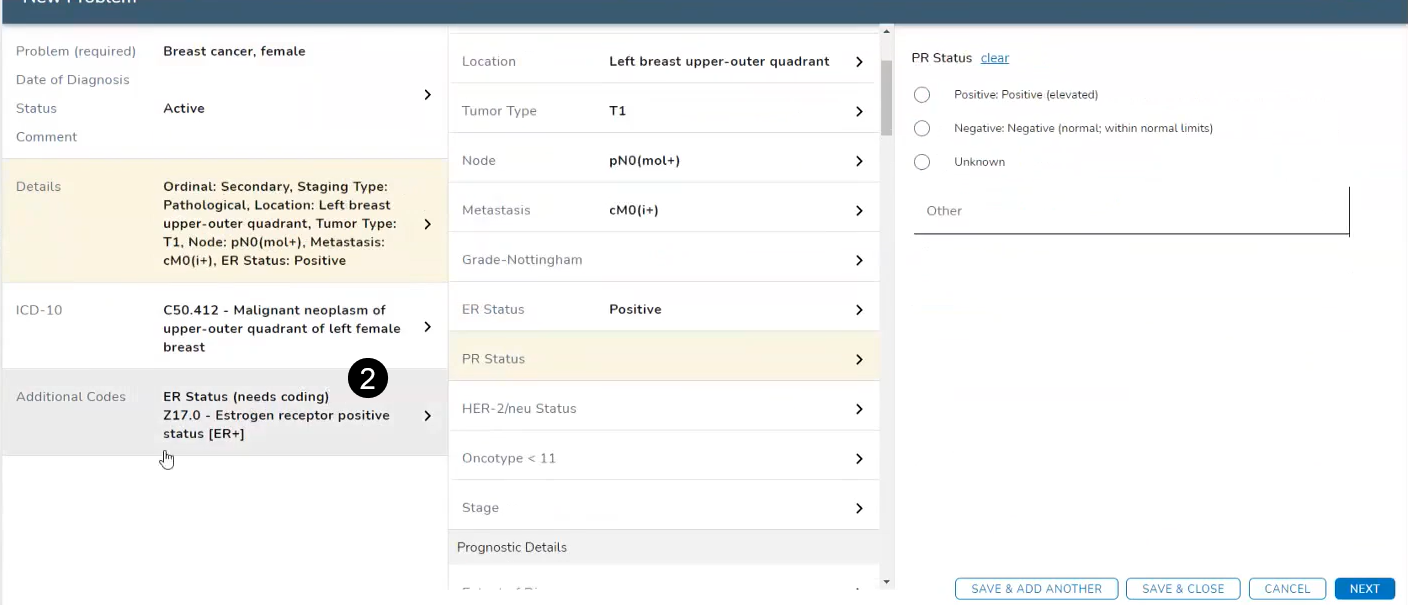
After an ER Status is selected, the Additional Codes section will auto populate with the appropriate ICD-10 code (see callout 2).
-
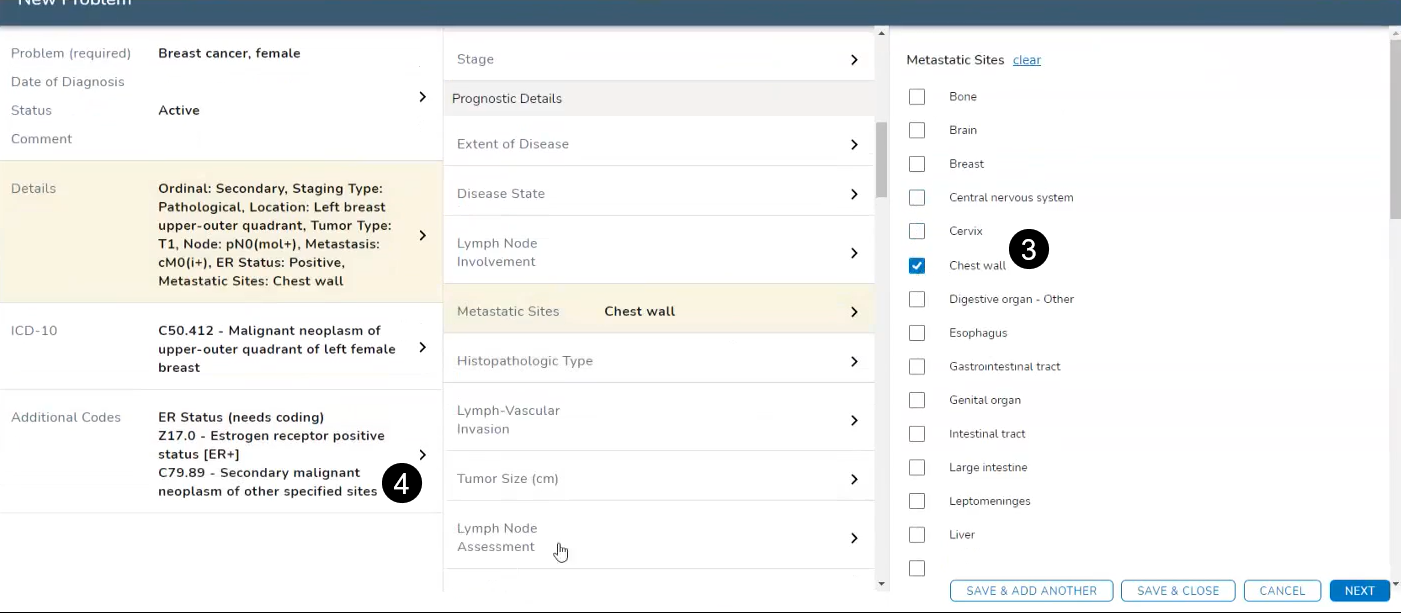
This same functionality applies after entering Metastatic Sites information. The Additional Codes section will auto populate with the appropriate ICD-10 code for that site (see callouts 3 and 4).
-
When this problem is saved and closed, users will now see the primary problem listed for the patient with the additional codes nested beneath it.
Editing existing problems
Viewing and editing problems are treated in much the same way as before, but now users have more flexibility when sorting and better visual cues for readability.
View an existing problem
-
Access a patient’s Clinical Profile and click the Problems tab.
-
By default, all principal diagnoses will be grouped together by the most recent diagnosis date followed by all other documented problems.
-
Sort the list by clicking on any column header (see callout 1).
-
Click the Filter icon and select options to include or exclude Inactive, Resolved, and Removed problems from the list (see callout 2).
-
Click the diagnosis name to display details.
Edit an existing problem
-
Access a patient’s Clinical Profile and click the Problems tab.
-
Select an existing diagnosis from the Problems List.
-
Click the area in the left column you want to change. This will open options in the middle and last columns for you to edit the information (see callouts 1, 2, and 3).
Add or edit a problem stage
-
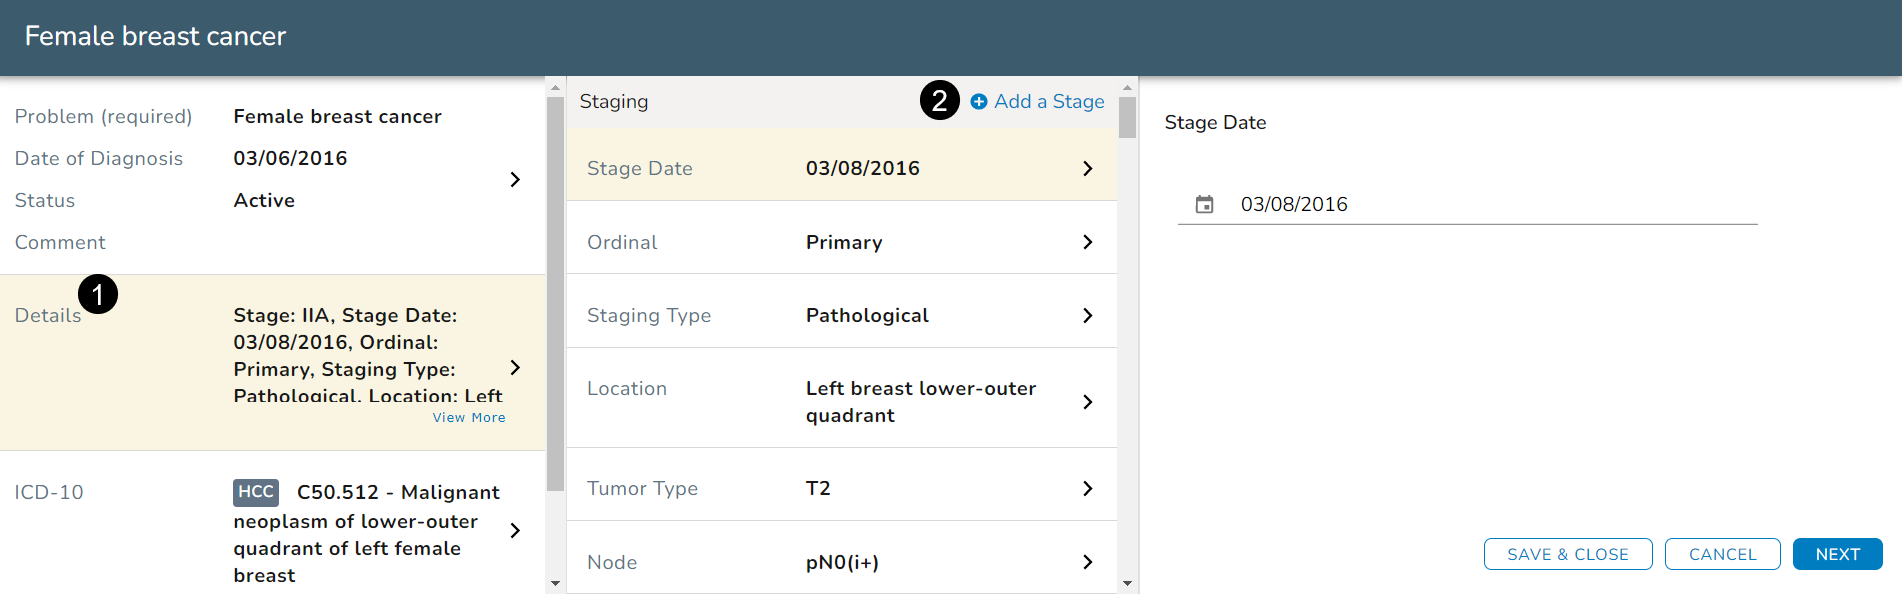
If you need to add or edit a stage to a problem, open the problem and click the Details section (see callout 1).
-
Click the Add a Stage link in the middle column (see callout 2).
-
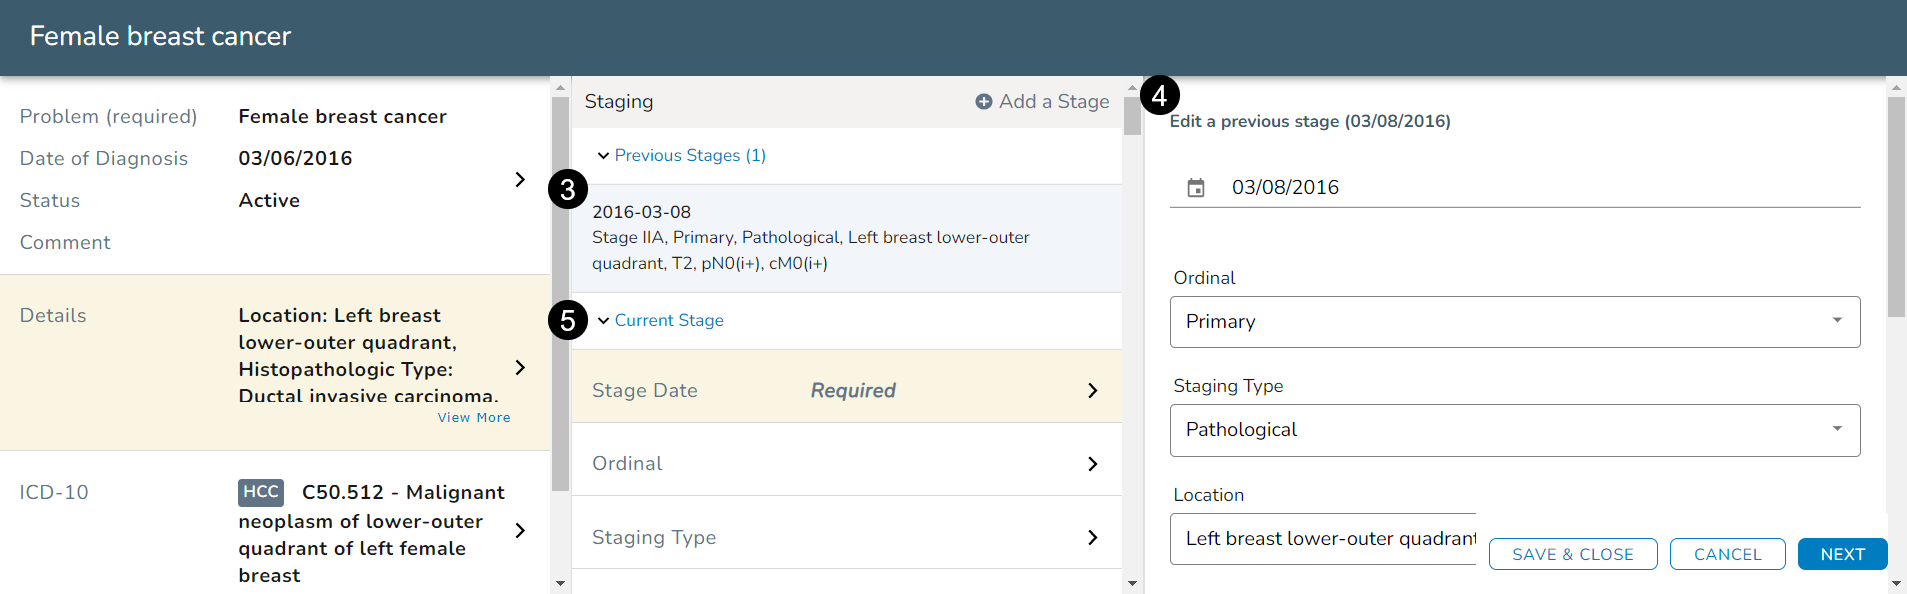
Now, you have the option to view and/or edit the details of Previous Stages if needed (see callouts 3 and 4).
-
To enter details for a new stage, complete the fields beneath the Current Stage section (see callout 5).
-
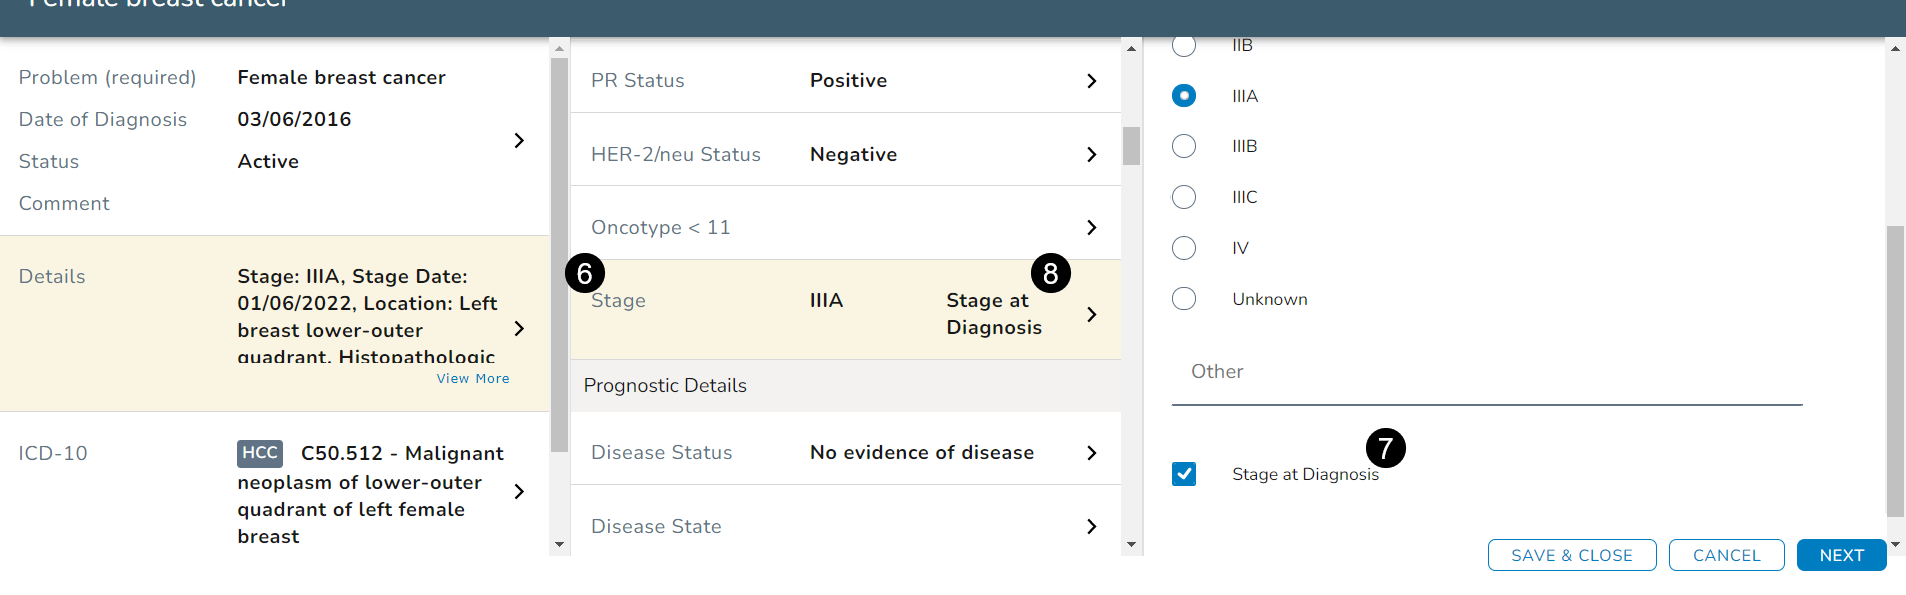
Based on the information entered, a stage will automatically be assigned to the problem. You can keep this stage or scroll to the Stage field and manually change it (see callout 6).
-
Checking the Stage at Diagnosis box indicates that this stage is the one documented when the patient was first diagnosed (see callout 7).
-
When checked, this option will place the phrase Stage at Diagnosis in the Stage field in the middle column (see callout 8).
-
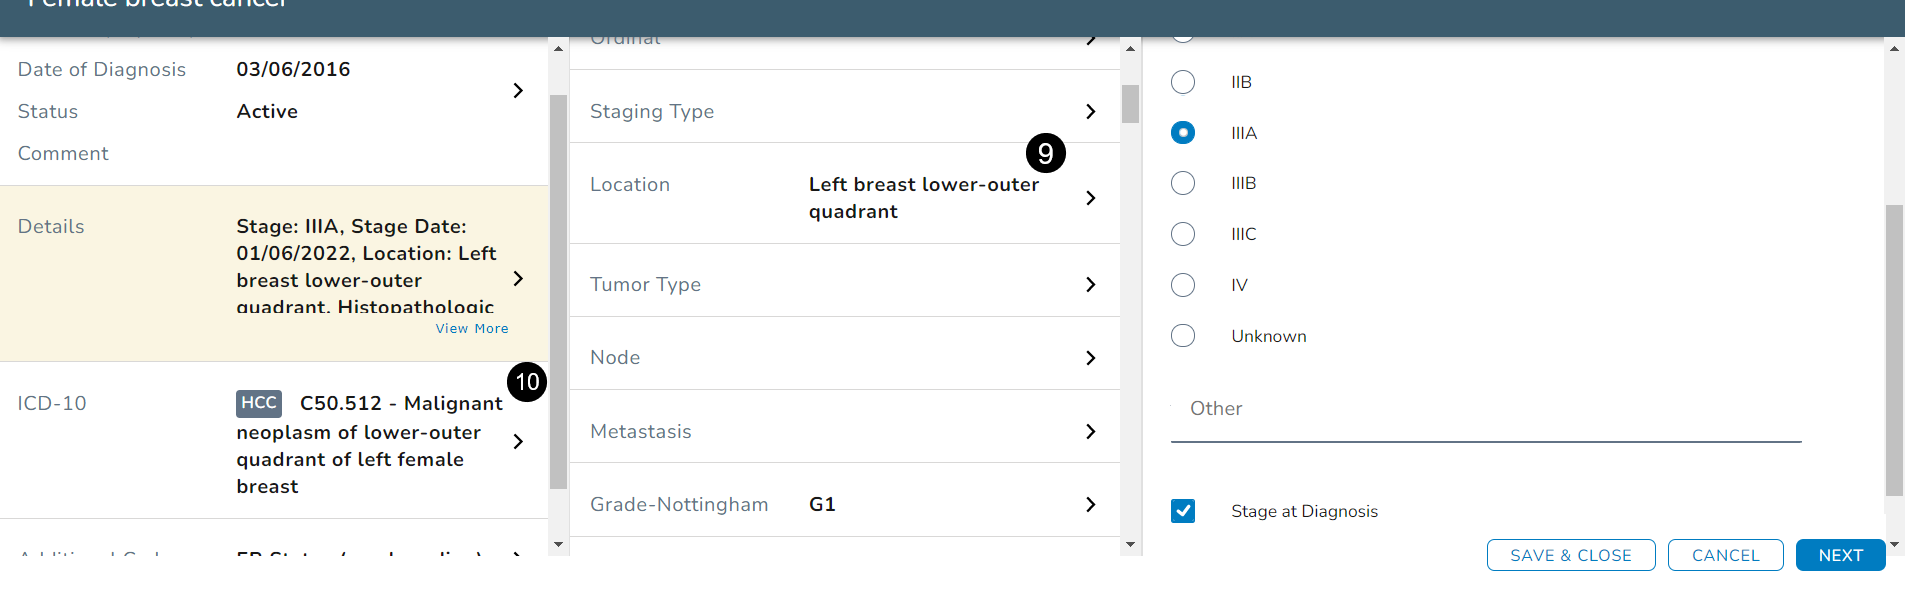
Adding a stage also carries over the Location and ICD-10 code from the original diagnosis will carry over to prevent duplicate charting (see callout 9 and 10).
-
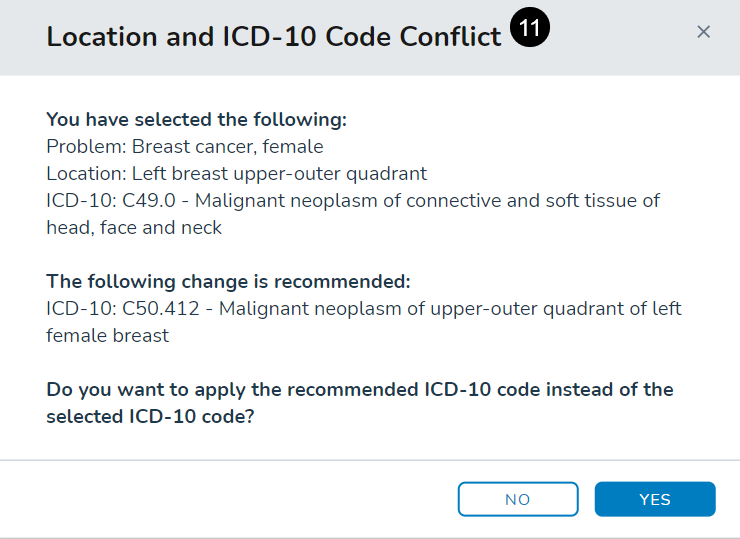
You may choose to override this code and pick another if needed; however, if that code does not align with the recorded Location information, an alert appears with a recommended diagnosis code to choose instead (see callout 11).
-
Choosing NO in this alert allows you to keep and save the mismatched diagnosis code whereas choosing YES accepts the recommended code, which will then automatically populate the IDC-10 section for you.
-
When finished, click SAVE & CLOSE at the bottom of the last column to return to the main view.
Remove an existing problem
-
Open a problem from a patient’s Problem List.
-
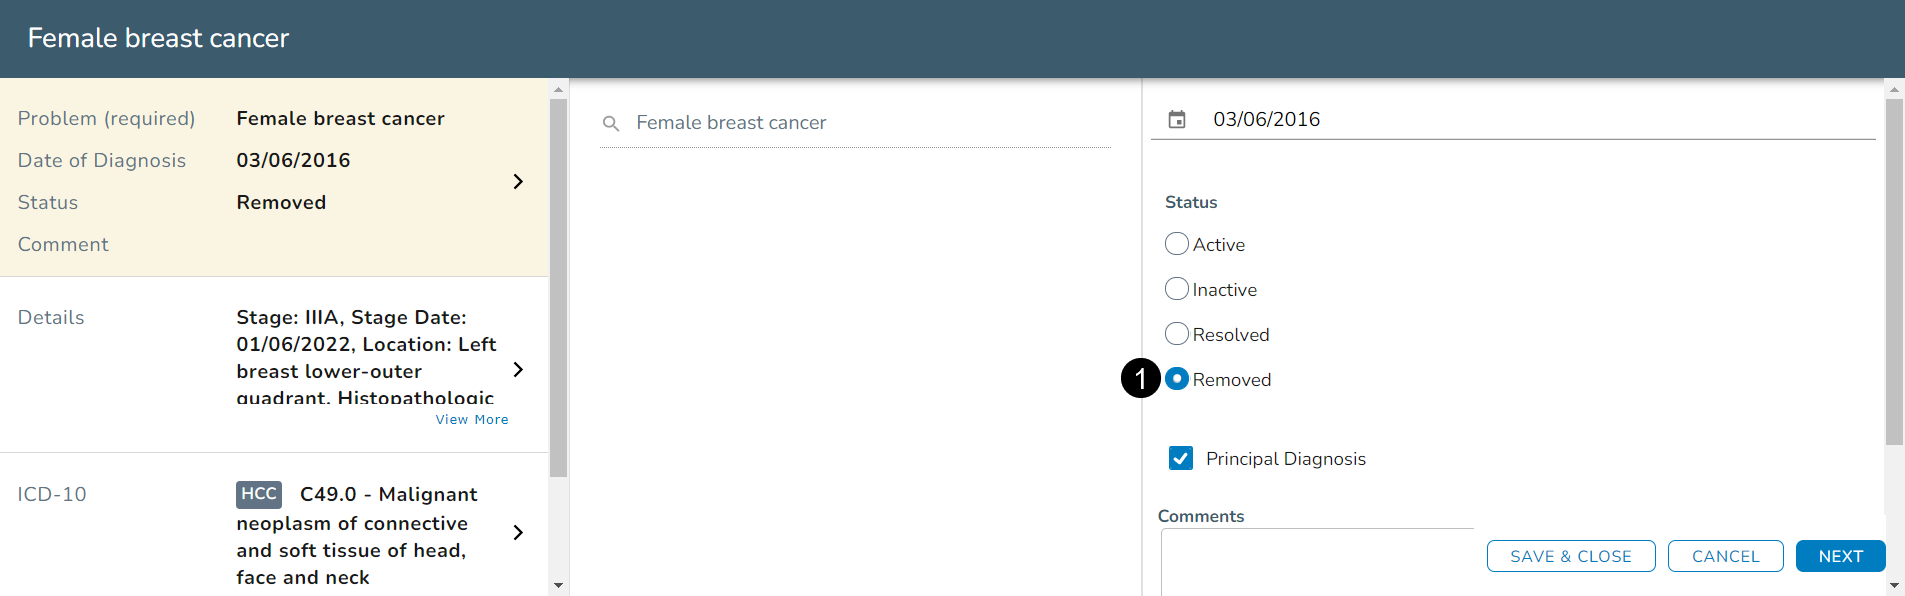
In the last column change the Status to Removed (see callout 1).
-
Click the SAVE & CLOSE button at the bottom of the column.
-
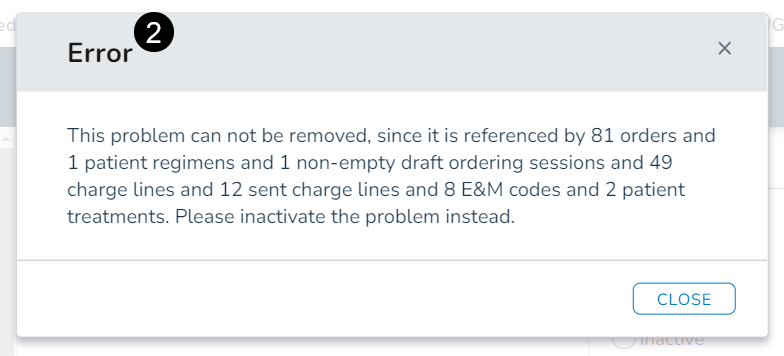
If you try to remove a patient's principal diagnosis while it is still associated with medication or non-medication orders, an alert will display (see callout 2).
-
This alert will tell you specifically what items are associated with this diagnosis and will direct you to set the diagnosis status to Inactive instead.
Reconcile patient information
NOTE: That the option to reconcile a patient's problems, allergies, and/or medications will only be displayed if that patient has a CCDA stored in the EHR.
-
Click the red RECONCILE button in the upper right-hand corner of a patient’s Problem List (see callout 1).
-
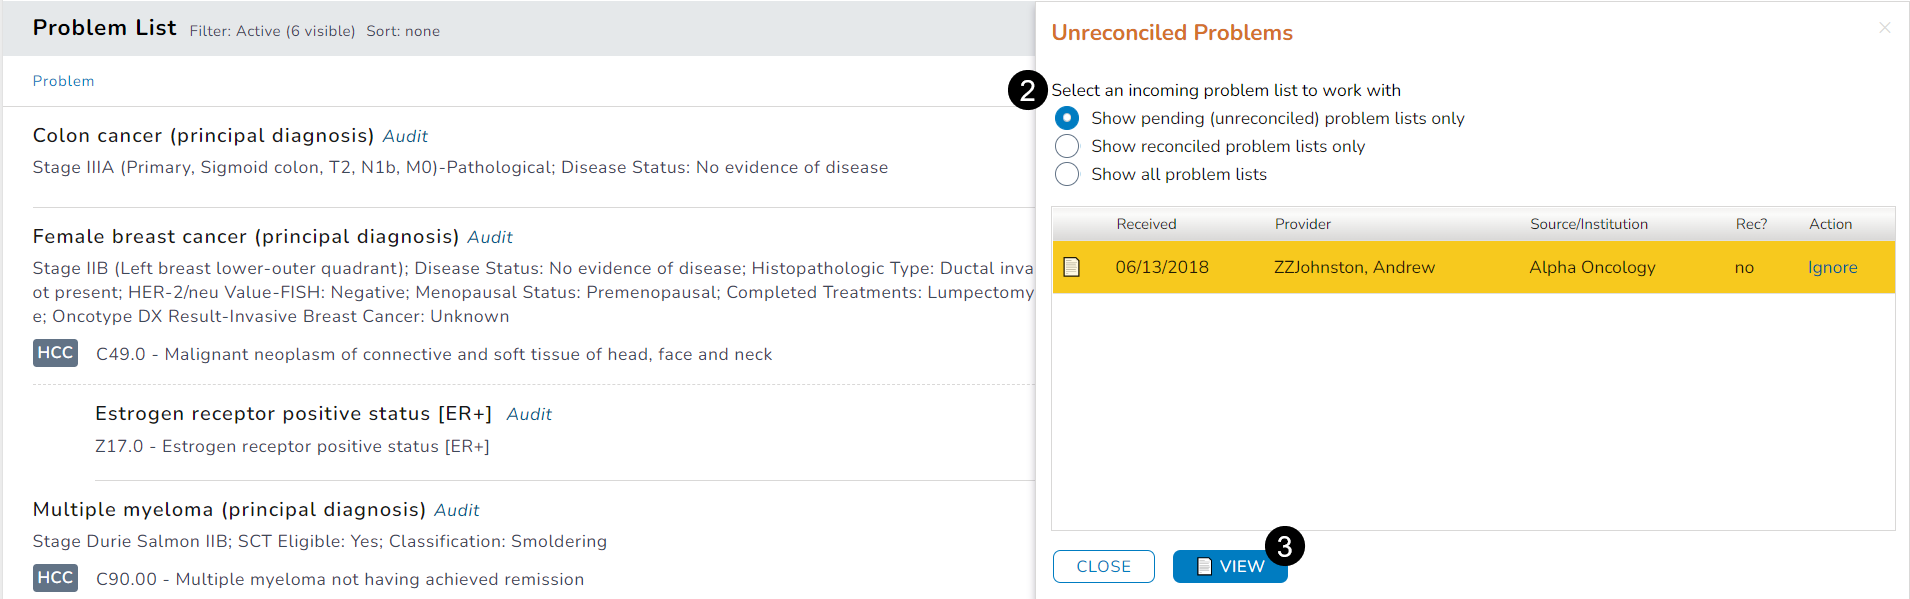
The Unreconciled Problems window will appear where you can choose to Show pending [unreconciled] problems list only, Show reconciled problems list only, or Show all problems lists (see callout 2).
-
Show pending [unreconciled] problems list only is selected by default and will only display items that need to be reconciled so you can work to resolve them.
-
Once you select an item, double-click it, or click the View button (see callout 3).
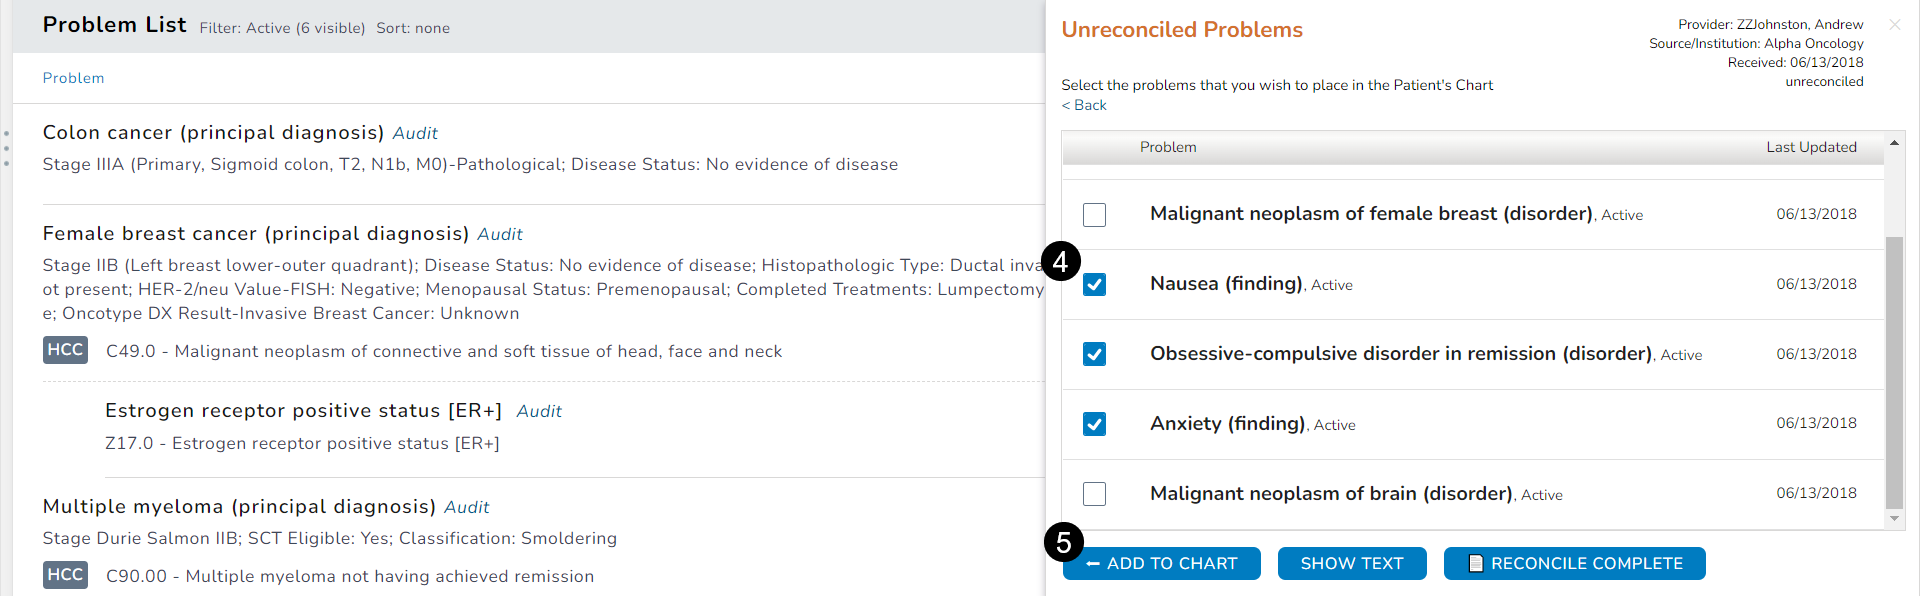
-
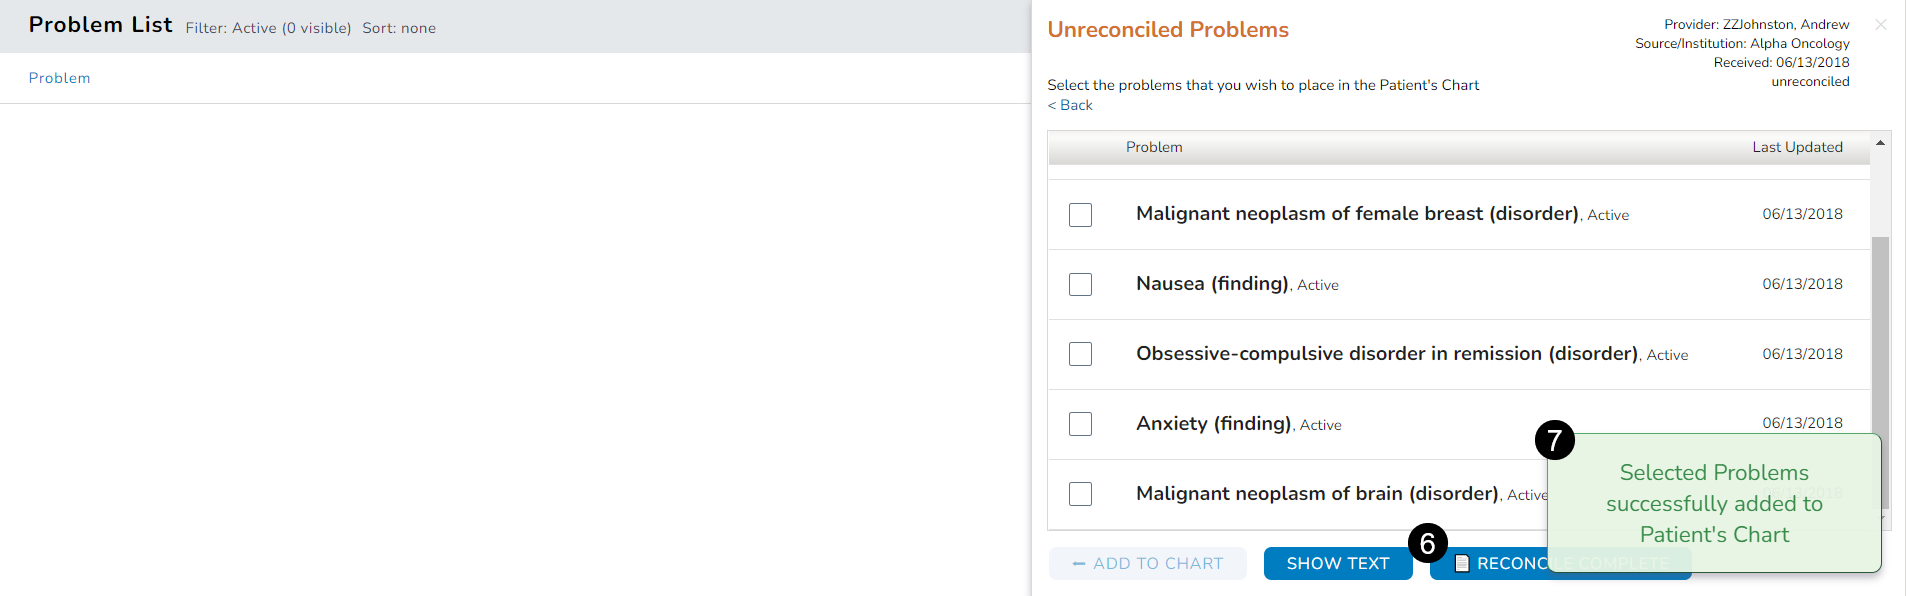
This will display the items you can choose if they are still applicable. After selecting the relevant items, click the ADD TO CHART button (see callouts 4 and 5).
-
When finished, click the RECONCILE COMPLETE button to receive a message confirming the reconciliation (see callouts 6 and 7).
-
Notice that when you return to the patient's Problem List, the RECONCILE button is no longer red (see image below).