
December 2023 Minor Release Notes
Version 3.41.1
This release contains an update in preparation for Okta where users can only use a PIN where previously a PIN or password was required. Additionally, there is a COVID-19 vaccine billing update for 2024.
New Recommended Biomarker Testing feature
![]()
![]()
![]()
![]()
Using our new Recommended Biomarker Testing feature can lead to more accurate diagnosis and personalized treatment strategies tailored to patients with Non-Small Cell Lung, Prostate, Colon, Rectal cancers, and for solid tumors stage IV diagnosis captured in Clear Value Plus.
The feature intelligently suggests the proper panel for biomarker testing. If you run the recommended test panel, the feature can automatically route you to the Orders page to complete the order.
How to use the Recommended Biomarker Testing feature
-
Open a patient’s chart and navigate to Clinical Profile > Problems.
-
Open an existing Non-Small Cell Lung Cancer, Prostate Cancer, Colon Cancer, Rectal Cancer, or cancer with a solid tumor Stage IV diagnosis from the Problems List.
-
After completing or editing the problem information, click the Save & Close button.
-
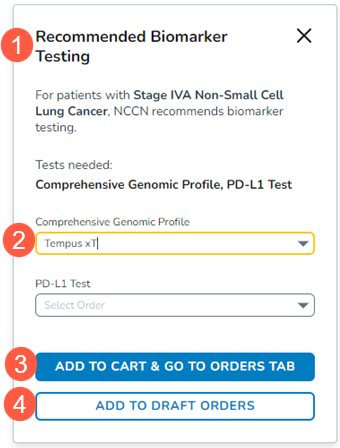
This will trigger the new Recommended Biomarker Testing feature (callout 1).
-
Use the drop-down to select a recommended order (callout 2) and click the Add to Cart & Go To Orders Tab button (callout 3).
-
If you do not wish to order the panel immediately, click the Add to Draft Orders button (callout 4). This will send the order to your Drafts tab on the Orders page.
-
-
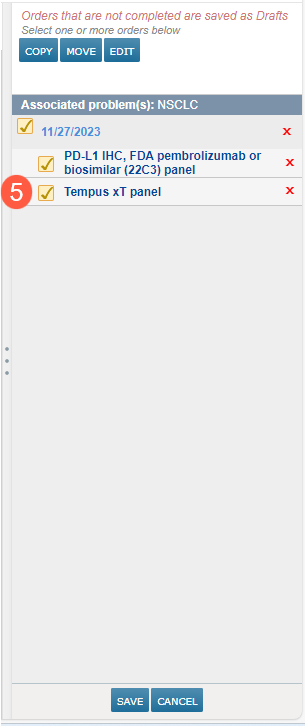
After being automatically routed to the Orders page, the recommended order will be placed in your cart (callout 5).
-
Follow your practice’s normal biomarker lab ordering process, including the completion of the appropriate requisition form, which can be located by clicking the Precision Medicine button on the page (callout 6).

-
Once the order is signed, practices using the new Orders Queue can track and complete it there.
-
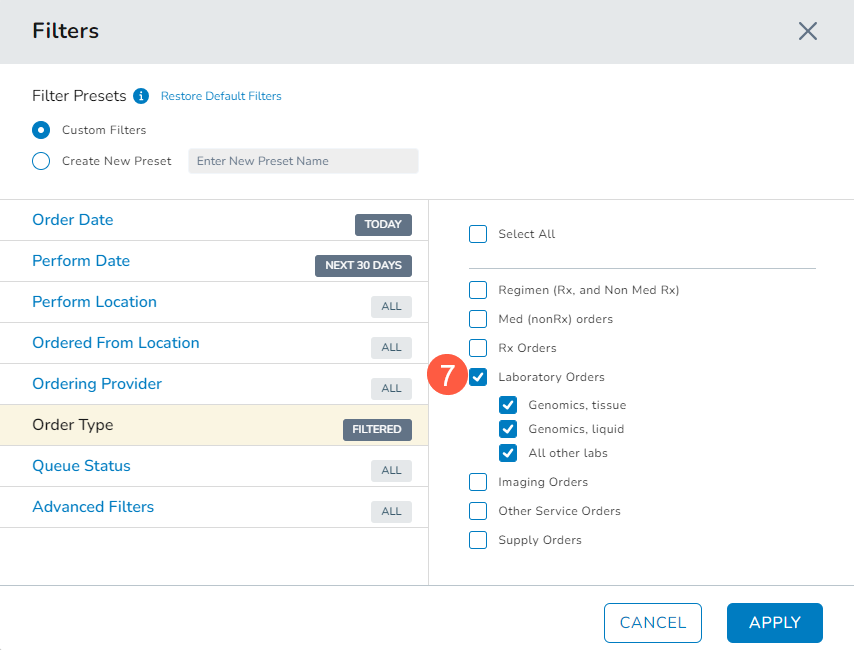
To quickly locate the order, click the Filters button, and in the filters window, choose to narrow the orders to Laboratory Orders and by sample type (callout 7).
-
Use the options in the new queue to complete the order and track its progress.
Additional instructions for Outbound Lab Interface (OLIF) practices
If your practice plans to order any Recommended Biomarker Testing lab panels, there are additional steps you must take to allow your providers to order these lab panels without disrupting the OLIF ordering process.
To complete these steps:
-
From the top navigation, go to Manage > Labs/Imaging & Services.
-
Select the option to search for a Panel (callout 1).
-
Type in the desired Recommended Biomarker lab panel (callout 2).
-
When it appears in the table, click on it (callout 3), and then click on the Edit button (callout 4).

-
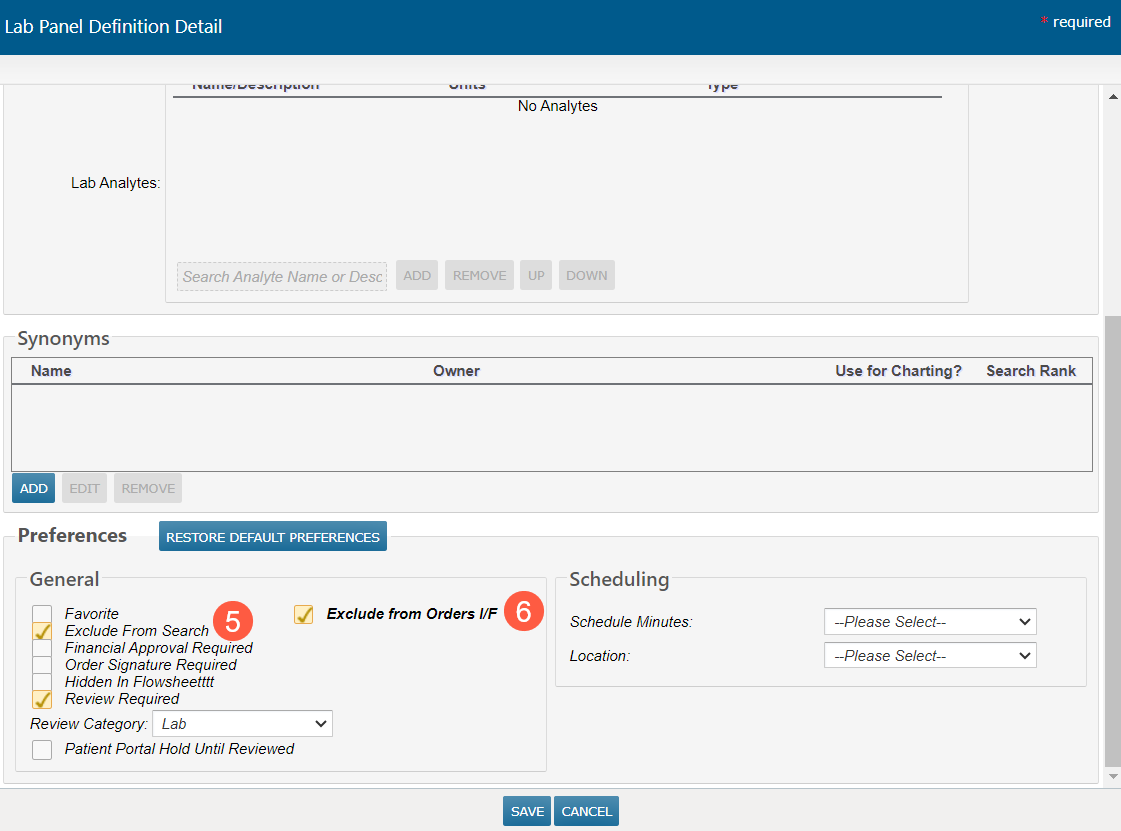
The Lab Panel Definition Detail screen will appear.
-
Go to the Preferences section and under the General area, uncheck the Exclude From Search option (callout 5)
-
If the lab panel will not be sent to the Lab Information System (LIS), select the Exclude from Orders I/F option as well (callout 6).
-
Save your changes.
-
If the lab panel will be sent to the LIS, the Lab Manager or trained staff will need to create the Lab Panel and Host Code in the LIS. This Host Code must then be mapped in iKnowmed.
-
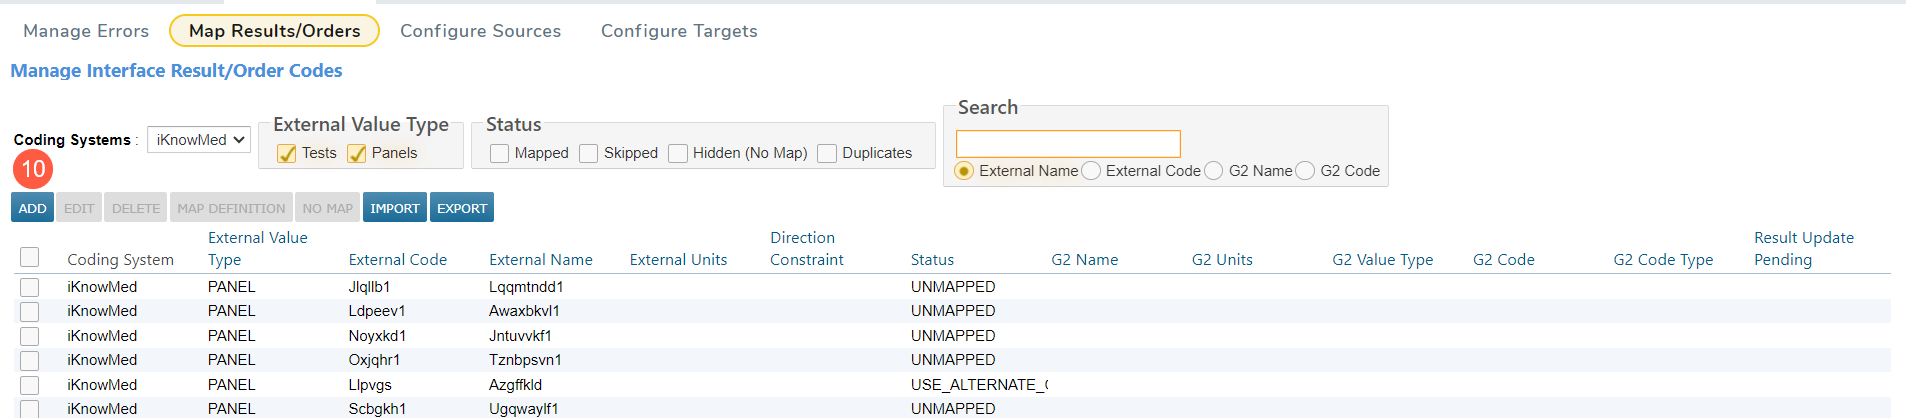
From the top navigation, go to Admin > Interface.
-
Select the Map Results/Orders page.
-
Select the Coding System used for your OLIF mapping from the drop-down (callout 7). This is usually the name of your LIS.
-
Use the Search box to ensure you do not already have the anticipated host code for the panel in your table (callout 8).
-
If the Panel is available but unmapped, hidden, or skipped, check the box next to the panel and click Map Definition (callout 9).
-
From here, follow the standard Lab Mapping process.
View standard Lab Mapping process


-
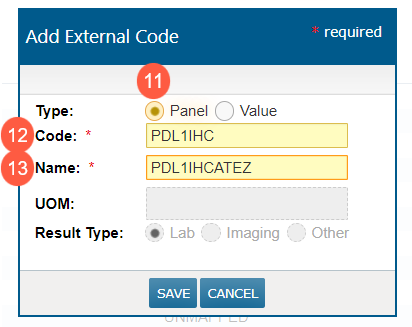
If the panel is not in the table, click the Add button to add the new panel mapping (callout 10).
-
In the pop-up window, select Panel as the Type (callout 11).
-
Enter the host Code that corresponds to the panel created in the LIS (callout 12).
-
Enter the Name as it appears on the Lab Panel Definition Detail screen (callout 13).
-
Save your changes.
-
The unmapped panel will now appear on the table and can be mapped.
-
Check the box next to the panel (callout 14) and click Map Definition (callout 15).
-
From here, follow the standard Lab Mapping process.

NOTE: If you have any questions about lab mapping for Recommended Biomarker Testing or OLIF, please call Technical Support at 888-338-8445.
Preparing for Okta: Required use of a PIN
![]()
![]()
![]()
![]()
As part of our Okta implementation preparation, areas of the application that previously required the use of a Password or Password/PIN, will now only accept a PIN. Passwords will no longer be accepted.
How to create a PIN
-
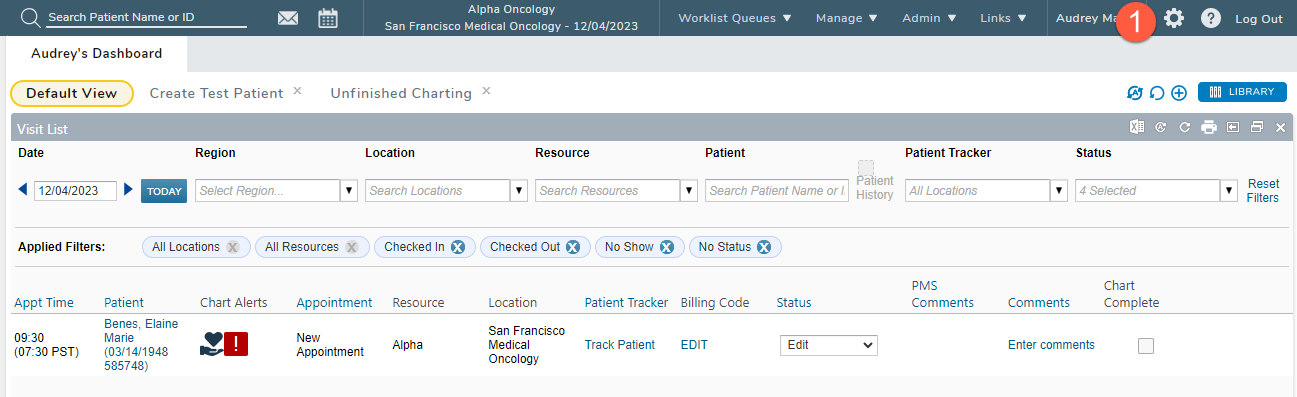
Select the gear icon from the top navigation (callout 1).
-
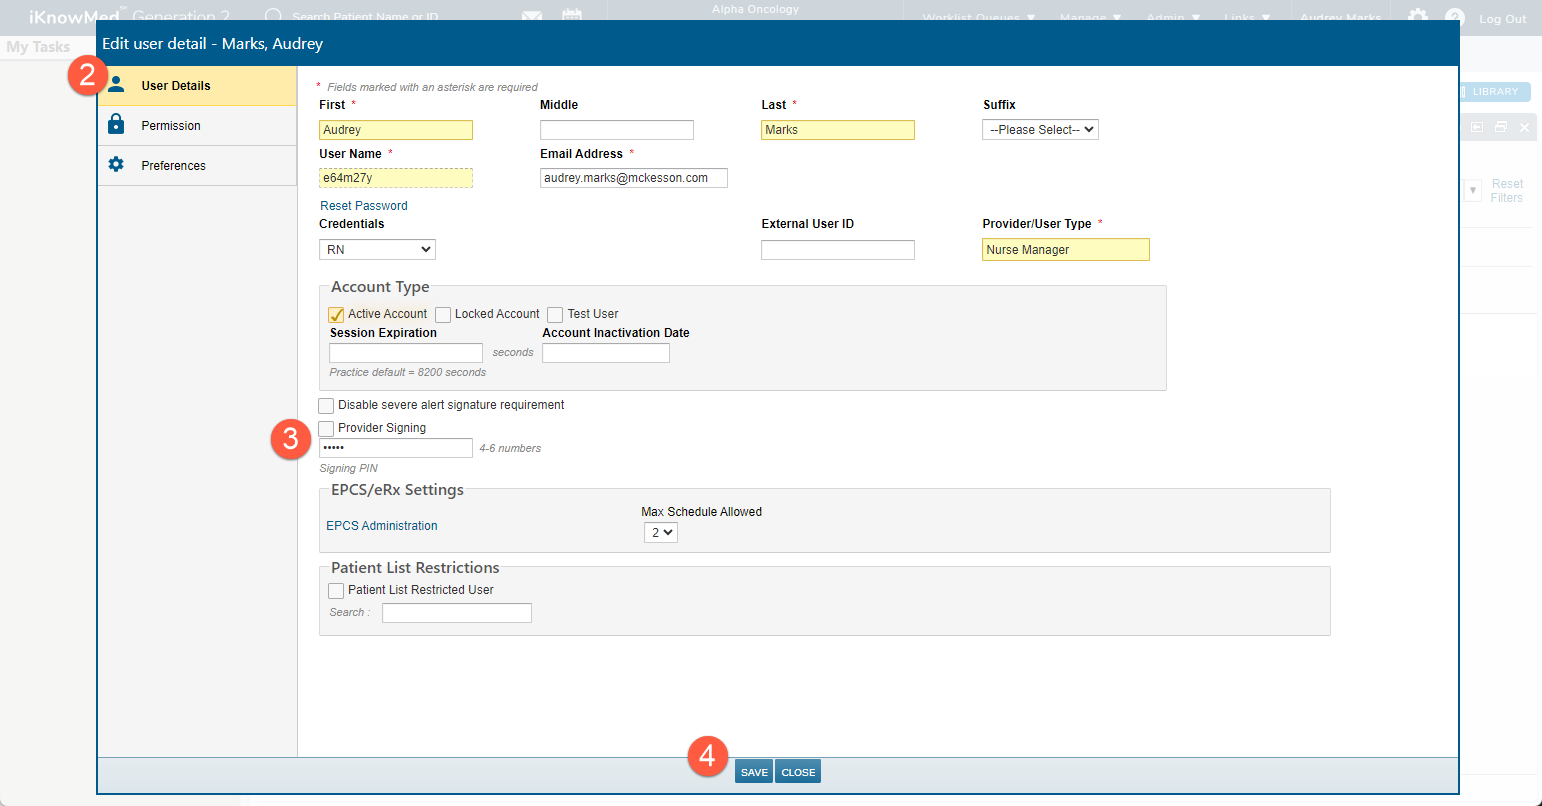
Select User Details (callout 2) and enter a four-to-six-digit PIN (callout 3). Then Save your changes (callout 4).
COVID-19 vaccine billing update for 2024
![]()
![]()
![]()
![]()
To support the CPT 2024 updates, we modified the Charge Capture Report to use the new billing administration code for COVID-19 vaccines. 90480 will replace the brand-specific administration codes created when vaccines were given Emergency Use Authorization. This simplifies billing for COVID-19 vaccines moving forward.
