E-Prescribe Using iKnowMed Mobile
August 2023
Send new medication prescriptions, including Schedule 2 drugs, straight to the pharmacy using the latest version of iKnowMed Mobile to save time and have patients’ prescriptions ready faster.
This information will sync with the desktop version of iKnowMed to ensure you’re always working with real-time information.
The app also provides and syncs with the lists of a patient’s past and active medications and their previously ordered medications from the desktop version of iKnowMed.
Getting started
Before you can begin mobile e-prescribing, your practice and user settings must be set to grant access to the feature.
Practice preferences
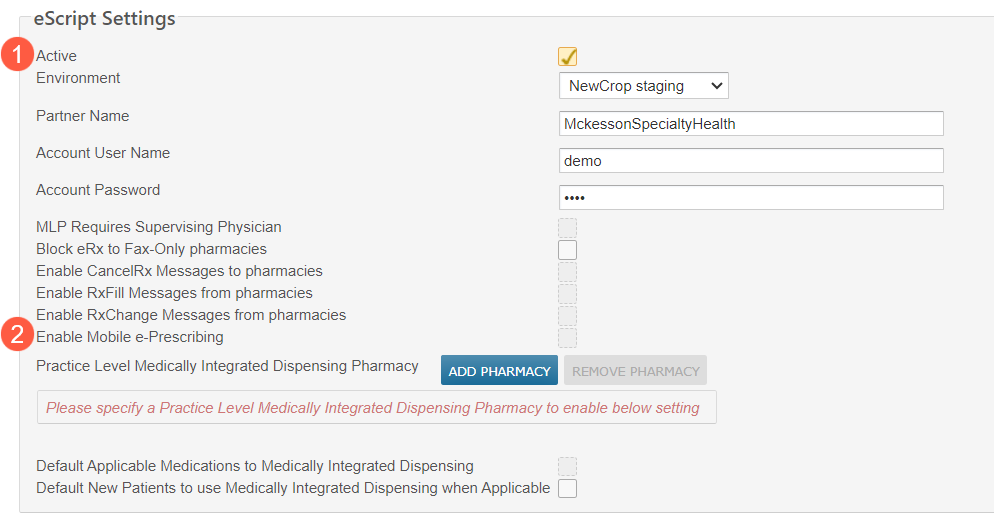
To set up mobile e-prescribing for your practice:
-
Go to Admin > Practice Preferences.
-
Under eScript Settings, check the box next to both Active Environment (callout 1) and Enable Mobile e-Prescribing (callout 2).
-
Save your changes.
-
Log out and back in for the changes to take effect.
User settings
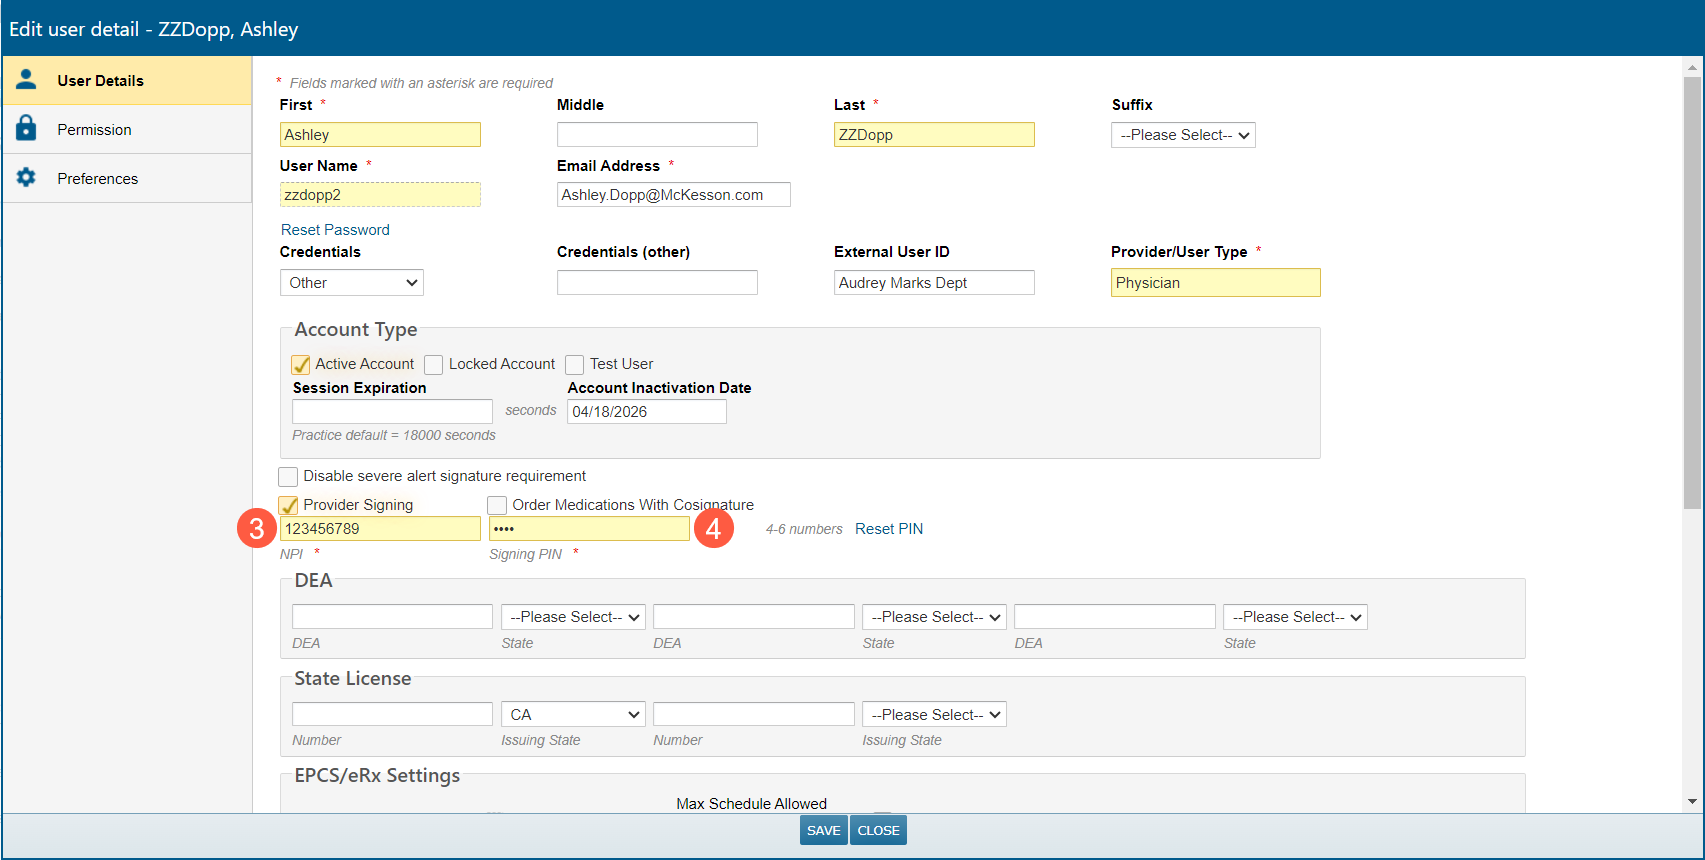
To set up mobile e-prescribing for individual users:
-
Go to Admin > Users.
-
Select a user and click the Edit User button to adjust their settings.
-
Select the User Details page.
-
Ensure the user has an NPI (callout 3) and a Signing PIN (callout 4) associated with their profile. If they don’t, these will need to be added before they can use mobile e-prescribing.
-
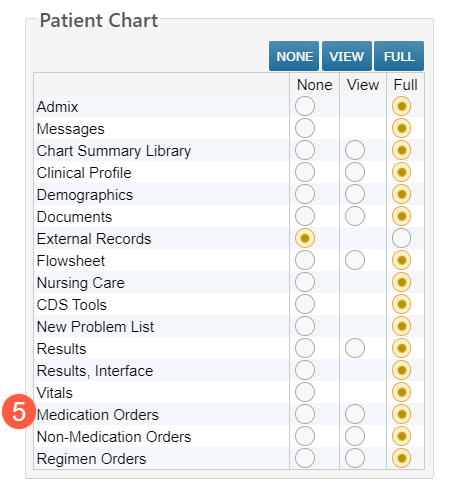
Select the Permission page.
-
Under the Patient Chart permissions, ensure the user has Full permission for Medication Orders (callout 5). If they don’t, the permission must be set to full before they can use mobile e-prescribing.
-
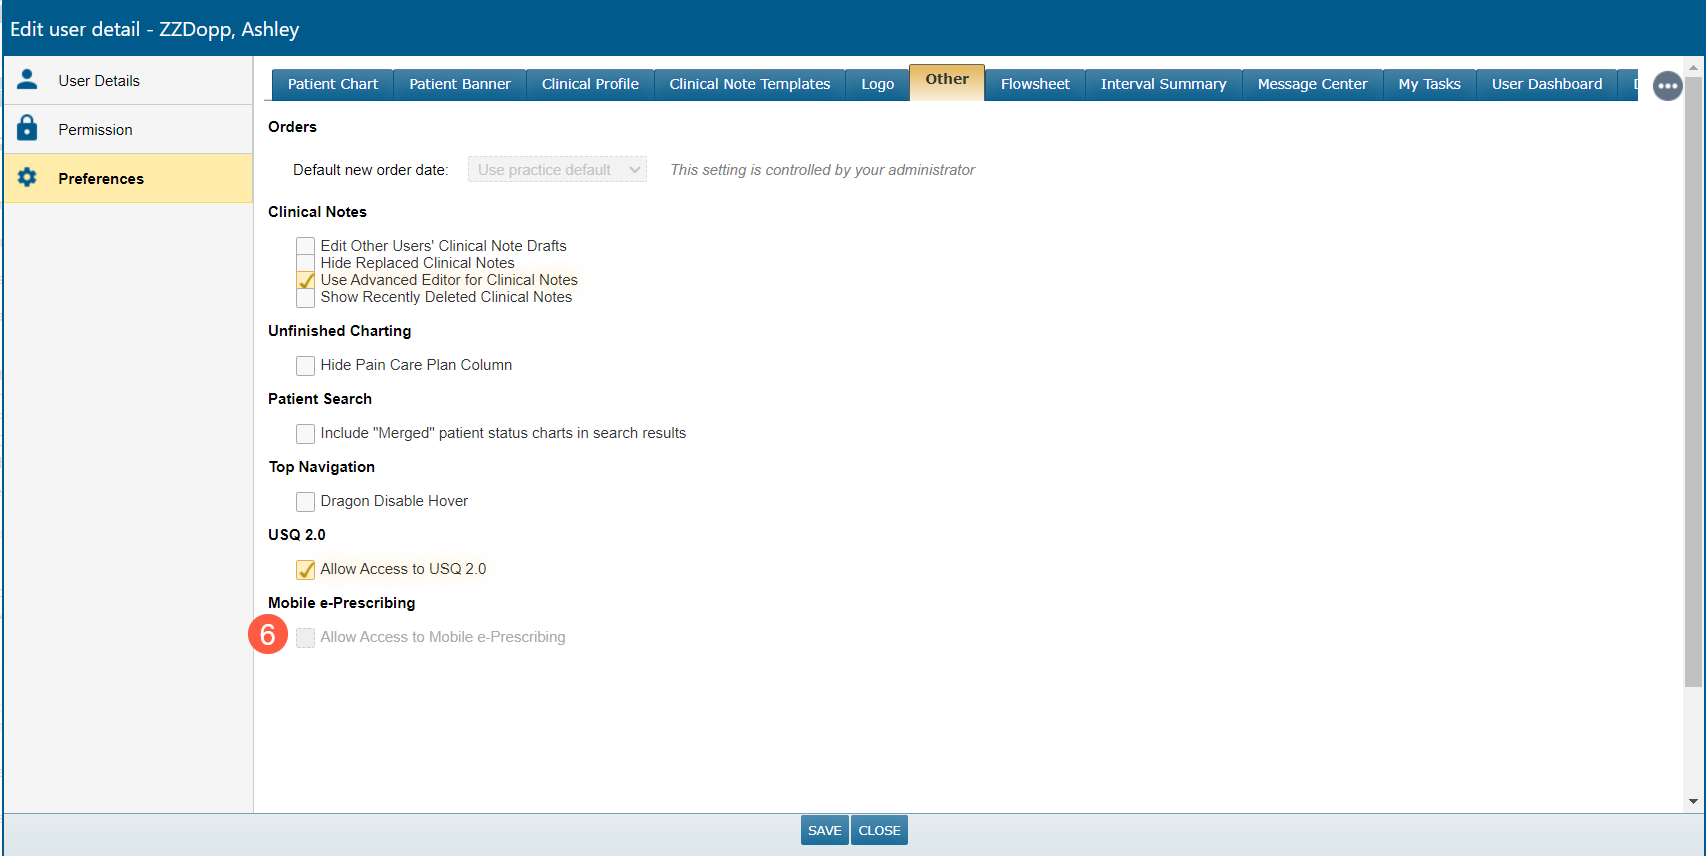
Select the Preferences page.
-
Select the Other tab from the top of the window and ensure the box is checked next to Allow Access to Mobile e-Prescribing (callout 6). This box must be checked before the user can begin mobile e-prescribing.
-
Once all the required settings are set, save your changes.
To make these changes to a group of users, follow the Help site instructions that explain how to apply a specific user profile to one or more user accounts.

NOTE: Mid-level providers (e.g., nurse practitioners) with Use Supervising Physician for prescribing (defaults to patient attending) checked in their user profile will not be able to e-prescribe during the first phase of the iKnowMed Mobile eRx beta.
Prescribing in the app
-
After your access is properly set, you can create orders in the app.
NOTE: iKnowMed mobile does not currently support approving or denying renewals. You may only place new orders using the app.
-
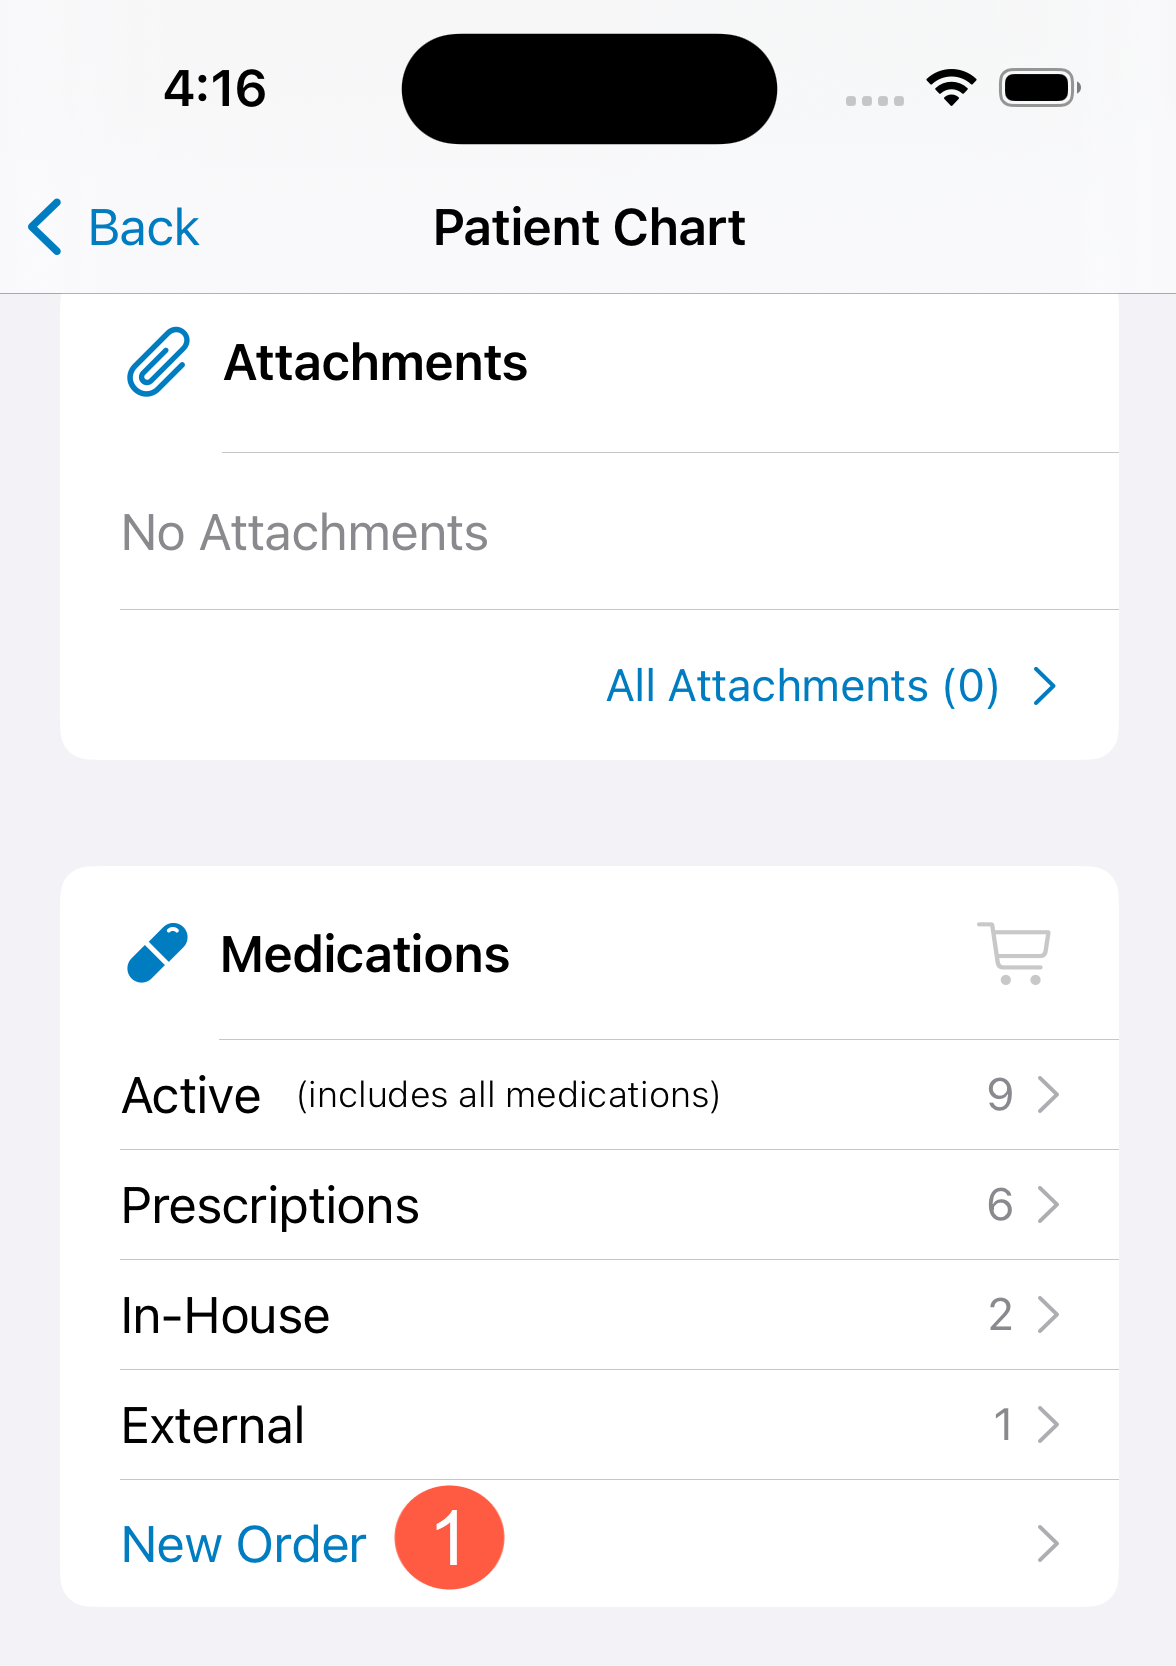
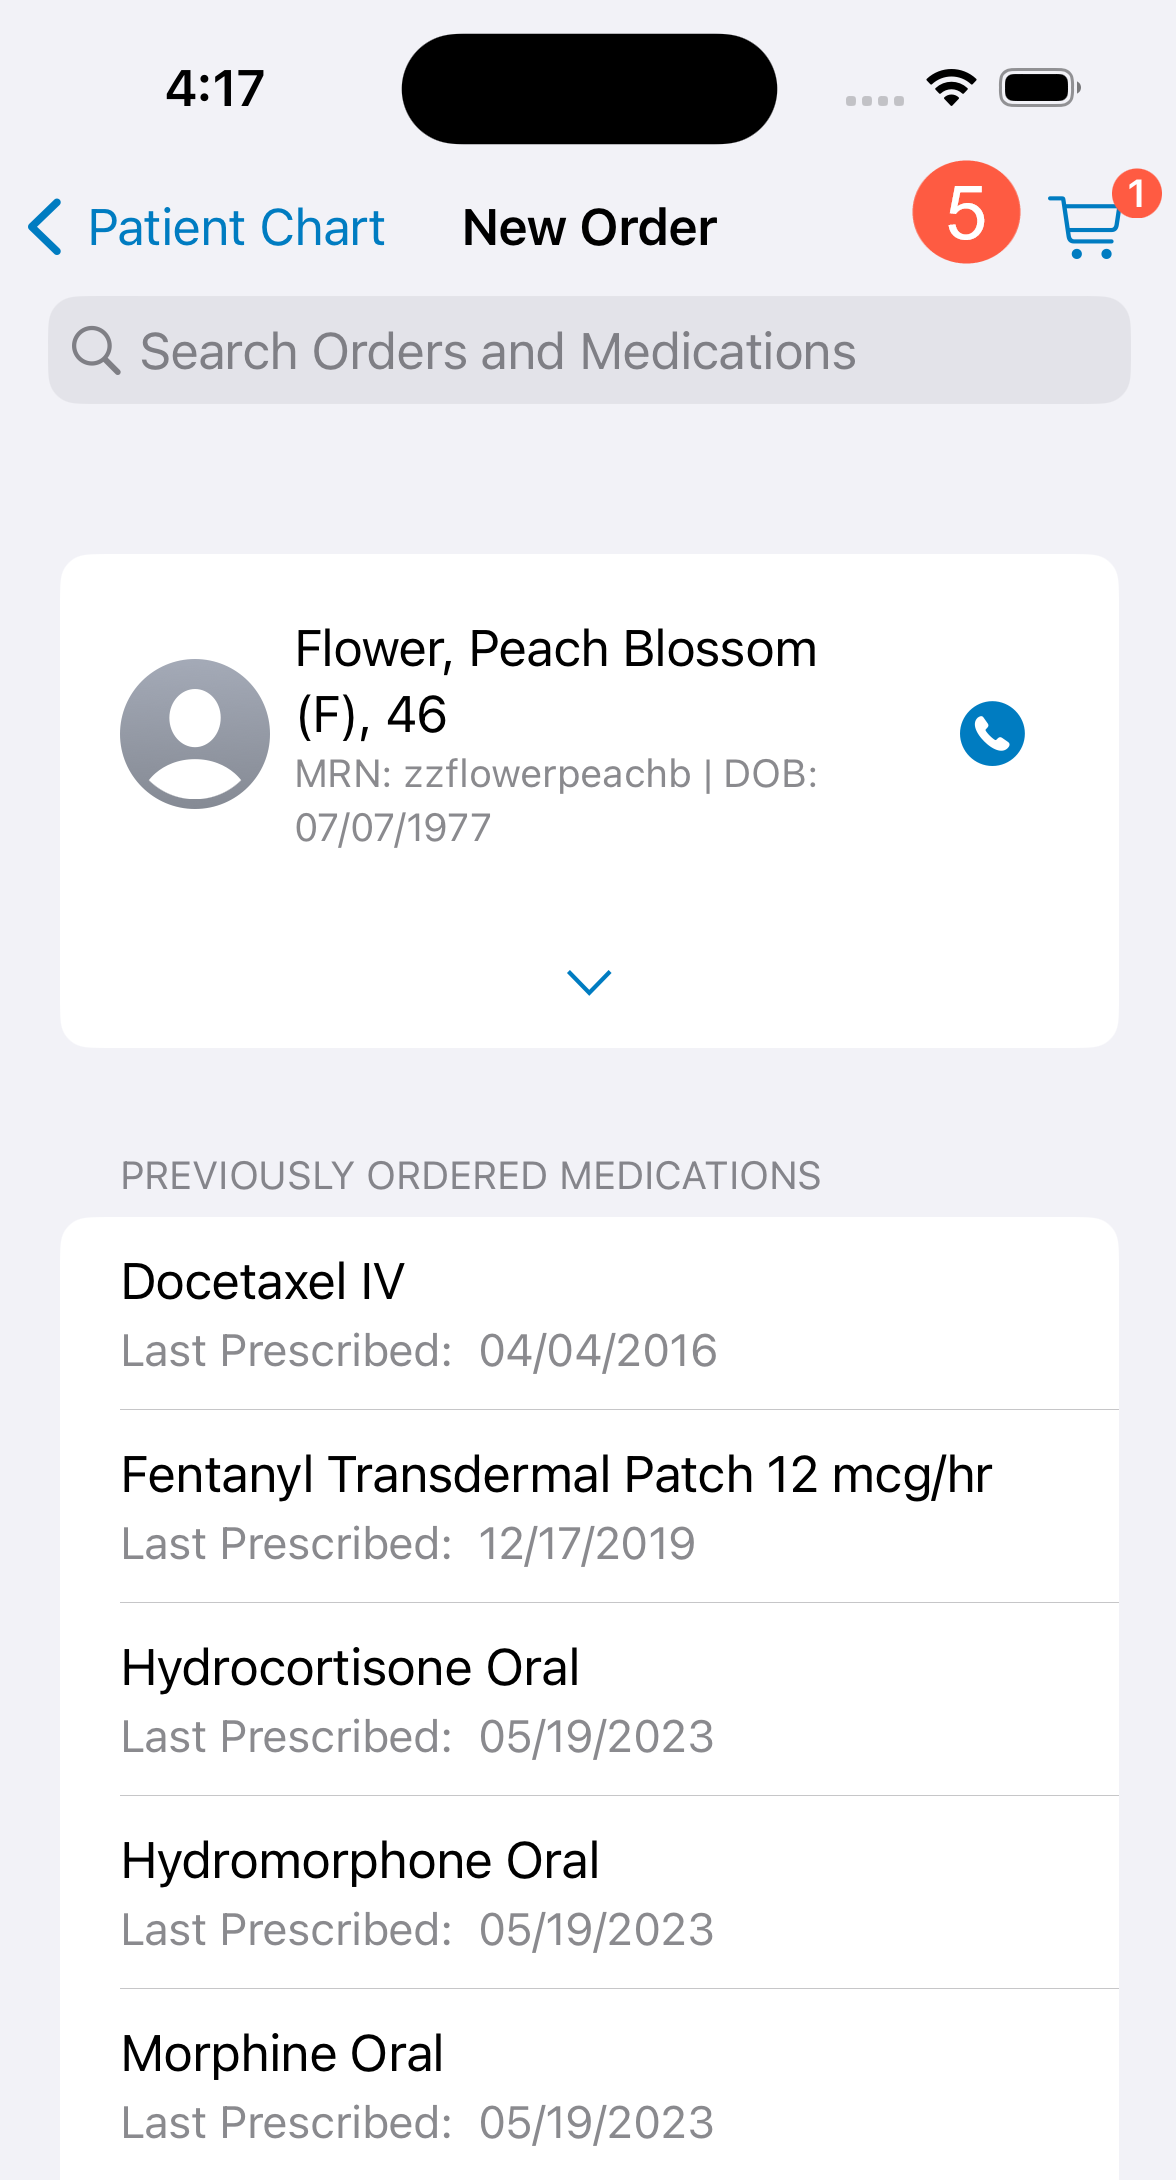
Open a patient’s chart and scroll down to the Medications section. Tap the New Order link (callout 1).
-
You may also place new orders on the page that lists the patient’s Active medications. Simply tap the plus sign in the upper right corner and select New Order from the drop-down.
-
-
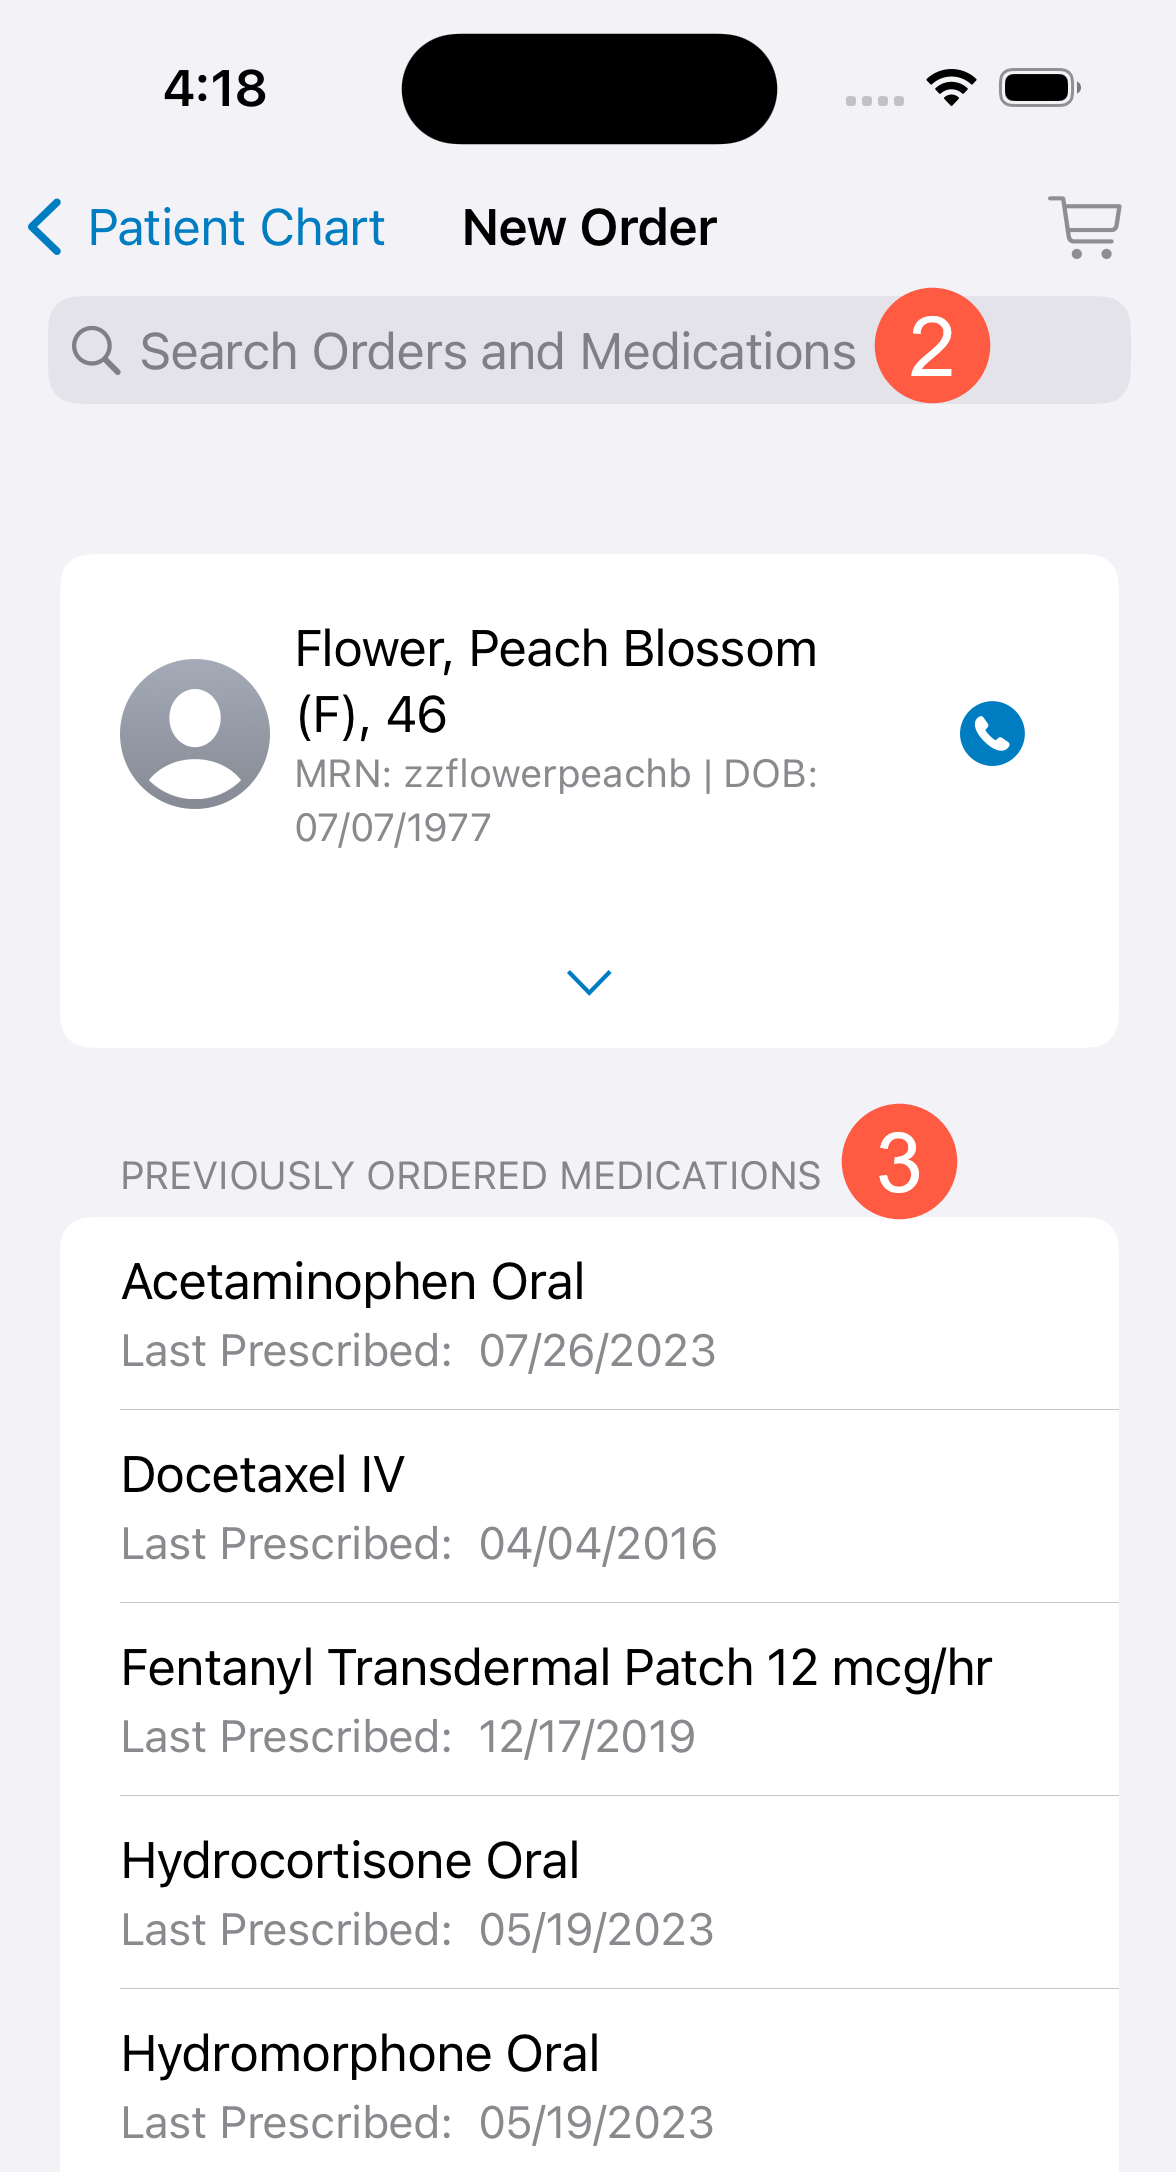
On the New Order page, use the search bar at the top to locate a medication (callout 2) or tap on and re-order a medication from the Previously Ordered Medications list (callout 3).
-
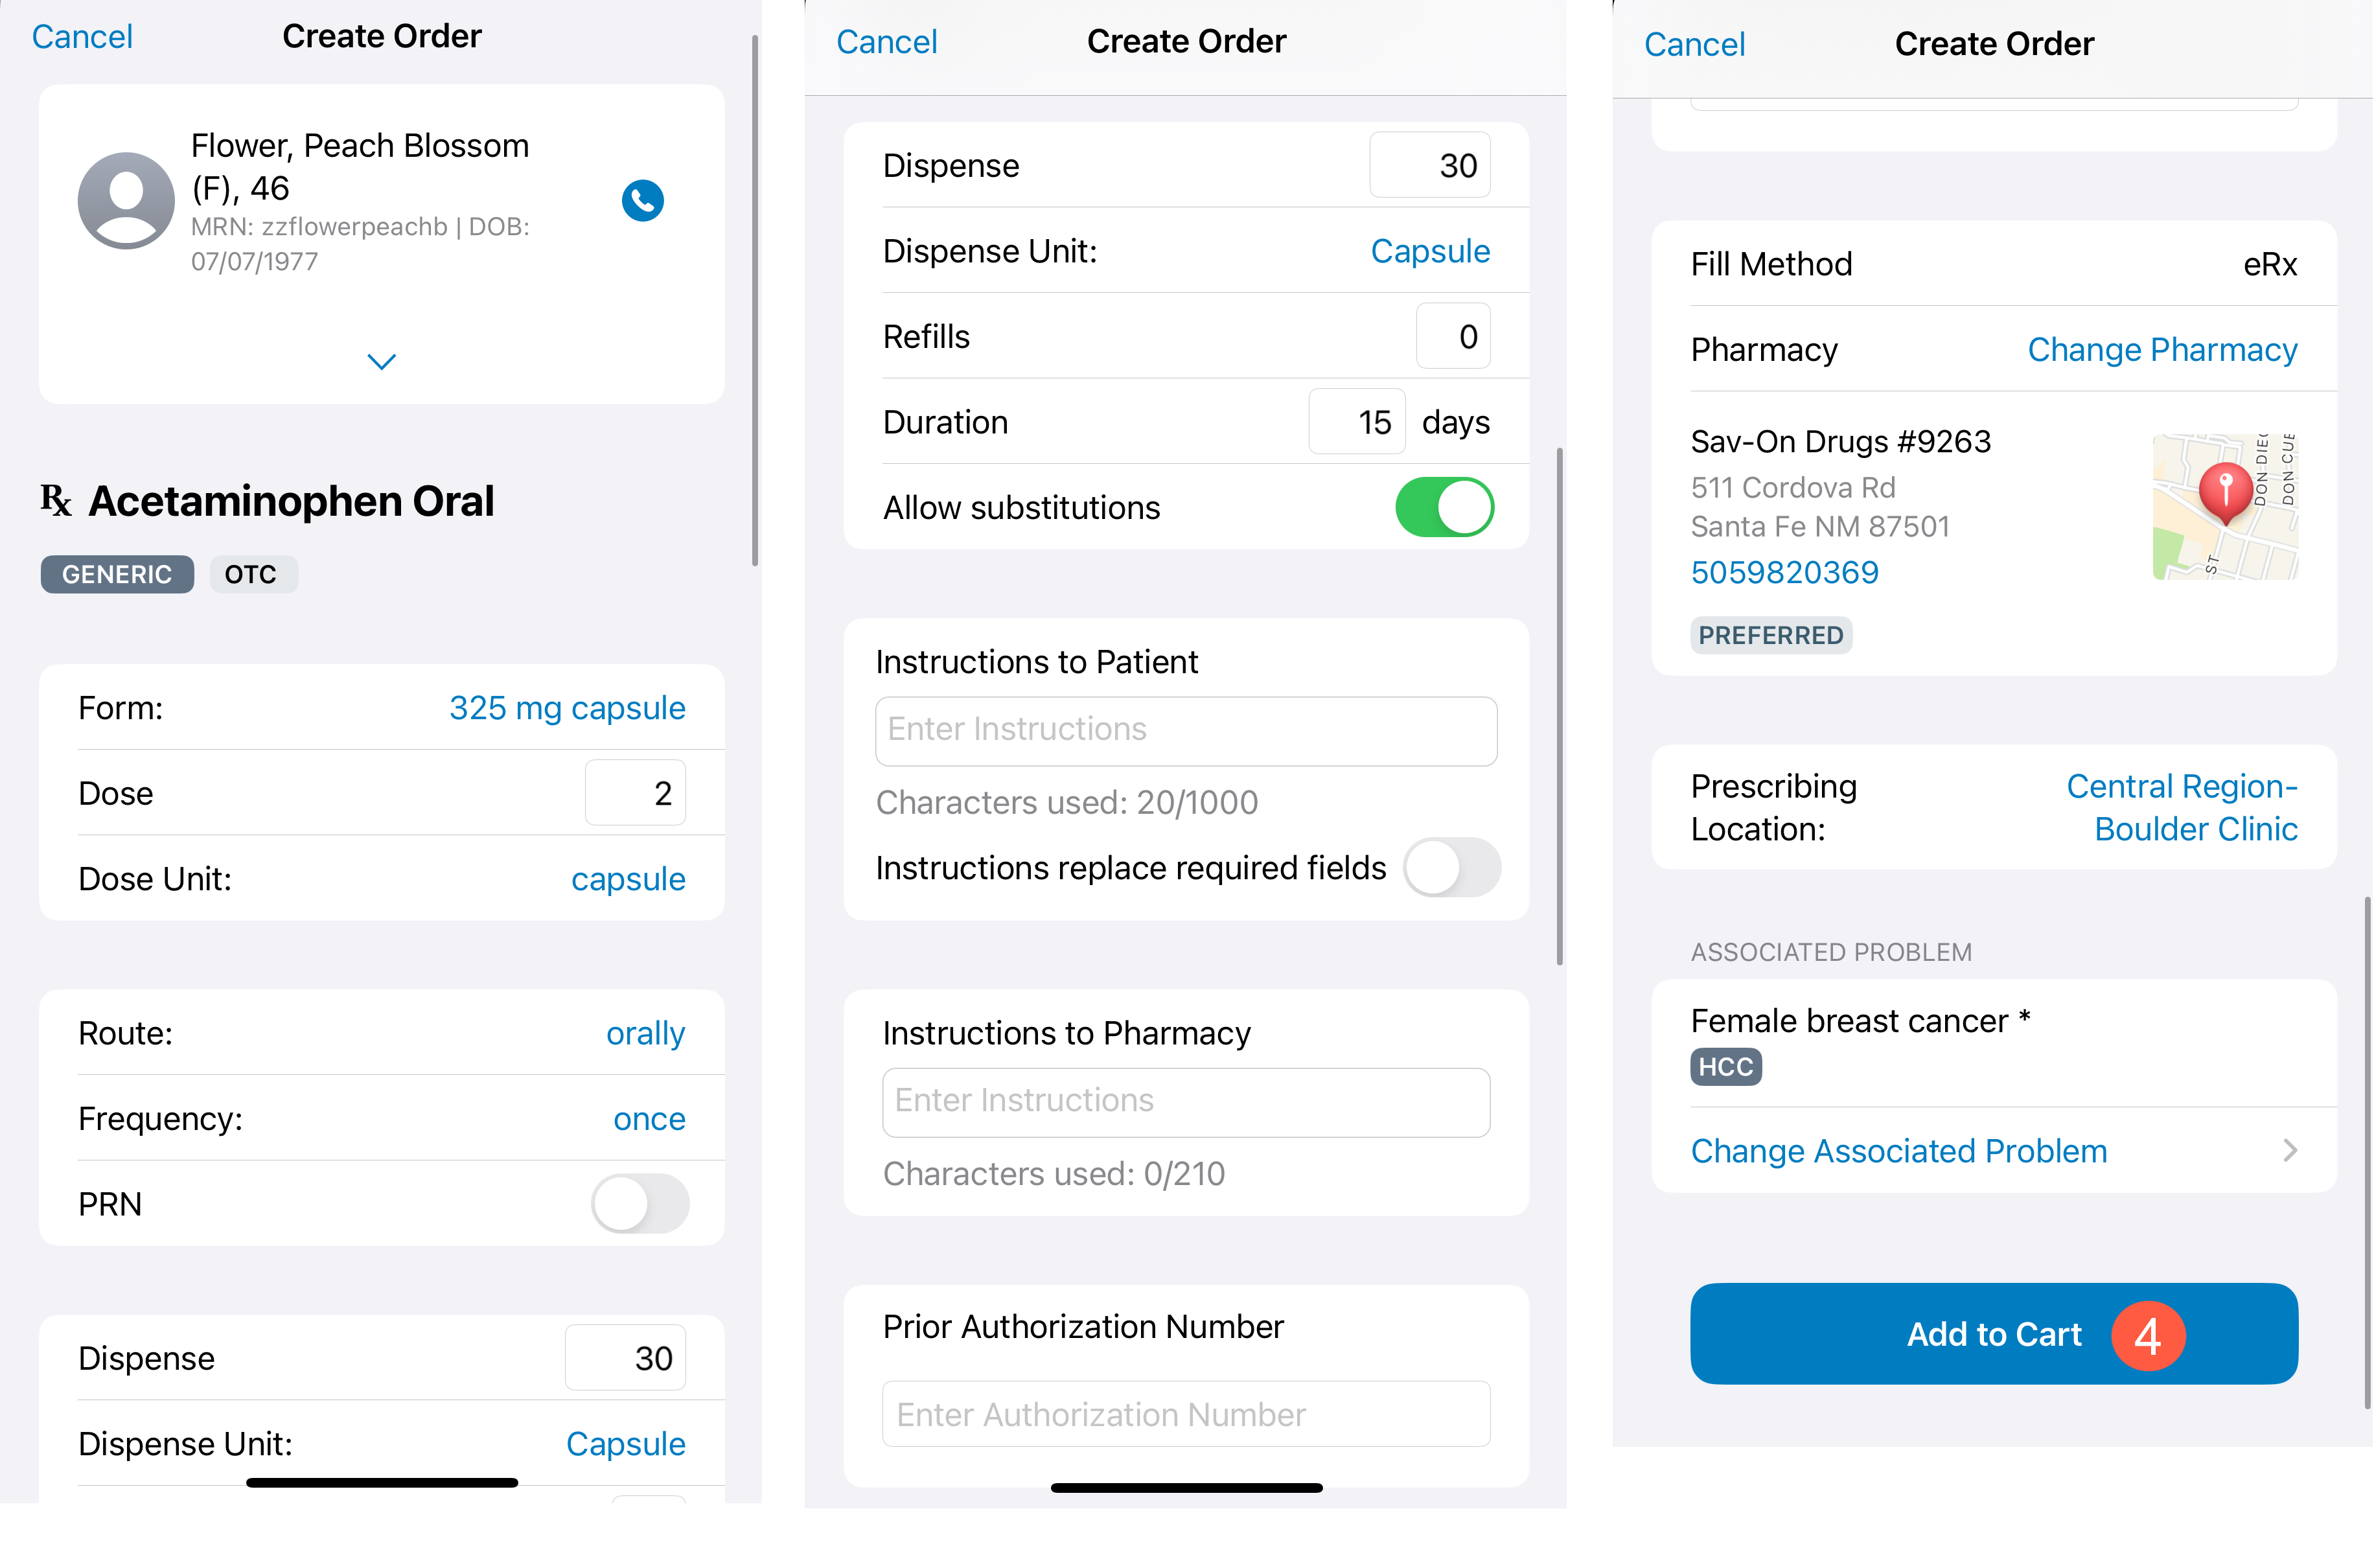
Once a medication is selected, you will land on the Create Order page.
-
From here, you may tap on the following items to add or edit the information:
-
Form
-
Dose
-
Dose Unit
-
Route
-
Frequency
-
PRN
-
Reason for order
-
Dispense
-
Dispense Unit
-
Refills
-
Duration
-
Allow substitutions
-
Instructions to patient
-
Instructions to pharmacy
-
Prior Authorization Number
-
Fill Method
-
Pharmacy
-
Prescription Location
-
Associated Problem
-
Opioid Signed Agreement (if needed)
-
PDMP Reviewed (if needed)
NOTE: During the first phase of the iKnowMed Mobile eRx beta, the formula dose value cannot be changed for medications that default to a formula dose. You may change the dose field in the app, but changes to the actual formula dosing are not available at this time.
-
-
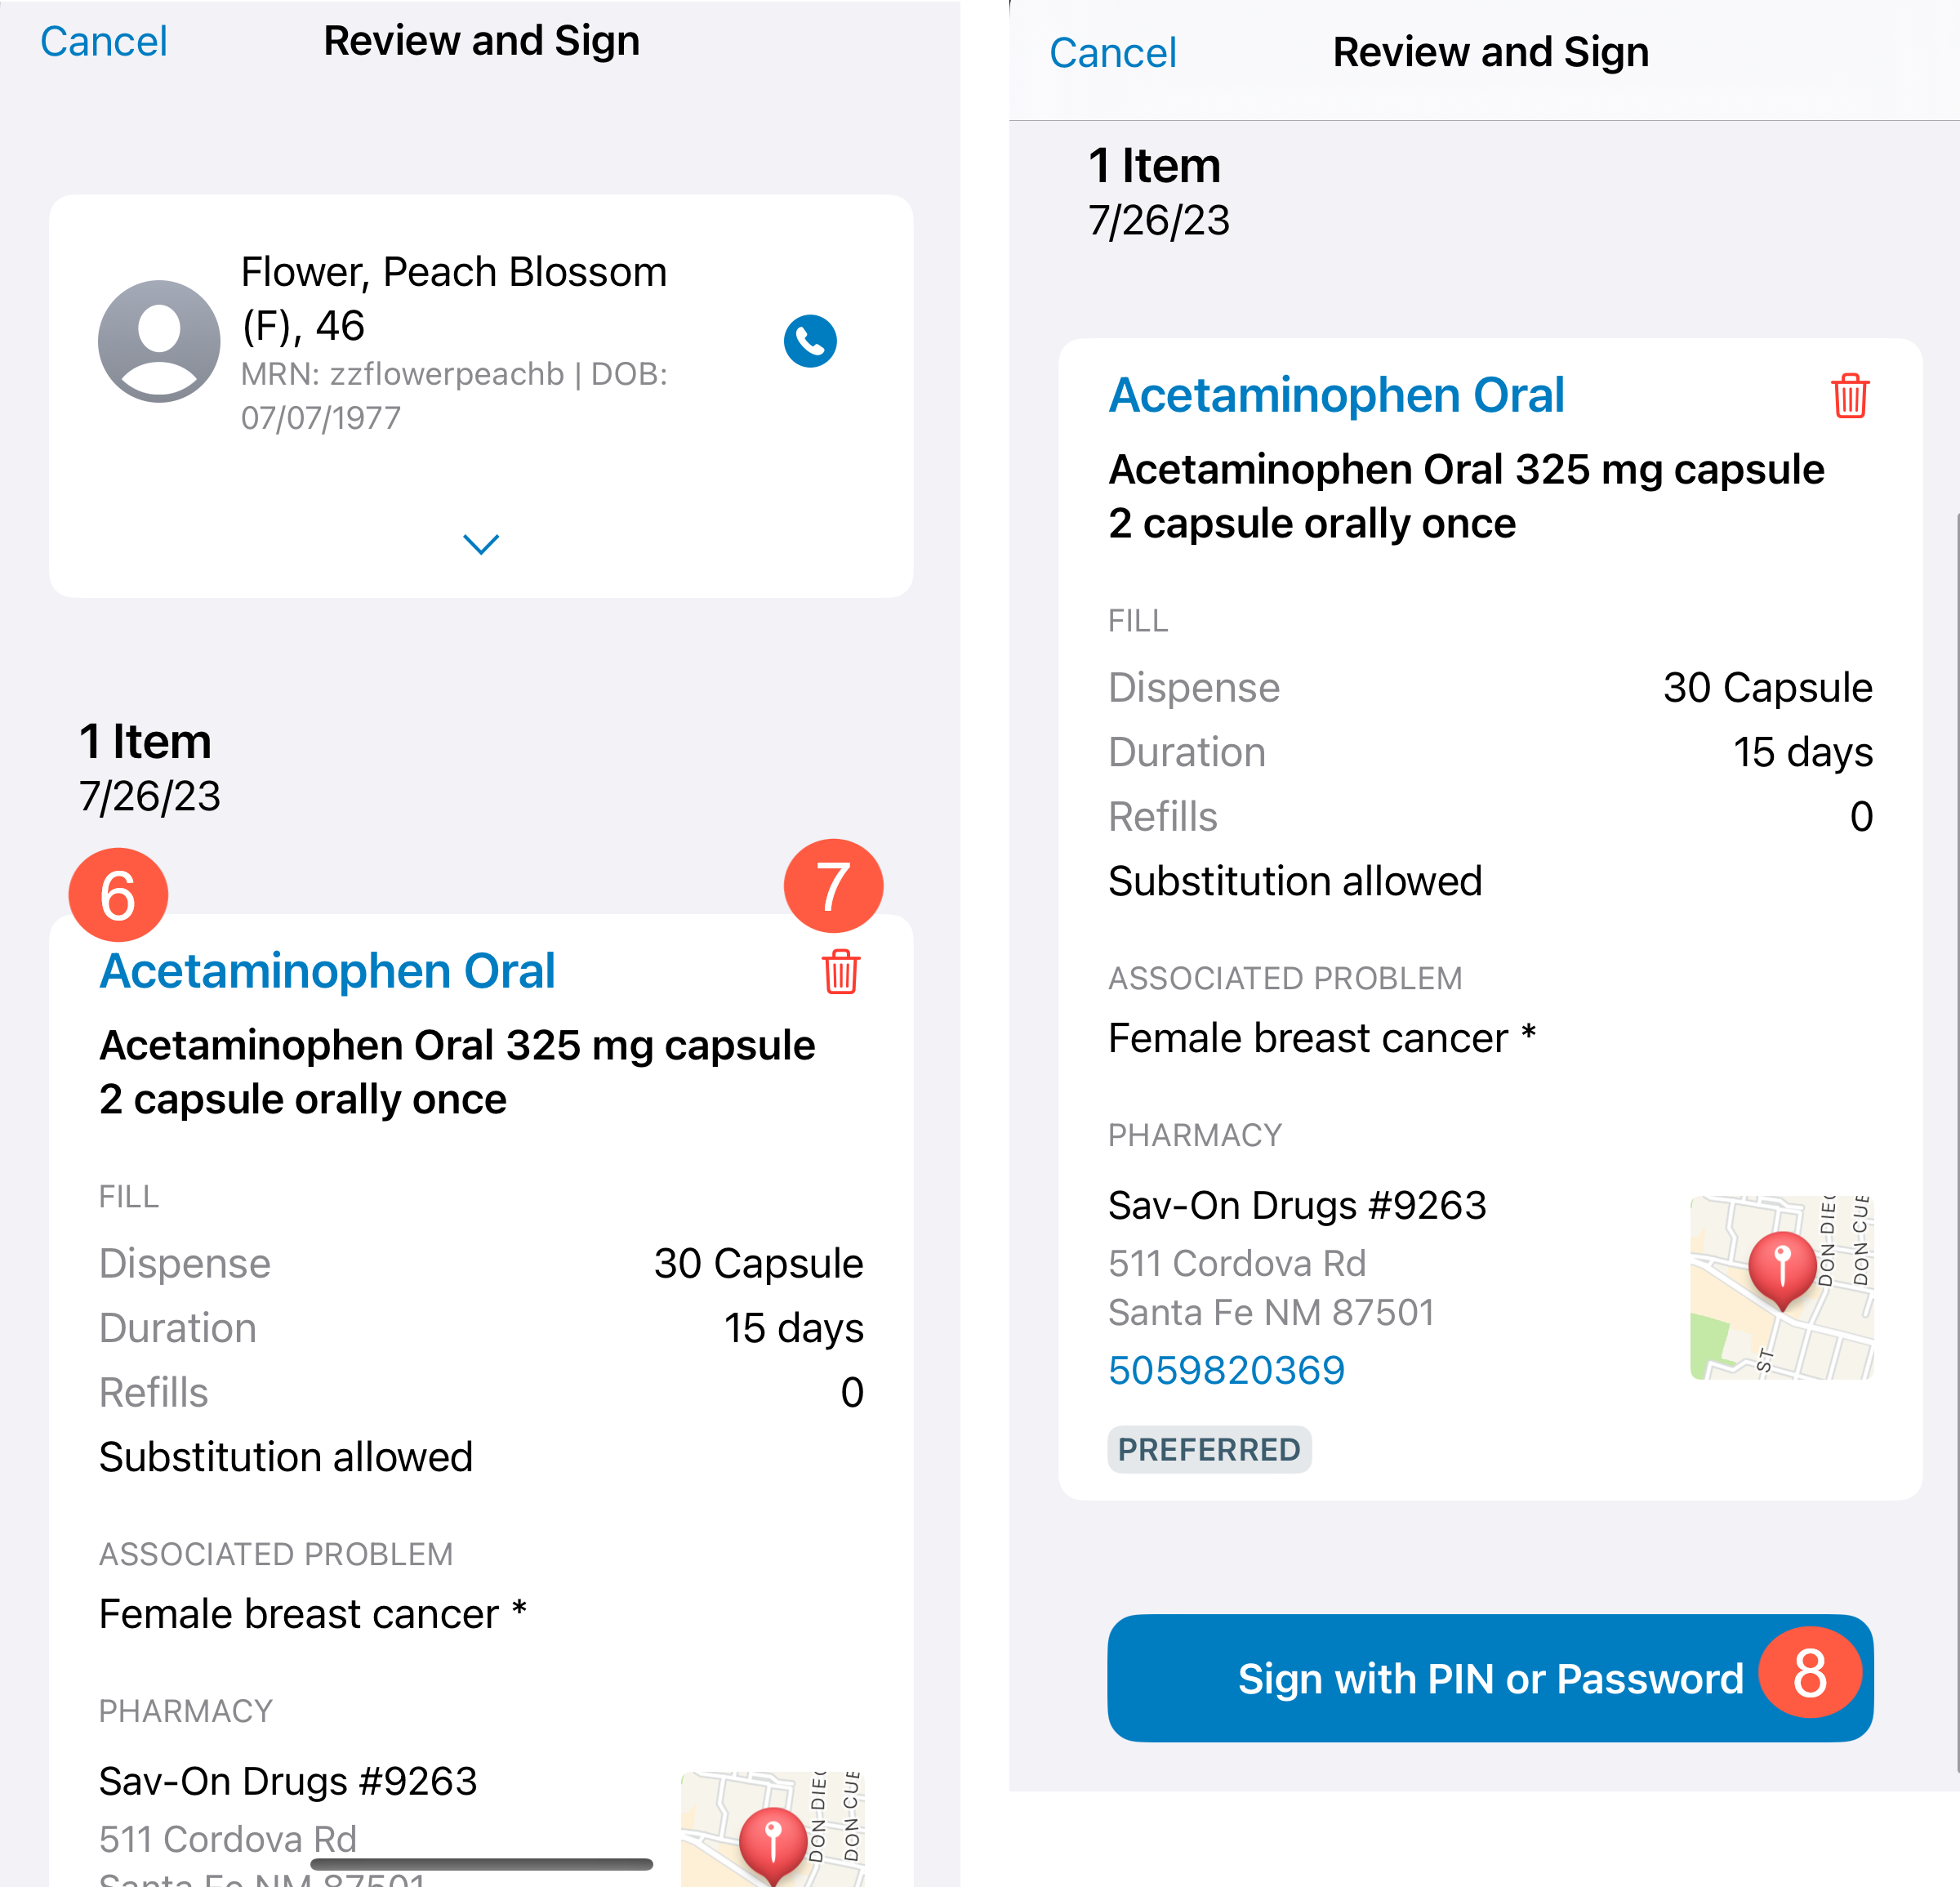
Once all the information is complete, tap Add to Cart (callout 4).
-
You will return to the New Order page where you may add more medications if needed.
-
To see the medications in your cart or to complete your order, click the cart icon in the upper-right corner of the screen (callout 5).
-
The cart will display the patient’s information at the top followed by the order.
-
To edit an order in the cart, simply tap the medication name (callout 6) to return to the Create Order page.
-
You may delete items from the order using the red trash can icon associated with each item (callout 7).
-
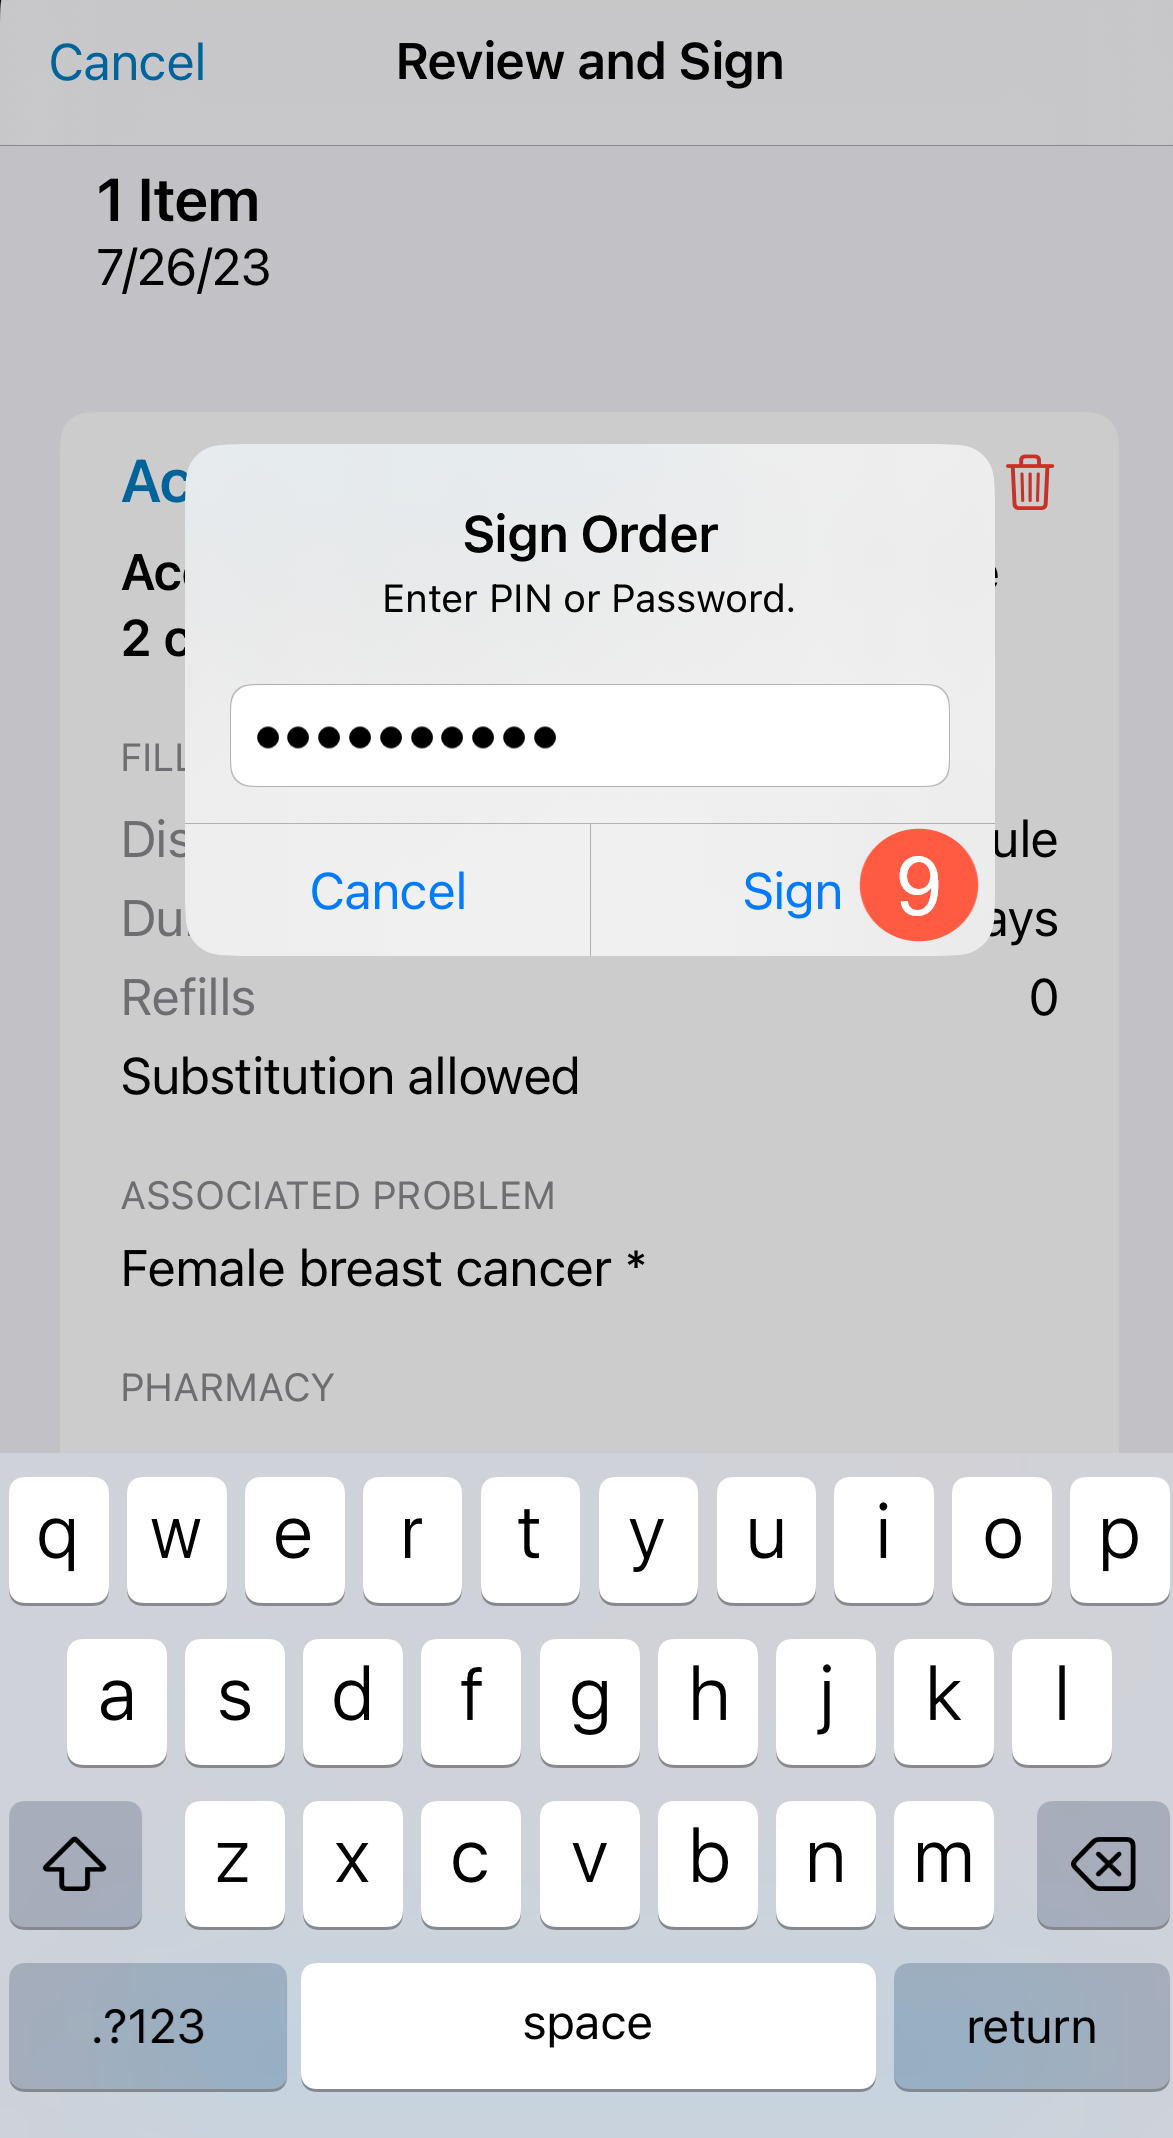
To complete the order, scroll to the bottom and tap Sign with PIN or Password (callout 8).
-
On the pop-up window, enter your PIN or password and tap Sign (callout 9).
-
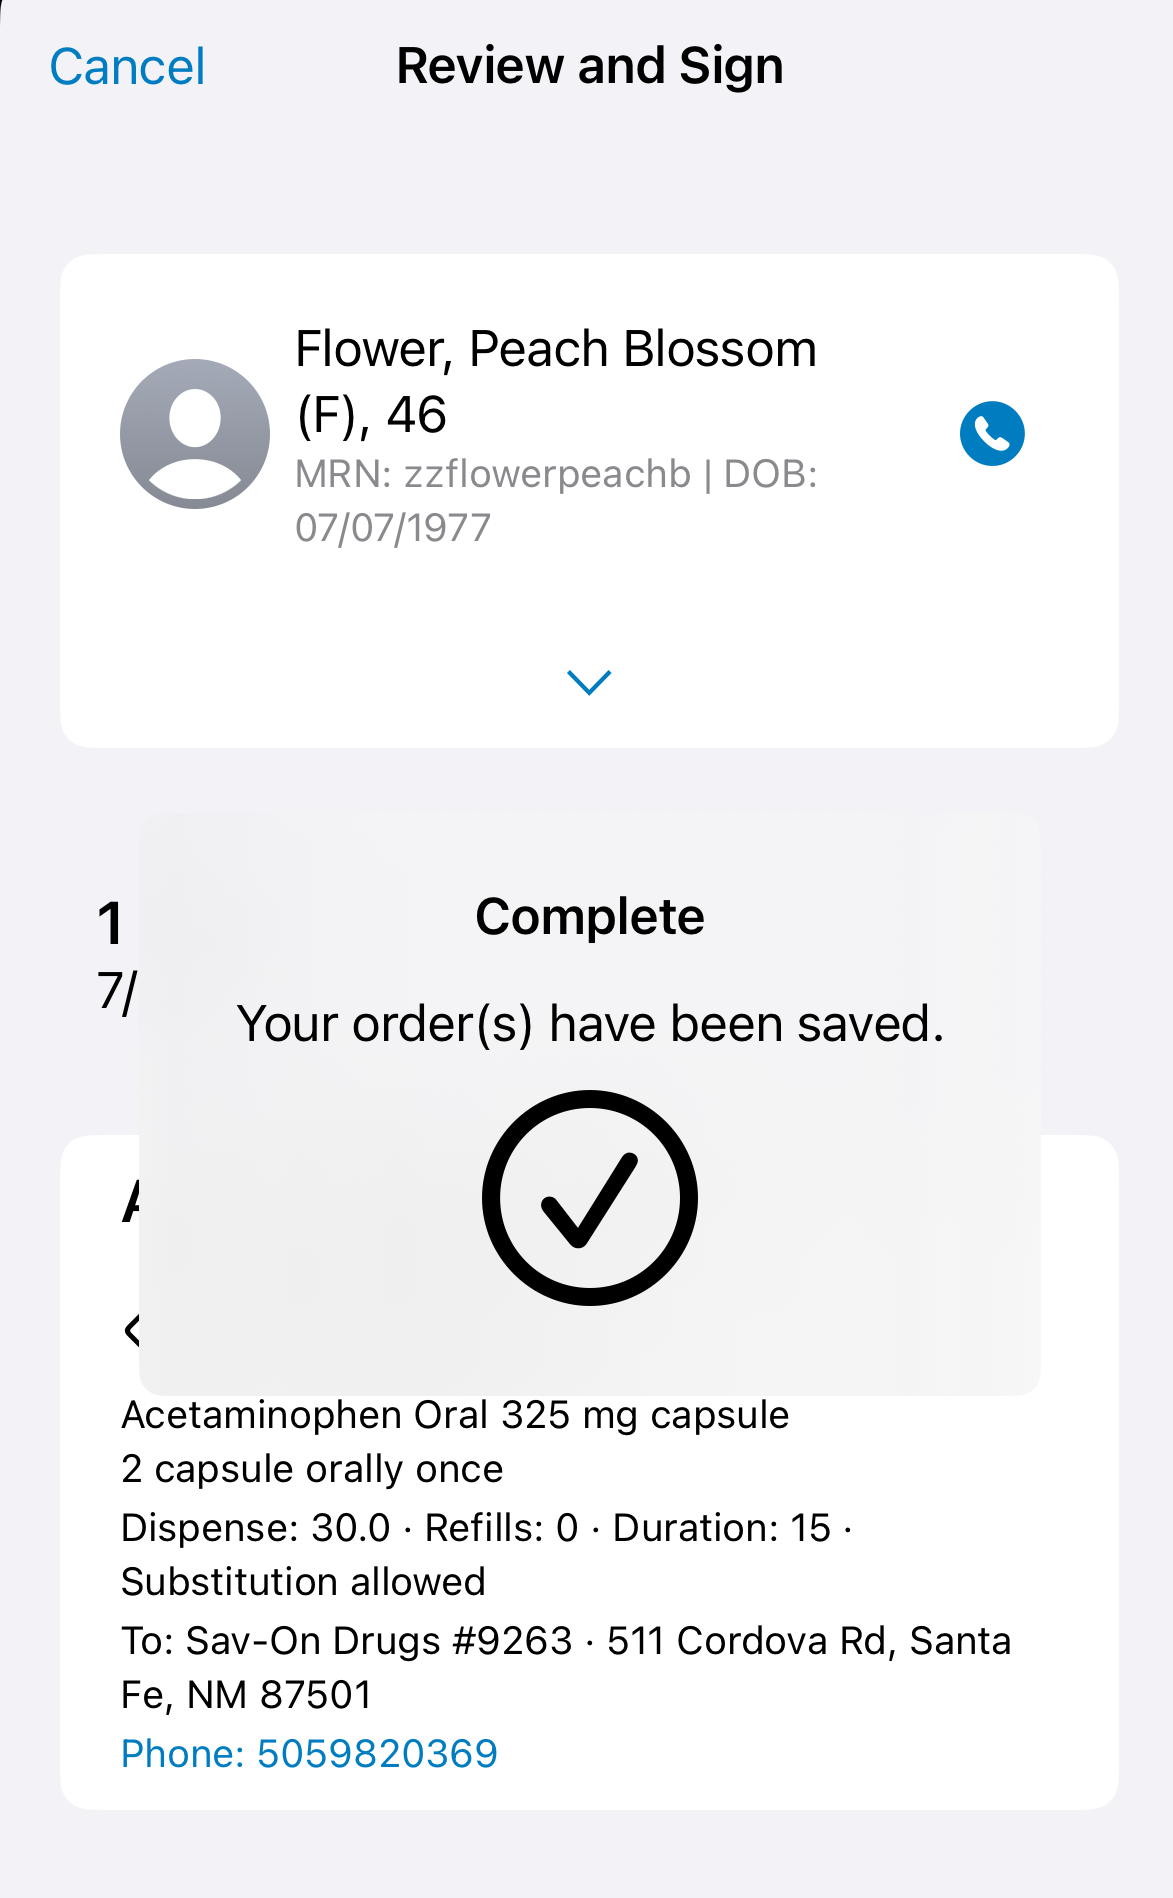
If successful, you will receive a message that your order is complete.
-
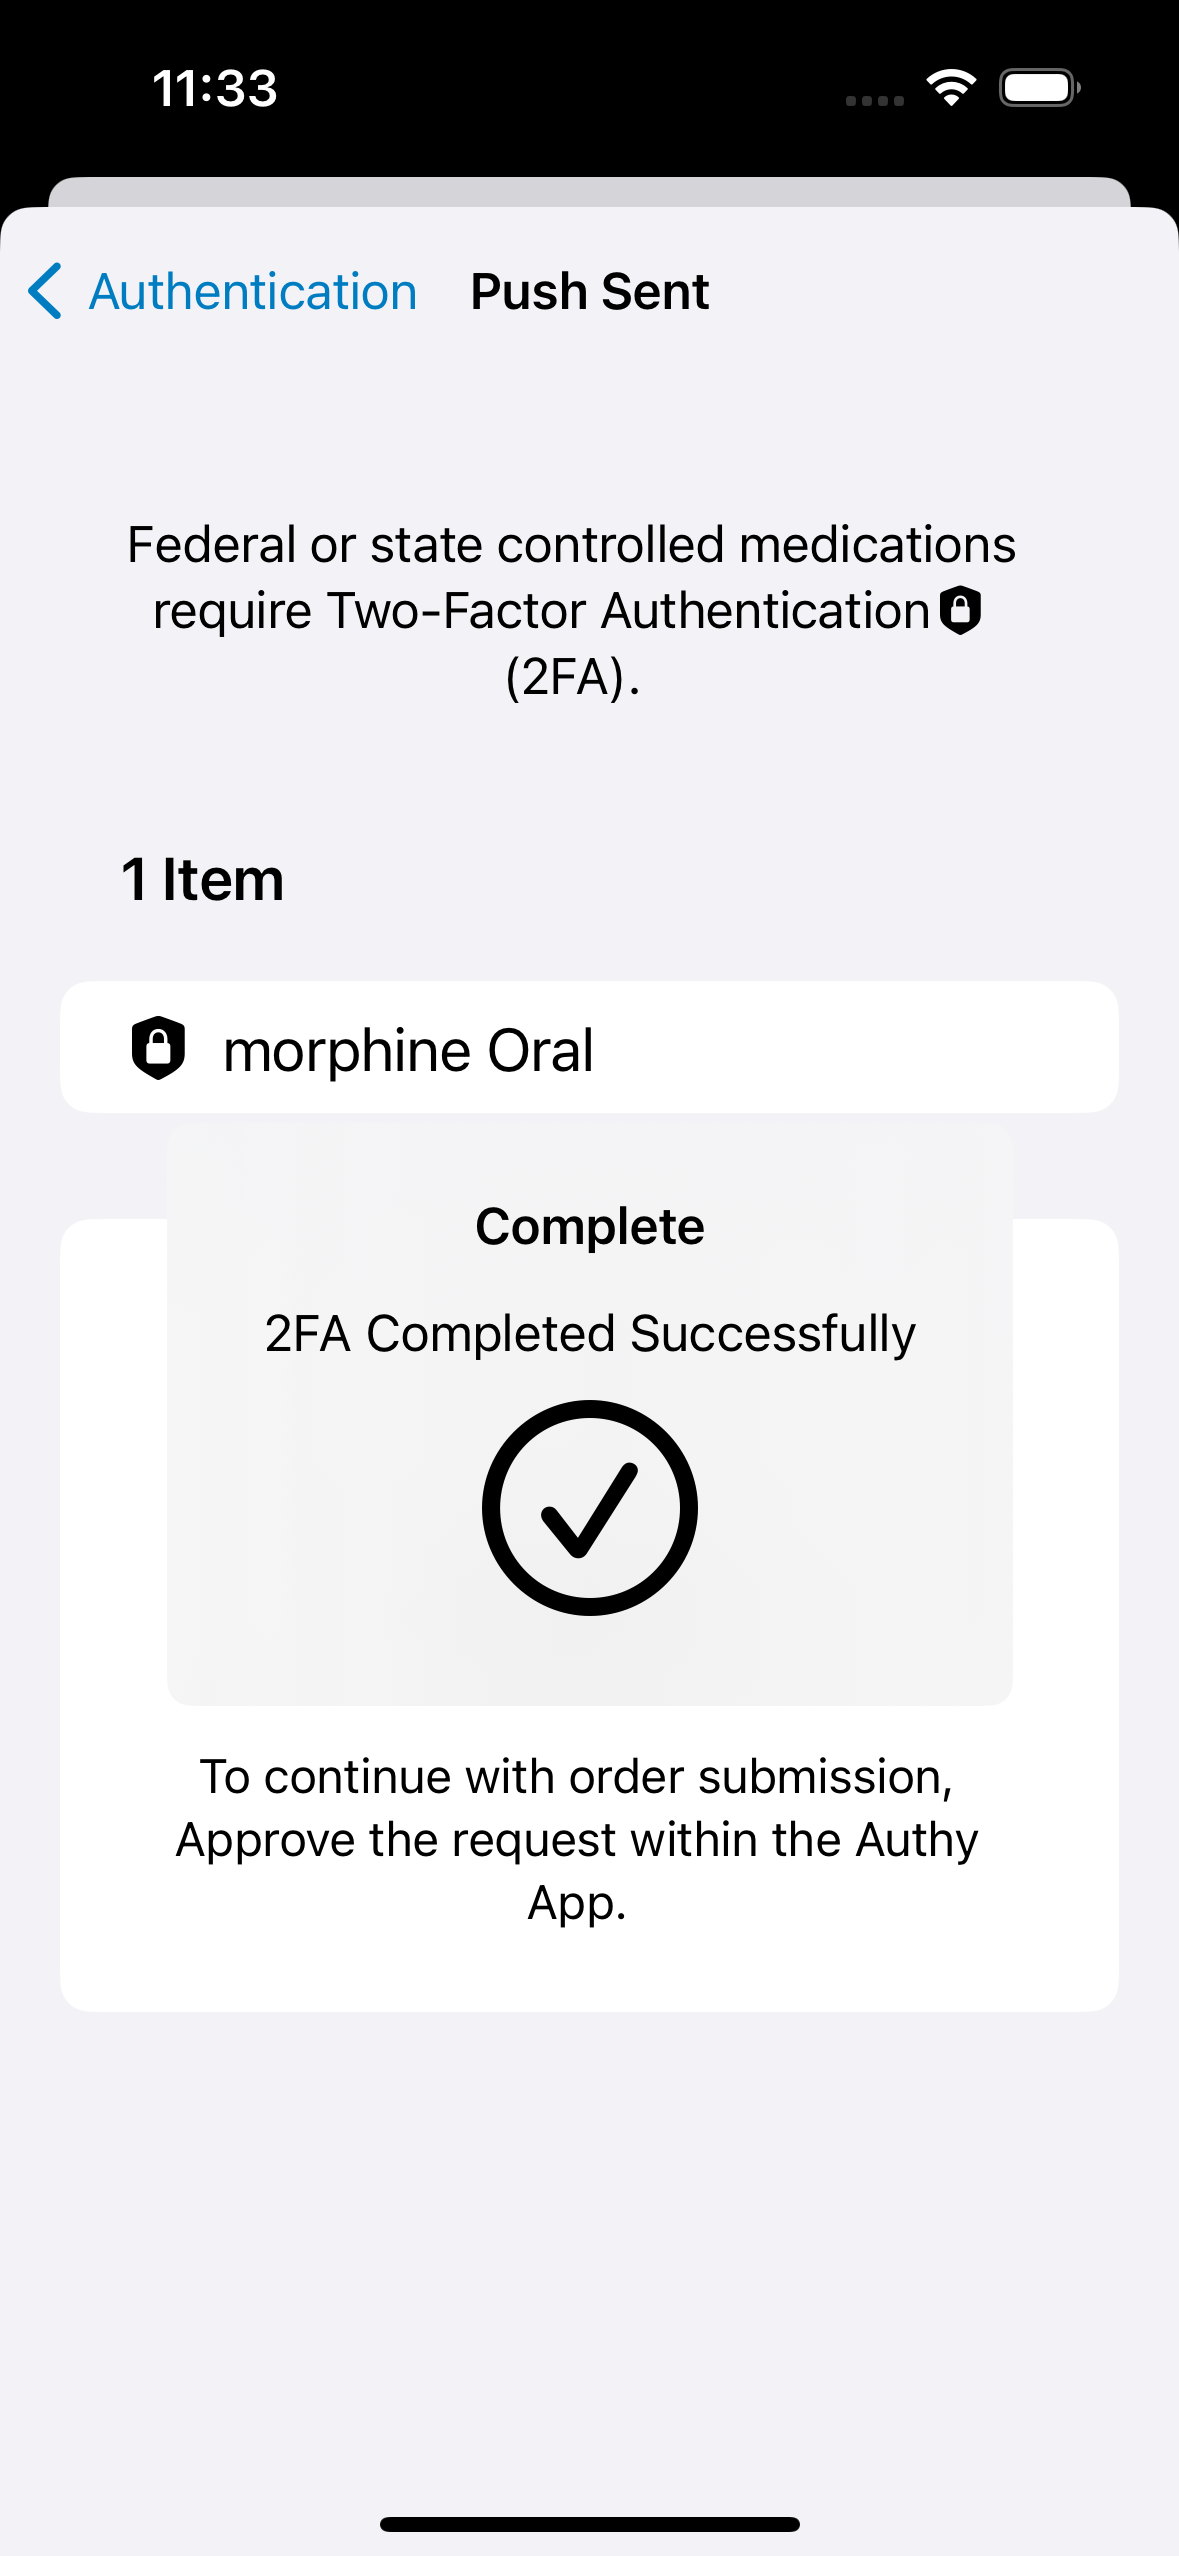
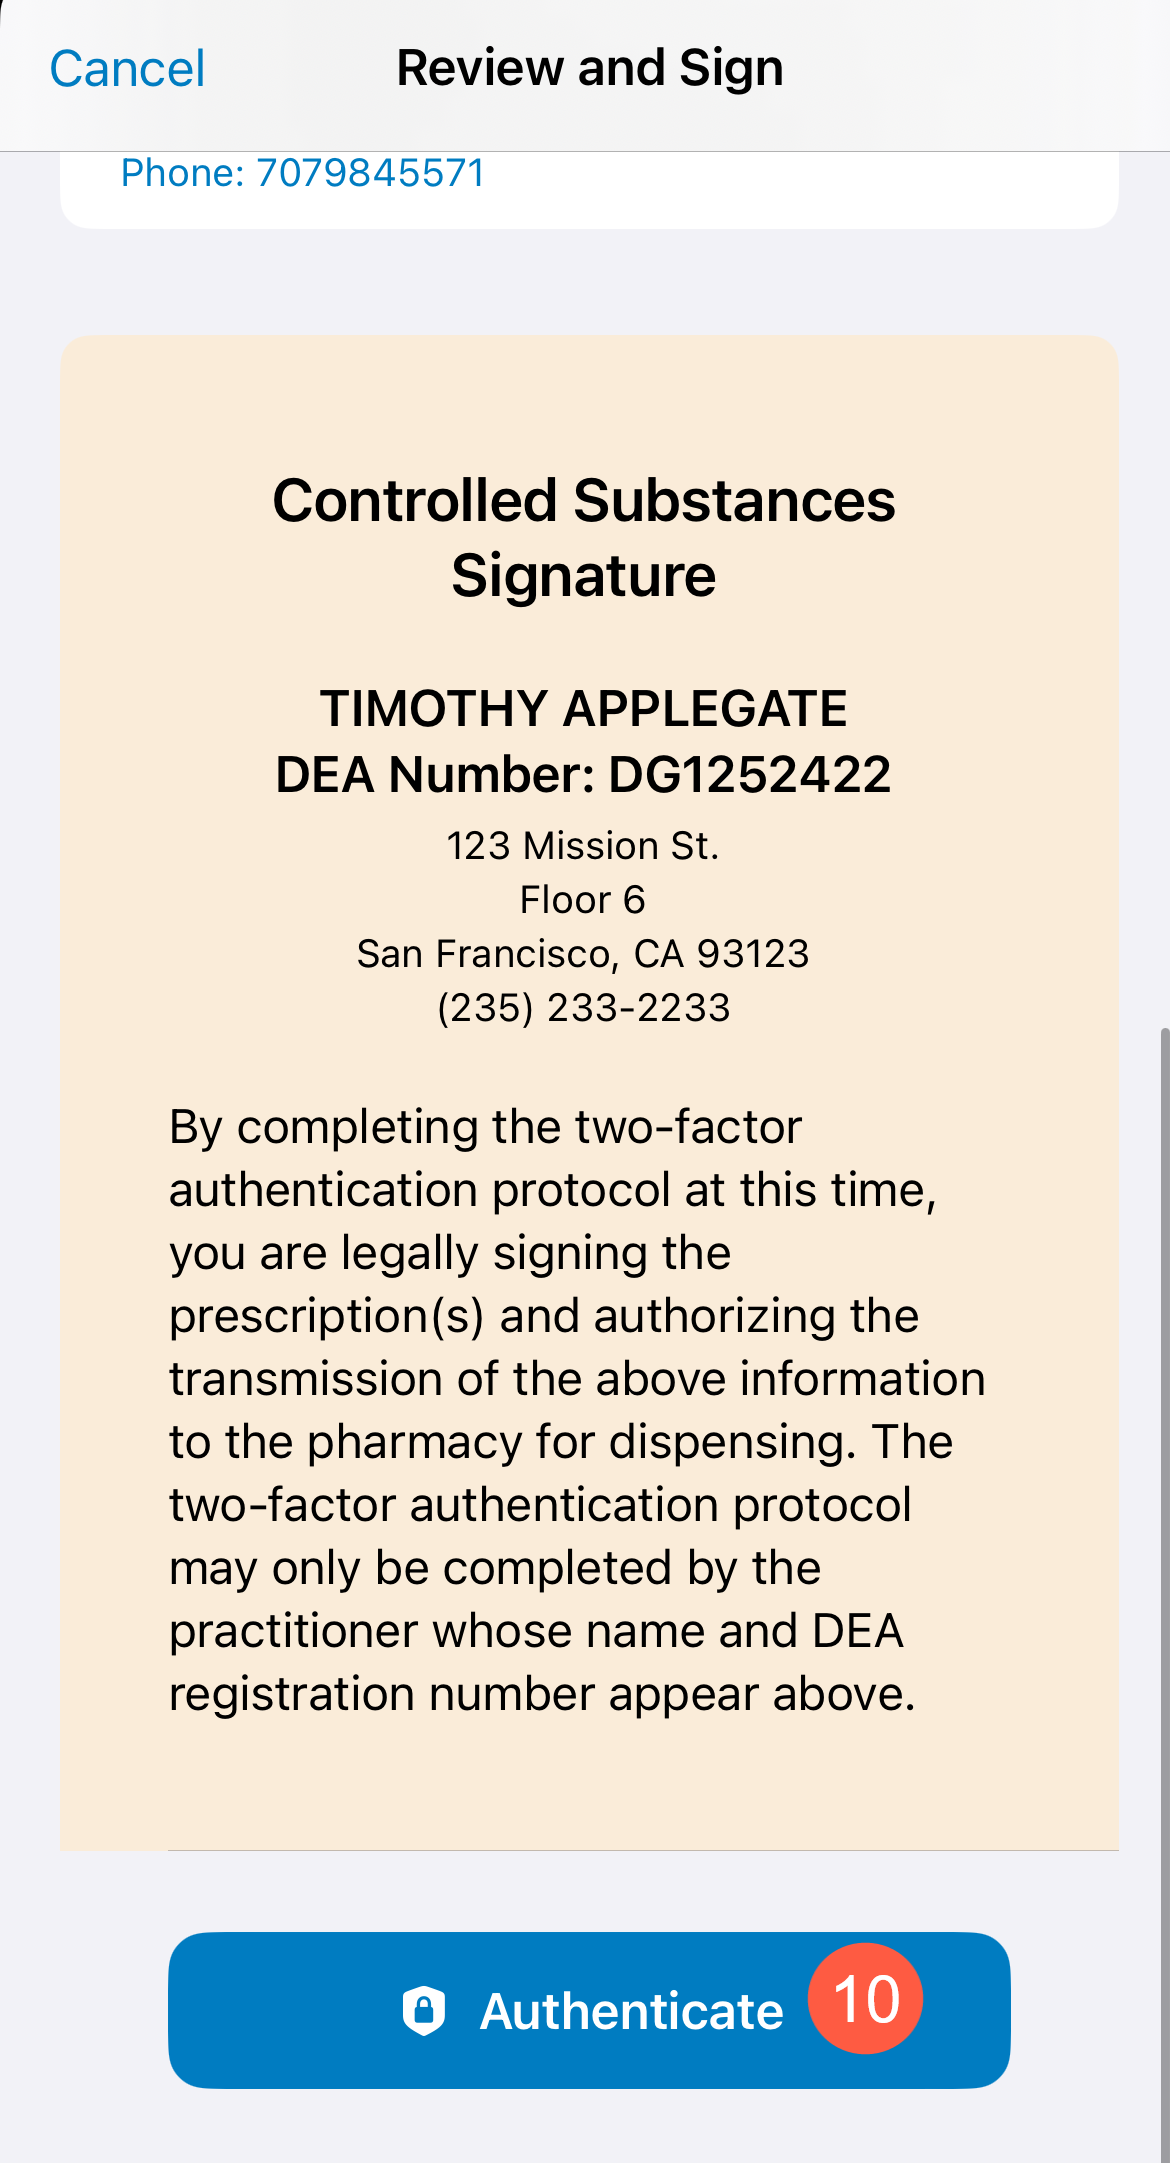
For controlled substances, you must complete two-factor authentication (2FA) to complete the order.1
-
Scroll to the bottom of the 2FA screen and tap Authenticate (callout 10).
-
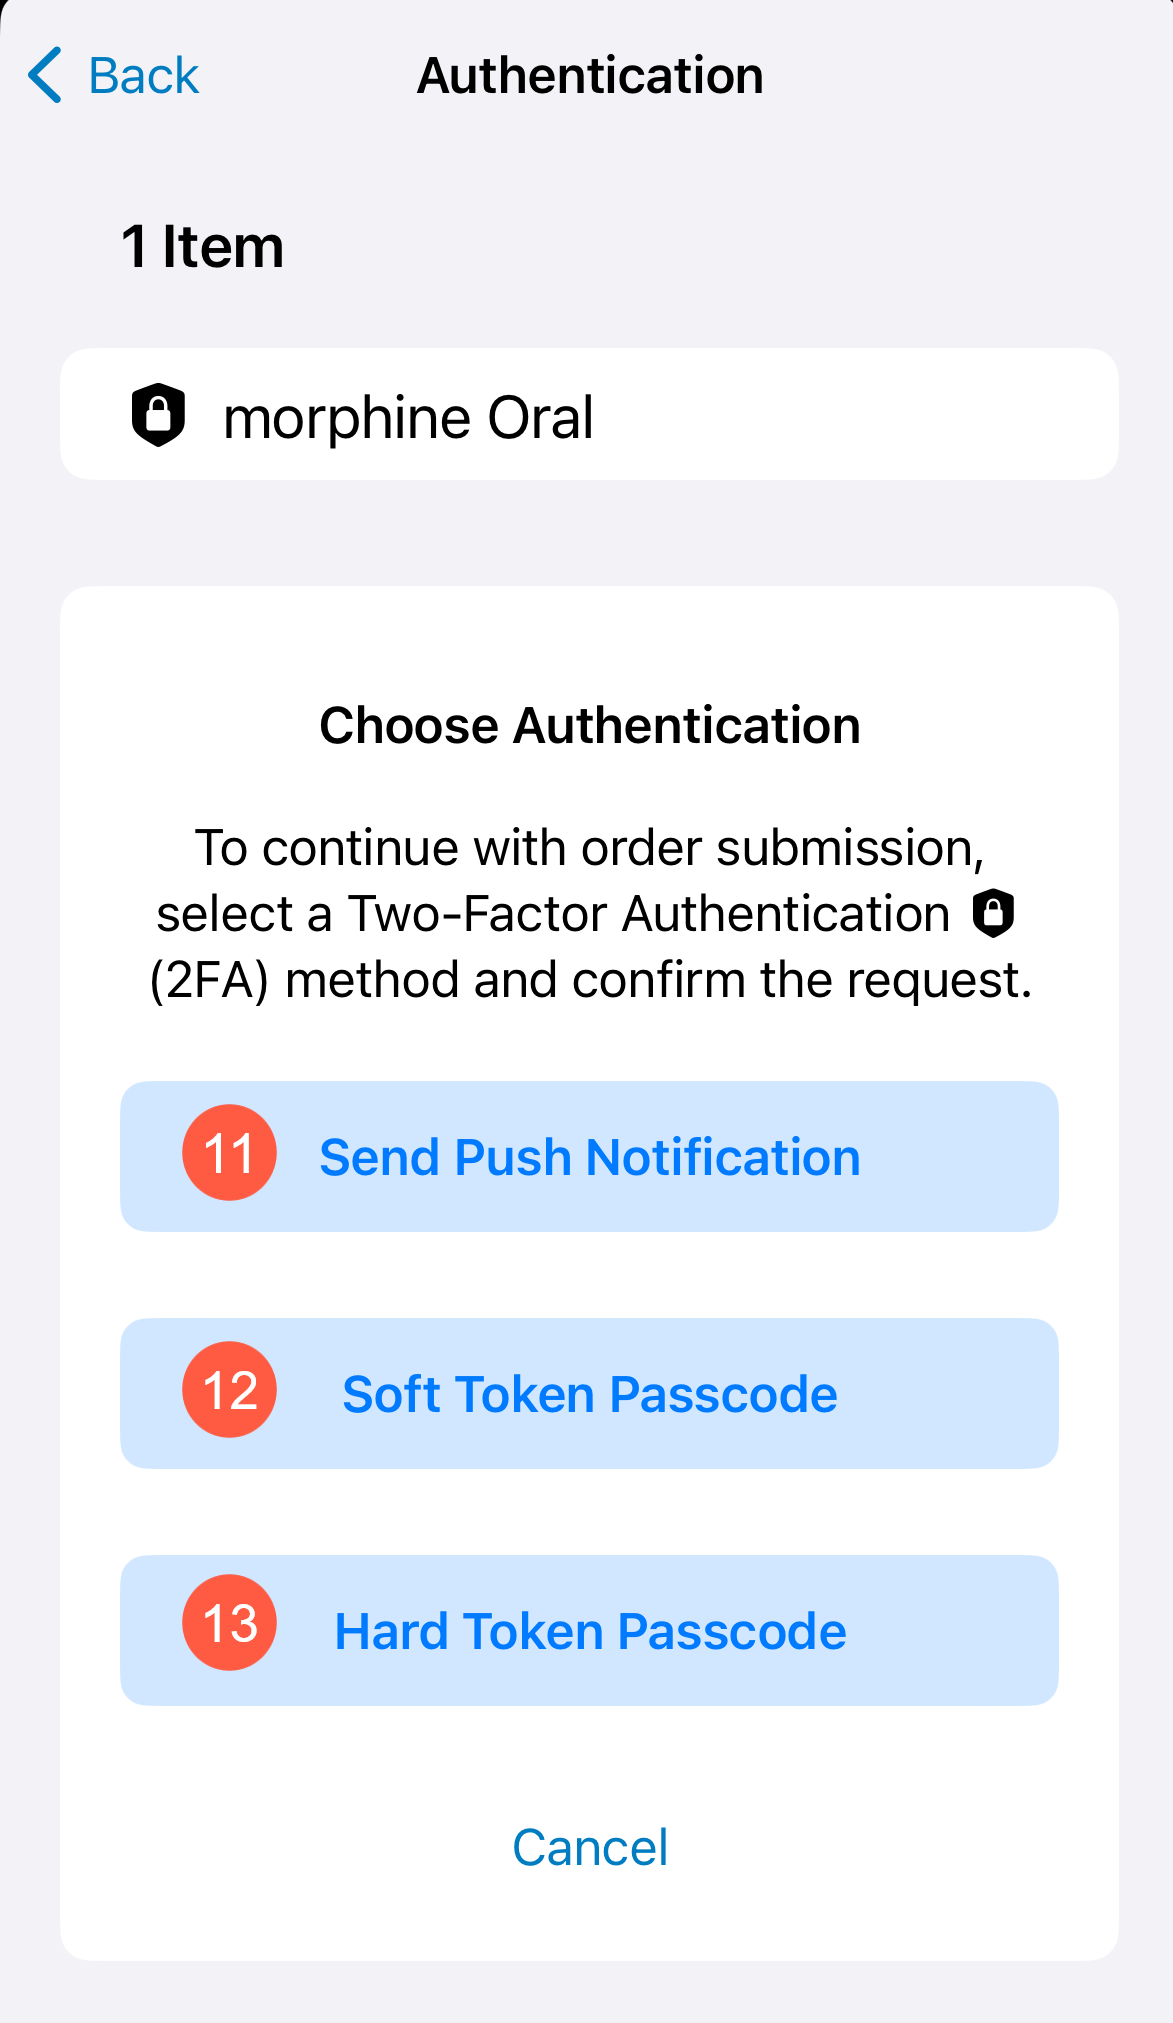
On the Authentication page, tap on your preferred 2FA method from push notification, soft token passcode, or hard token passcode (callouts 11-13).
-
You will then land on an intermediary page until you complete your 2FA.
-
If successful, you will receive a message that your order is complete.