Introducing AI Scribe
We’re introducing AI Scribe to integrate clinical note transcription from your preferred AI vendor directly into iKnowMed. This feature allows you to seamlessly access and incorporate transcriptions from your vendor into your patient charts, simplifying the documentation process and improving workflow efficiency.
|
|
This functionality requires an Ontada Marketplace Vendor Agreement. Please reach out to your Ontada Technology Account Manager for additional information. |
NOTE: All the updates outlined below only apply to the AI Scribe workflow. No changes have been made to the traditional clinical notes workflow.
Key features
-
AI Integration in Clinical Notes: AI Scribe provides a direct connection between your AI transcription vendor and iKnowMed, allowing you to quickly pull the content generated by AI into your patient's clinical notes.
-
Enhanced Documentation Workflow: Easily add or replace sections in your notes using AI-generated content, saving time and ensuring consistency.
-
Customizable Macros: Include AI macros in your clinical note templates to suit your practice's documentation needs, with options to insert AI-generated content such as Assessment, Chief Complaint, Family History, and more.
Enabling AI Scribe access
Practice-Level Access
By default, this feature is disabled. Please contact your Account Manager to enable AI Scribe for your practice.
User-Level Access
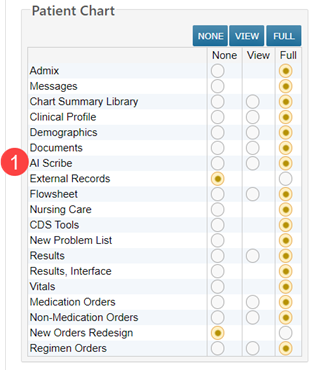
Once practice-level access is enabled, assign individual user permissions to AI Scribe via User > Permission. Under the Patient Chart section, locate the AI Scribe preference (callout 1).
Set the preference based on the following:
-
None: The user cannot access the AI Scribe tab.
-
View: The user can view but not add or edit AI Scribe content.
-
Full: The user can view and add or edit AI Scribe content in patient charts.
Additional Access
To use AI Scribe, the Use Advanced Order Editor for Clinical Notes setting must be enabled. Without this setting, permissioned users will not be able to edit AI-generated macros.
To enable this setting for all permissioned users at your practice:
-
Navigate to Admin > Practice Preferences.
-
Scroll to the Clinical Notes Settings section.
-
Check the box next to Use Advanced Order Editor for Clinical Notes (callout 1).

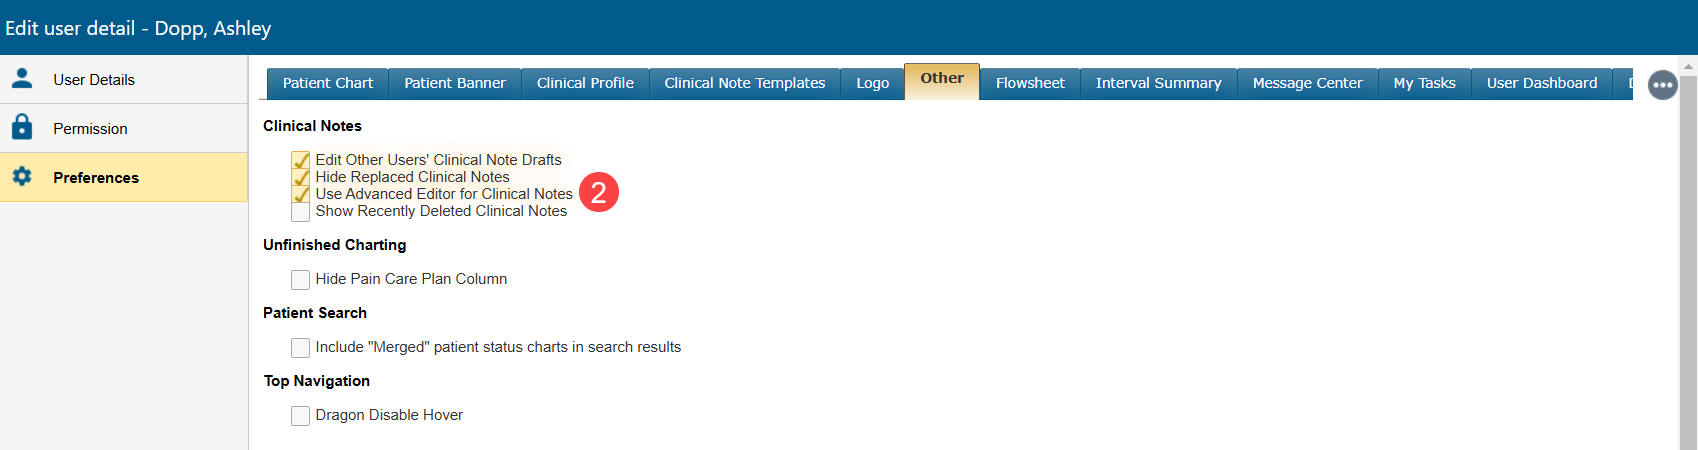
If you prefer to enable this setting for specific users instead of all permissioned users:
-
Open the user’s Preferences.
-
Click on the Other tab.
-
Check the box next to Use Advanced Order Editor for Clinical Notes (callout 2).
To update this setting for a group of users, follow the Help Site instructions on how to apply a specific user profile to multiple accounts.
Updating clinical note templates
Your practice must update all clinical note templates for users with access to AI Scribe. These macros are how the content from your AI vendor can be added to patients’ clinical notes.
To update your clinical note templates:
-
Navigate to Manage > Clinical Note Templates.
-
Open the desired Clinical Note Template and explore the new AI macros.
-
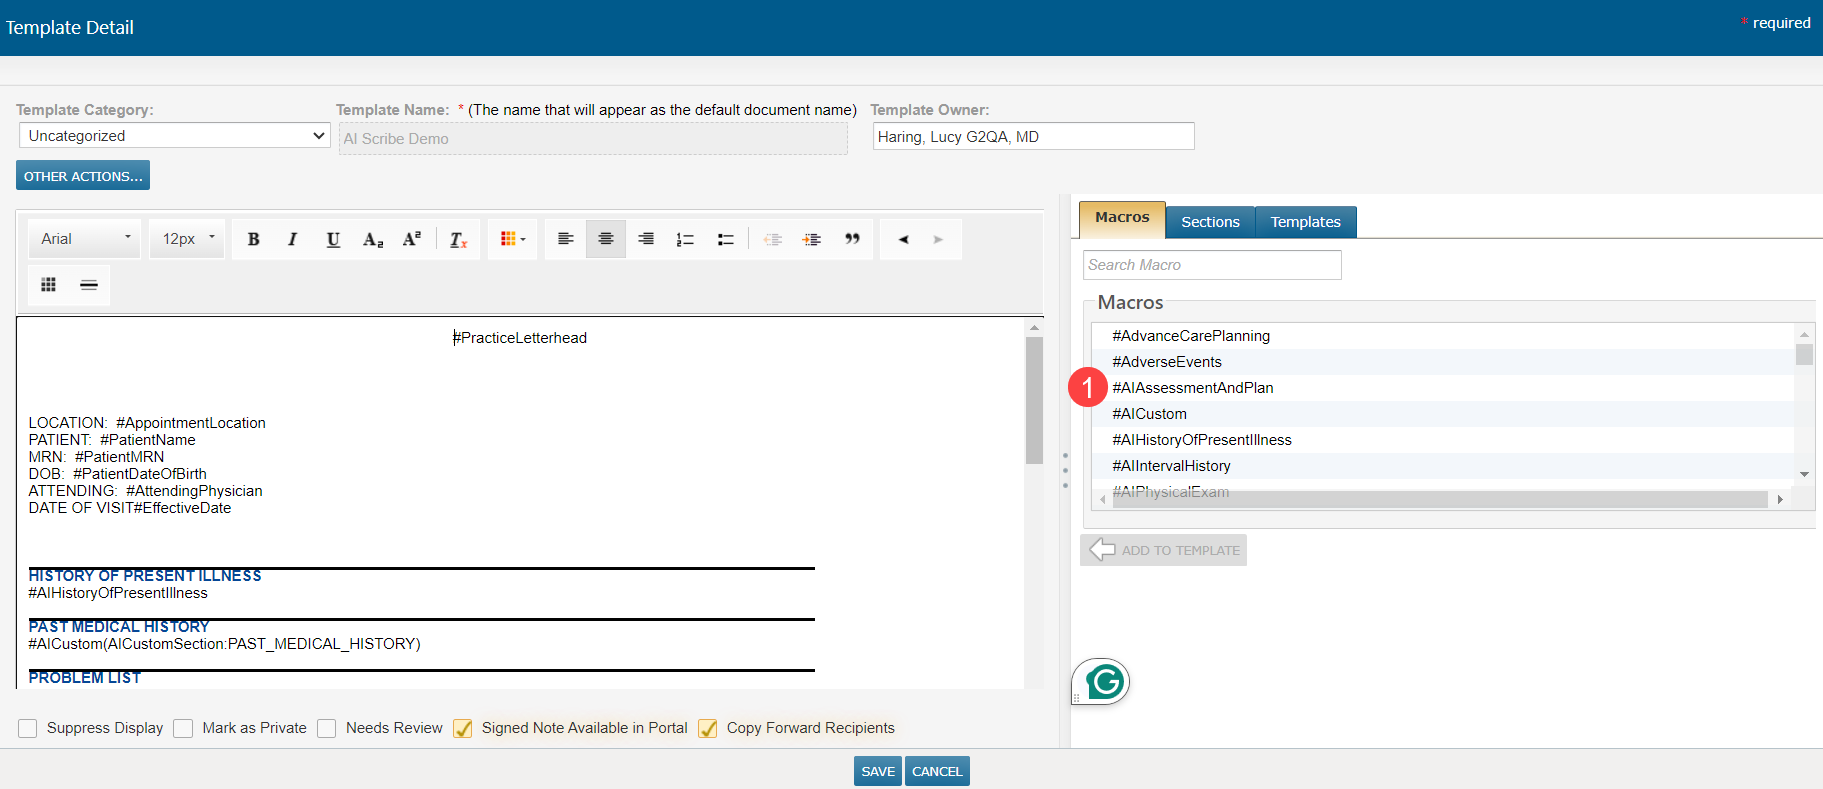
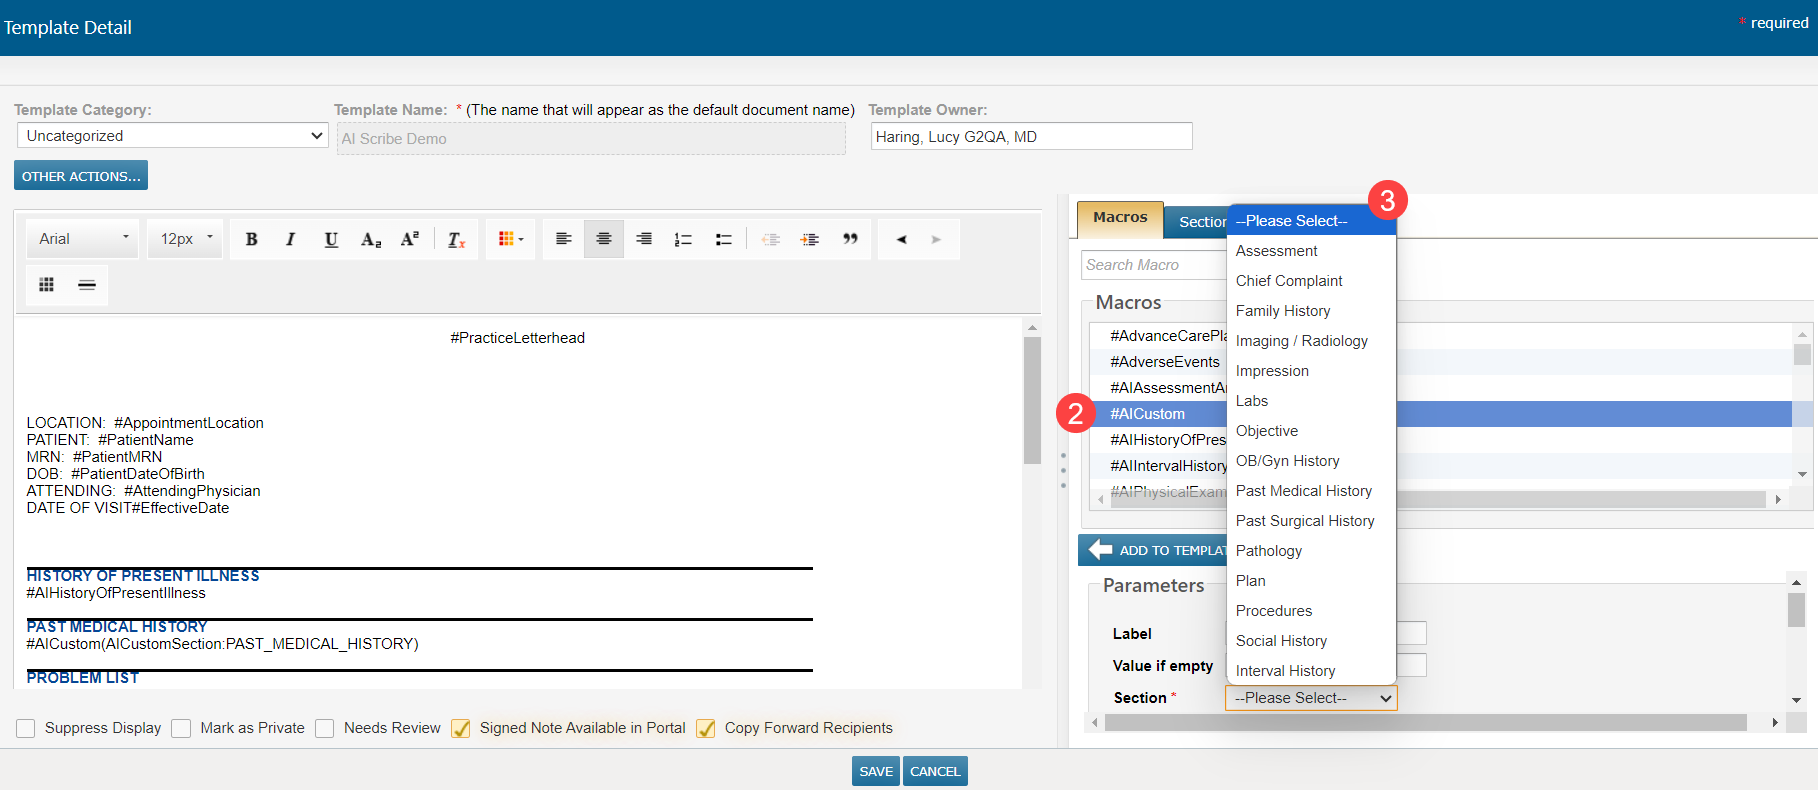
Use the following AI Marcos found on the main page (see callout 1 for example):
-
#AIHistoryofPresentIllness
-
#AIReviewOfSystems
-
#AIPhysicalExam
-
#AIAssessmentAndPlan
-
#AICustom
-
-
Use the #AICustom macro (callout 2) to add the following AI-generated content to your note template to reflect the specific data your practice's AI vendor provides (callout 3):
-
Assessment
-
Chief Complaint
-
Family History
-
Imaging / Radiology
-
Impression
-
Lab
-
Objective
-
OB/GYN History
-
Past Medical History
-
Past Surgical History
-
Pathology
-
Plan
-
Procedures
-
Social History
-
Using AI Scribe in patient charts
-
Open a patient's chart and create or edit a note.
-
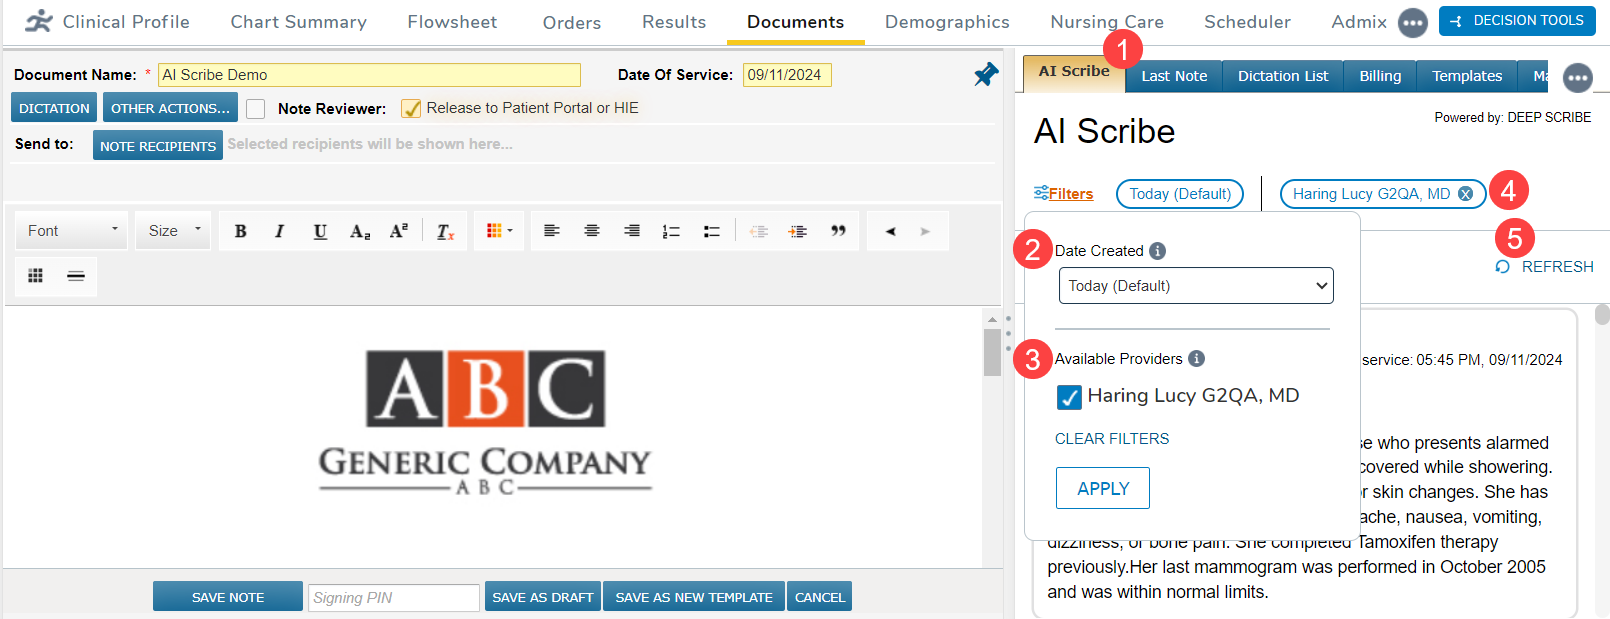
Access the AI Scribe tab on the right side of the screen (callout 1). This tab shows the content generated from your practice’s AI vendor.
-
Use the Date Created filter to view notes from today or dates of service as far back as 14 days (callout 2).
-
Use the Available Providers filter to view your AI-generated content or the content of other providers at your practice (callout 3).
-
The tab will show which filters are currently applied to the AI Scribe content (callout 4).
-
Use the Refresh option to see the latest content for each AI Macro sent from your AI vendor to iKnowMed (callout 5).
-
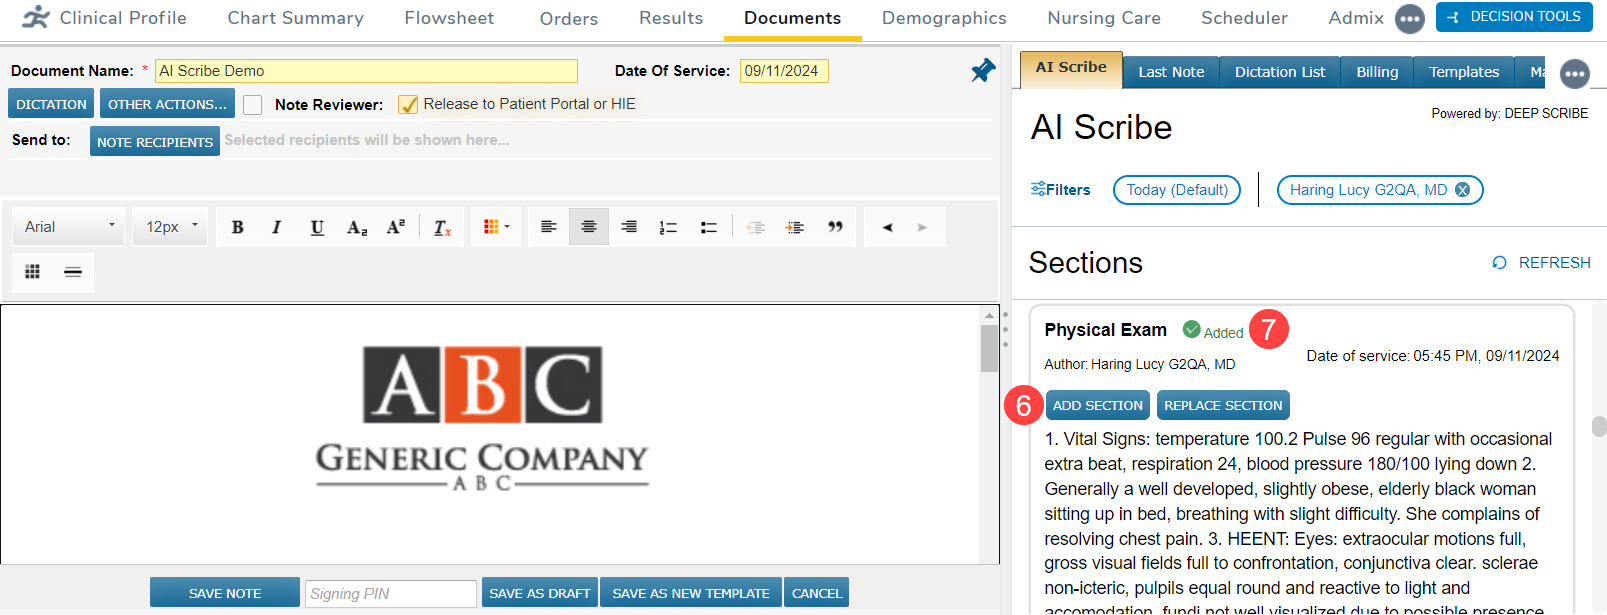
Add or replace sections in your note with AI-generated content using the buttons in each section (callout 6).
-
A green check mark indicates a successful addition to the clinical note the first time the section is added (callout 7).
-
Content in the note can still be manually added or edited by clicking in the note window and typing as needed.
-
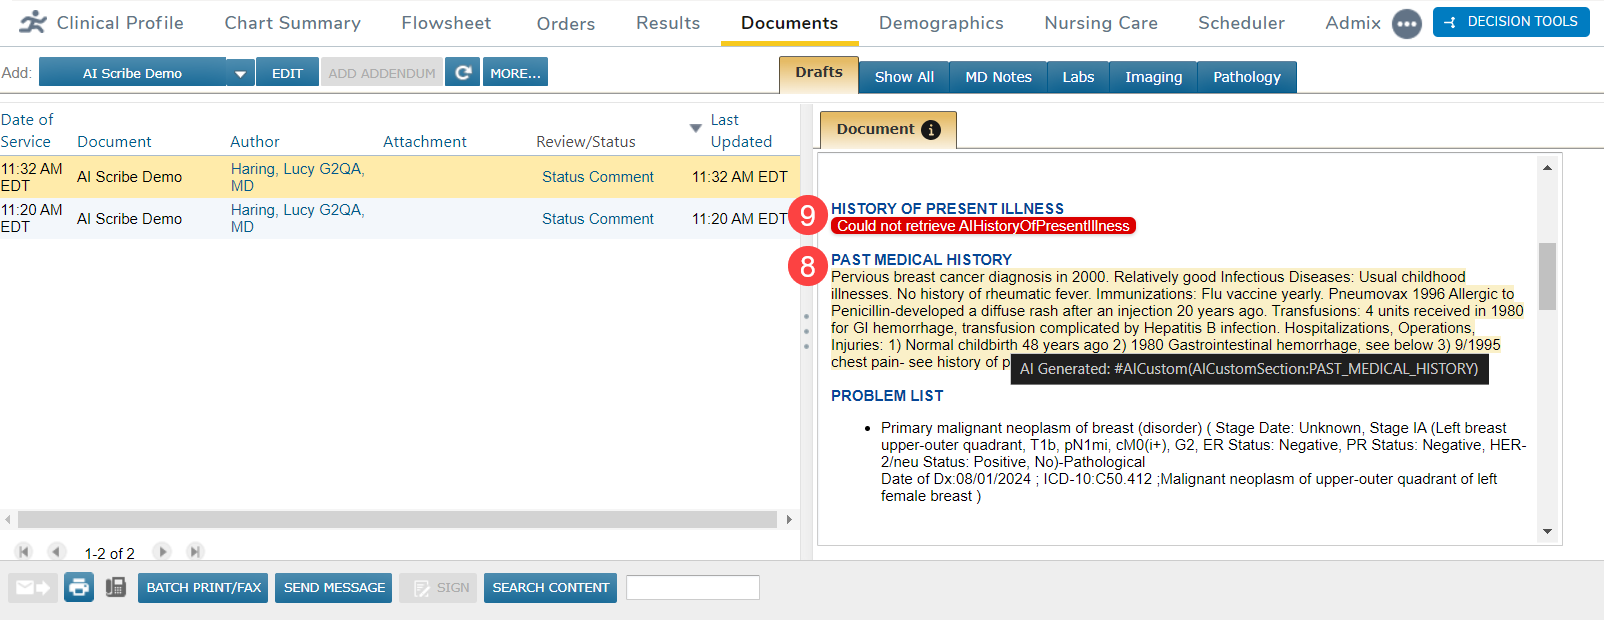
Once the note is saved, hovering over content supplied by an AI Macro will display a yellow highlight (callout 8).
-
The traditional macros will continue to show a light gray.
-
-
If content cannot be retrieved from your vendor, an error message will be displayed in that section (callout 9).