December 2023 Ontada Health Release Notes
Patient Portal 2.2.1 | December 8
Expanded access to and control of patient information during the transition to Ontada Health
Several enhancements were made to help ease the transition between My Care Plus and Ontada Health patient portals for patients and practices and to create a more seamless and user-friendly experience within the Ontada Health platform.
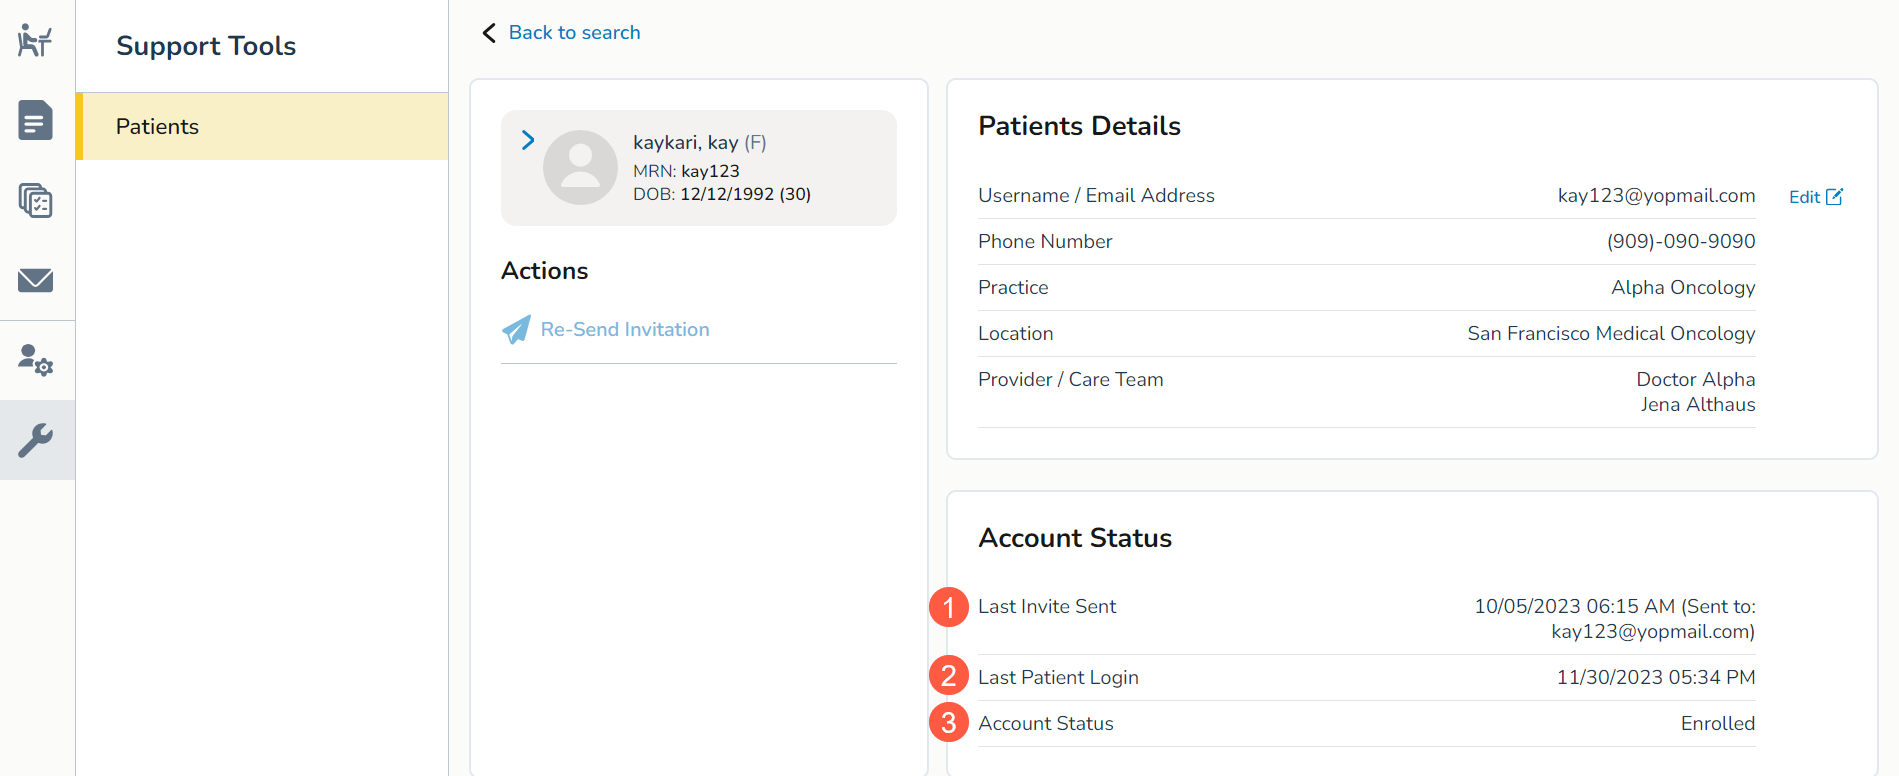
New Account Status section to monitor patient account progress
The Support Tools queue now includes a new Account Status section, providing comprehensive insights into a patient's journey as they create their Ontada Health patient portal account. Key information captured include:
Last Invite Sent
Displays the date, time, and email address associated with the most recent portal invitation sent to a patient (callout 1). If no invitation has been sent, the system will indicate "N/A."
Last Patient Login
Presents the date and time of the patient's last login to Ontada Health (callout 2). If the patient has not logged in, the system will display "N/A."
Account Status
This section outlines the patient's enrollment status with the following options (callout 3):
-
N/A: The practice is not utilizing the Ontada Health portal.
-
Not Consented: The patient Portal flag is not set to Yes, and the patient has not created an Ontada Health account.
-
Invite Sent: The most recent invite was successfully delivered, but the patient has not created an account.
-
Invite Failed: The most recent invite failed to send or be delivered, with detailed reasons for the failure.
-
Invite Expired: The most recent invite has expired.
-
Account Created, Not Verified: The patient created an account but has not completed the verification process.
-
Enrolled: The patient has created an account and completed verification.
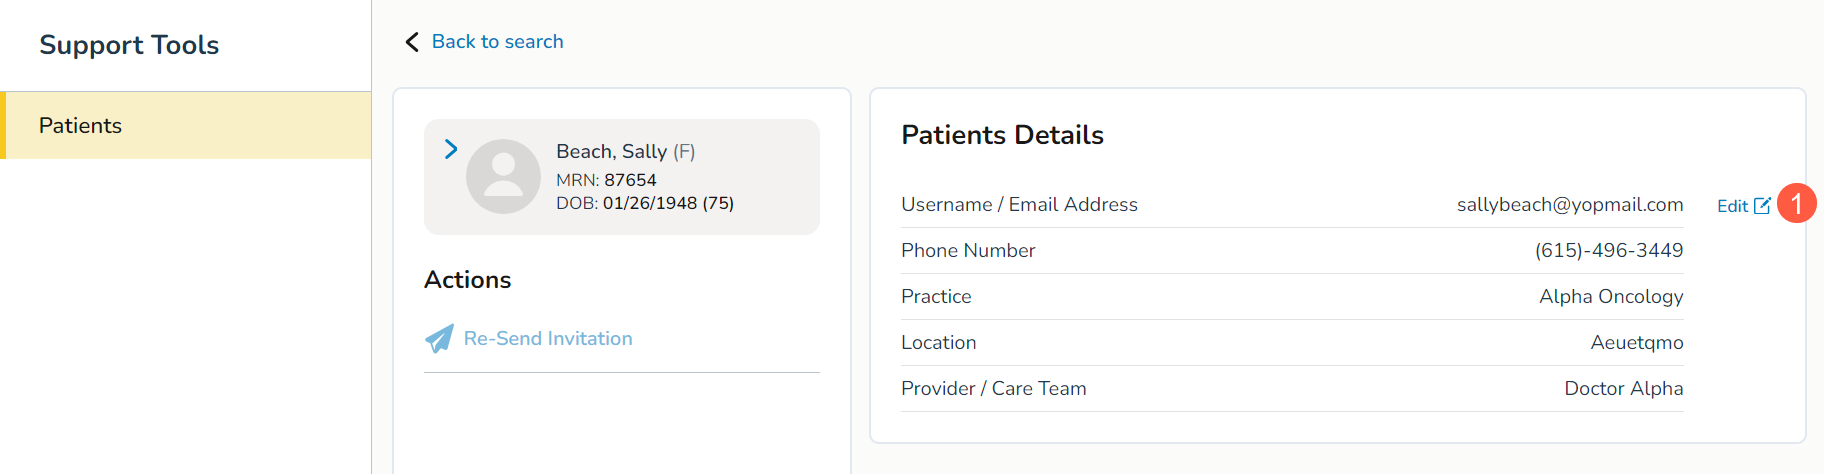
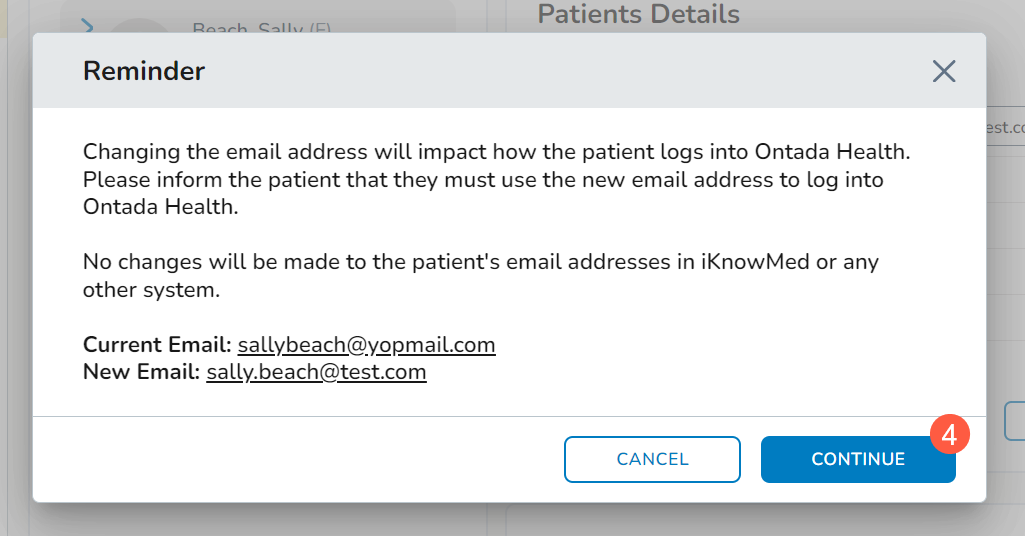
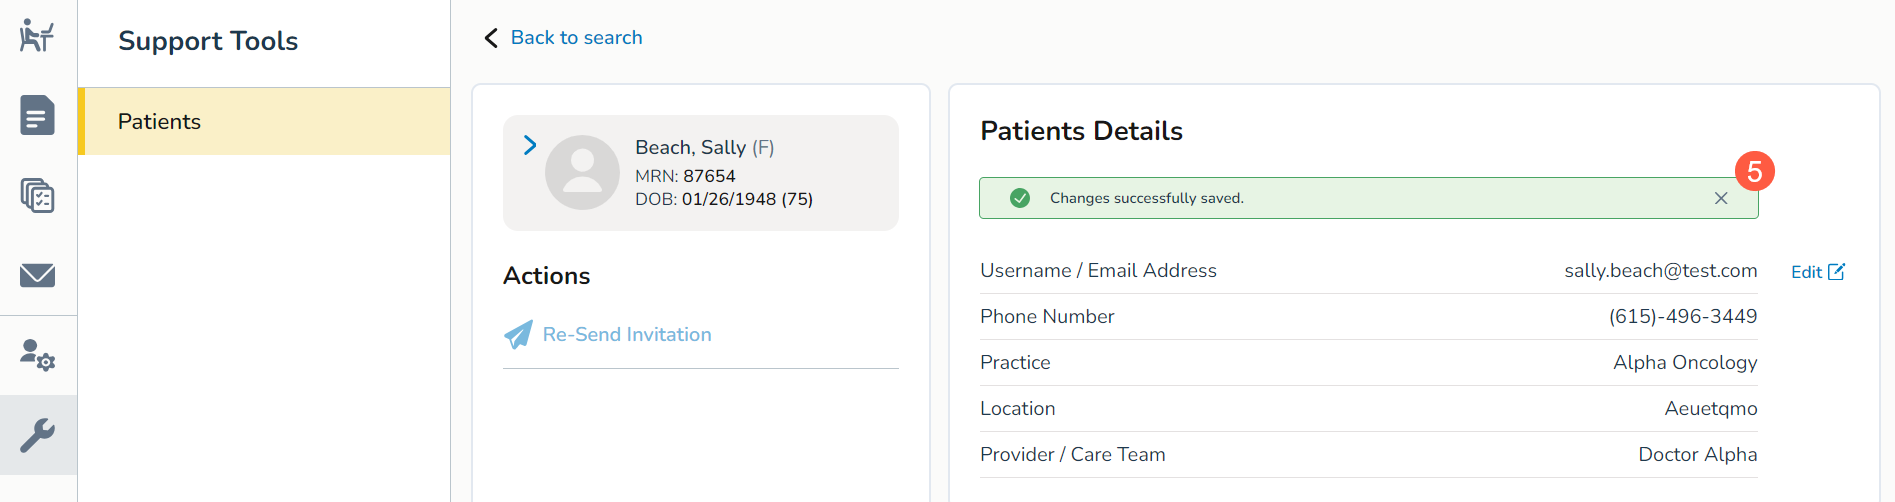
Ability to change patient’s email address
The Support Tools queue now empowers you to change a patient's email address, ensuring their account is linked to the most appropriate email.
To change a patient’s email address:
-
Open the Support Tools queue.
-
Locate the patient and access their account details.
-
In the Patient Details section, click the new Edit icon next to the Username / Email Address field (callout 1).
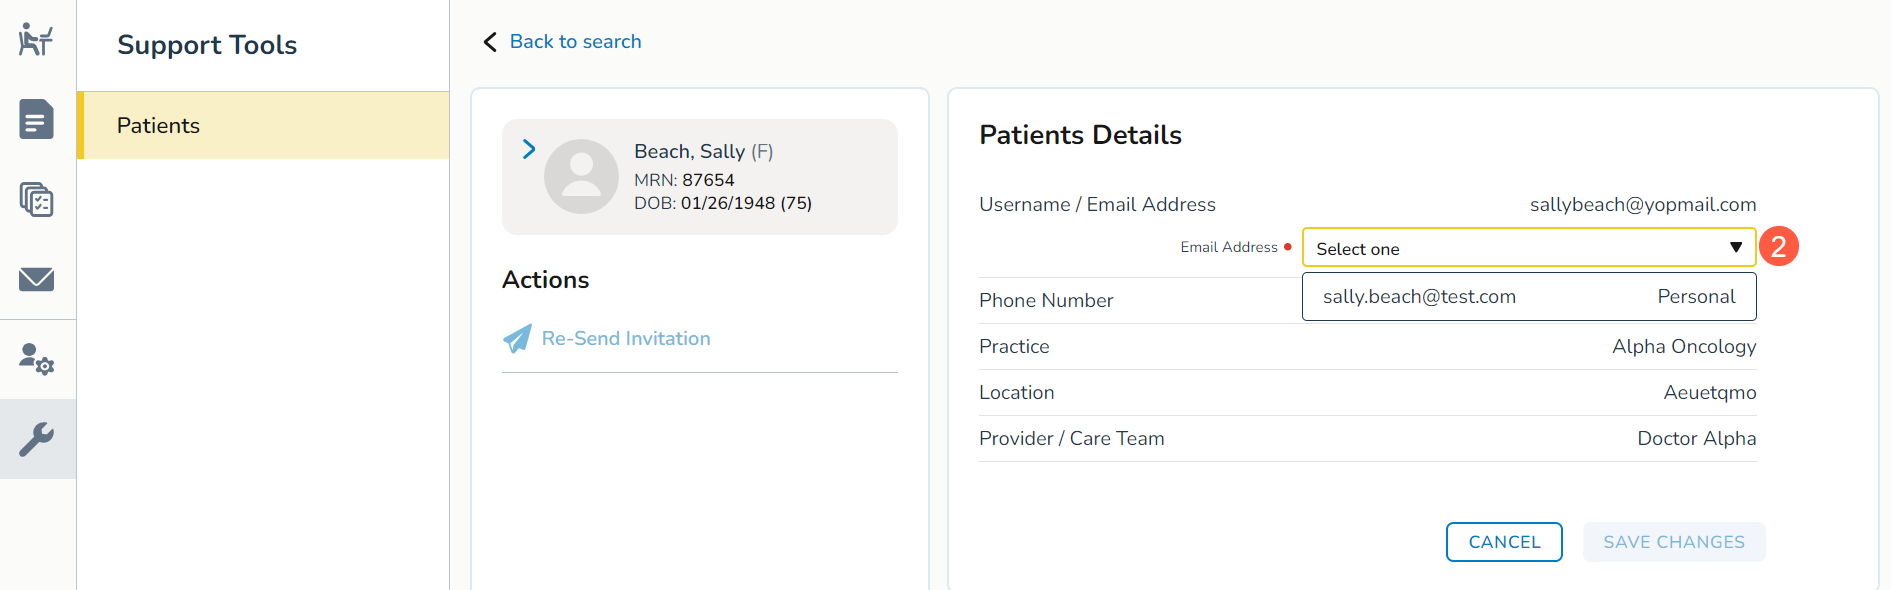
-
This will open a new Email Address drop-down to select an email associated with the patient's iKnowMed patient chart (callout 2).
NOTE: A notification will appear if an Ontada Health account already exists for the chosen email.
-
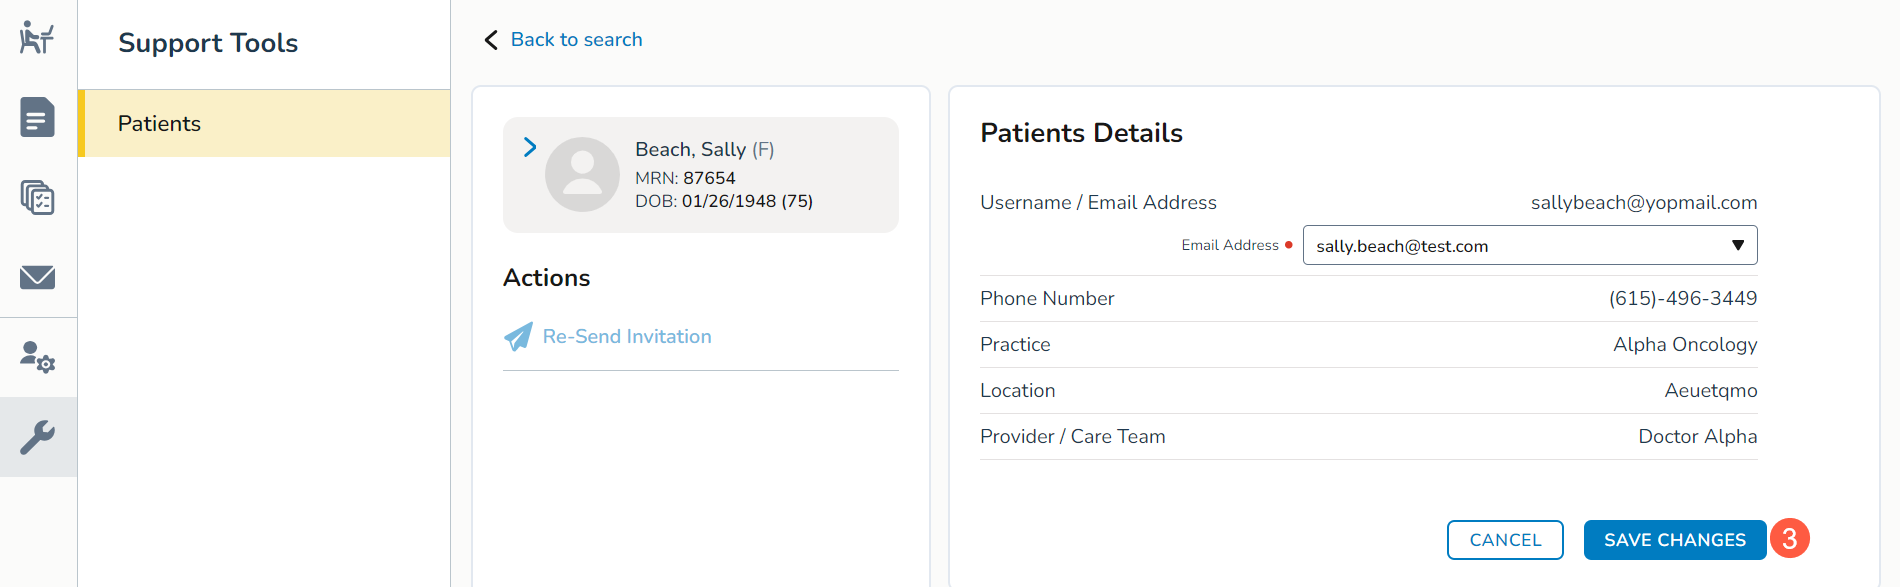
After choosing a different email address, click the Save button (callout 3)
-
A confirmation window will prompt you to click Continue to finalize the process (callout 4).
-
If the patient hasn't created an Ontada Health account, an invite will be immediately sent to the selected email.
-
If the patient has already created an Ontada Health account, they must log in using the newly selected email address going forward.
-
-
A success message confirms the completion of the process, while an error message appears if unsuccessful (callout 5).
-
