Documenting social history and NCCN Distress Thermometer
Updated April 2023
Documenting social and behavioral data is a crucial step to providing better patient care and helping identify opportunities for interventions beyond clinical treatment.
Starting Monday, May 1, 2023, iKnowMedSM Generation 2 users will have access to the new Patient Hx tab to document social history details. The Patient Hx tab will capture this information as structured data – ensuring data completeness, enhancing interoperability with your community partners, and fulfilling requirements for quality programs.

NOTE: Past Medical History, Family History, and Depression Screening pages are currently unavailable. They will be activated in a future release.
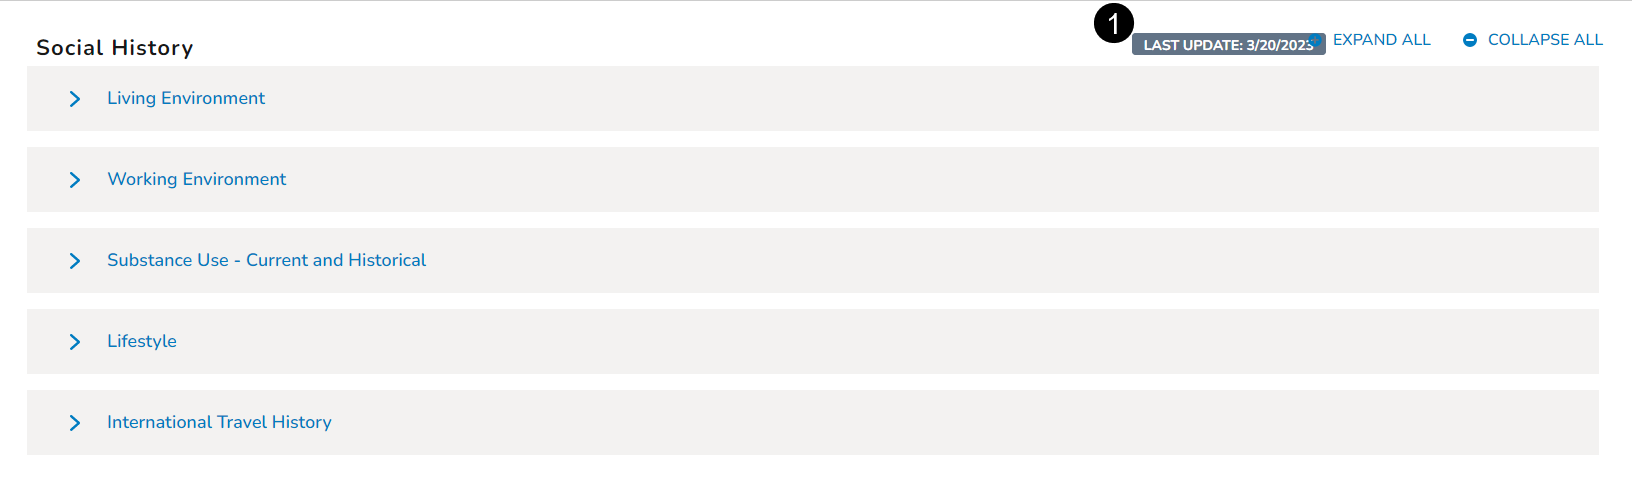
To record a patient's social history:
-
Open a patient chart and go to Clinical Profile > Patient Hx.
-
The Patient Hx tab will default to the Social History page.
-
You can expand or collapse all sections as needed (callout 1).
-
To enter information section by section, click a section to expand it (callout 2).

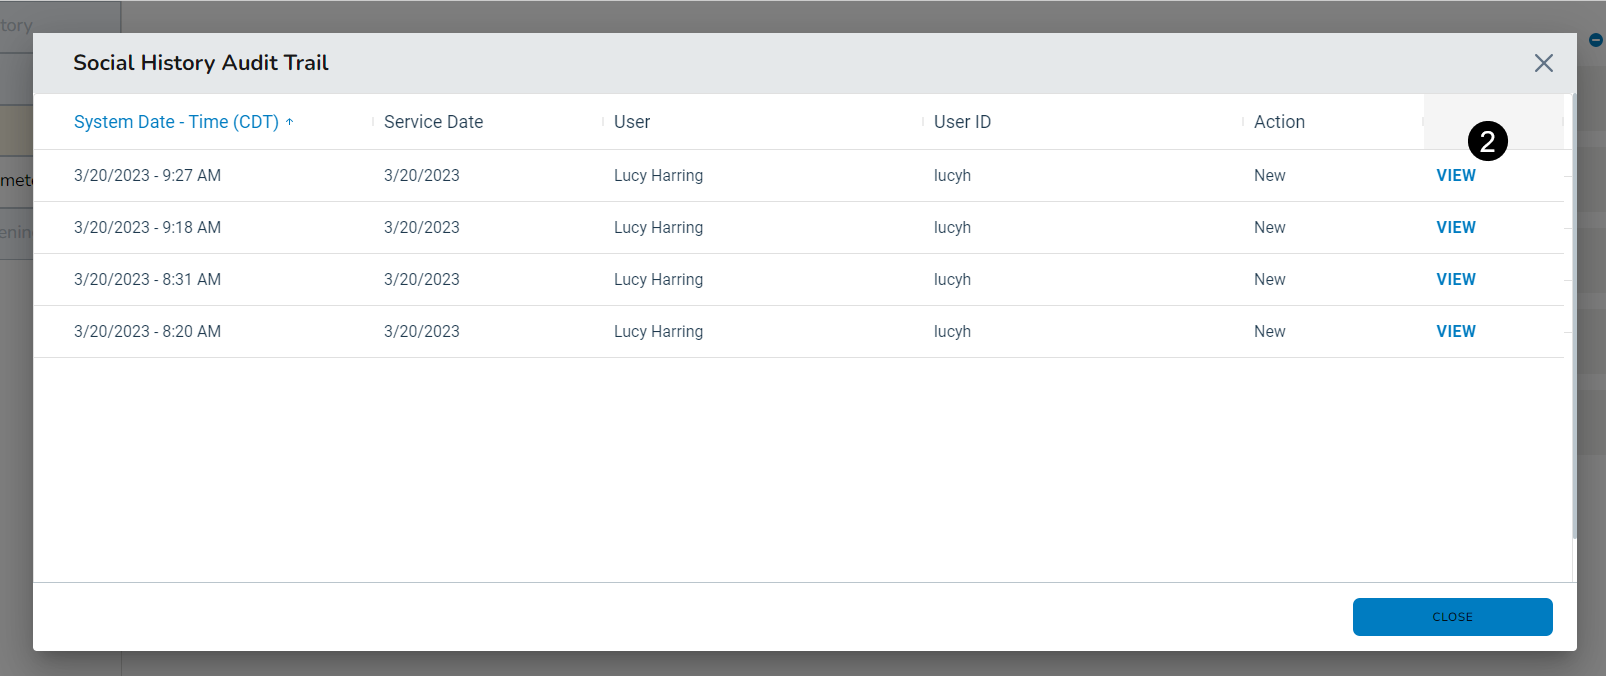
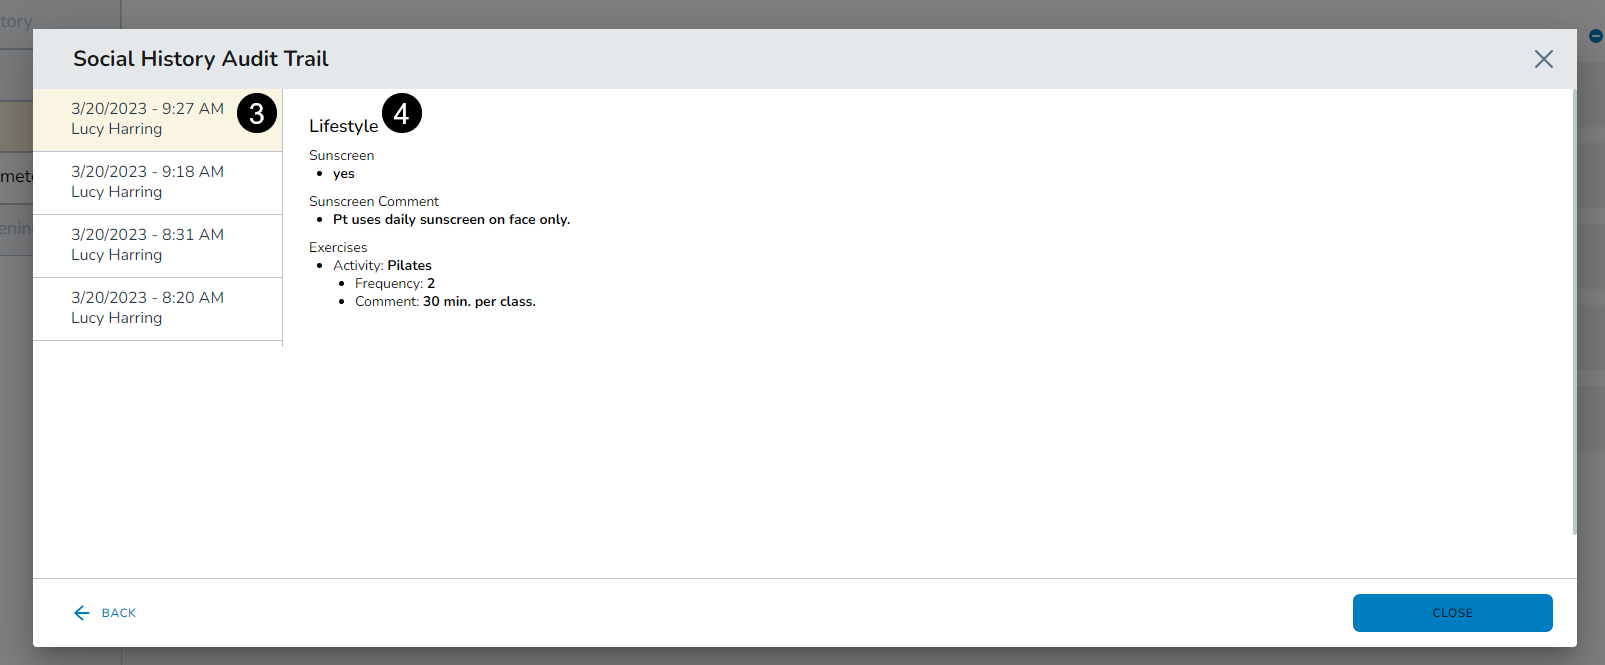
Audit History
The audit history will only appear at the top of the Social History page when information is entered and saved in the different sections. If the audit history does not display, then no social history information has been saved for this patient.
Click the audit history badge to see an overview of all changes made to the social history (callout 1).
Click the View option (callout 2) to see complete details regarding those changes, including what sections were updated, what information was added/updated, and by whom (callouts 3 and 4).
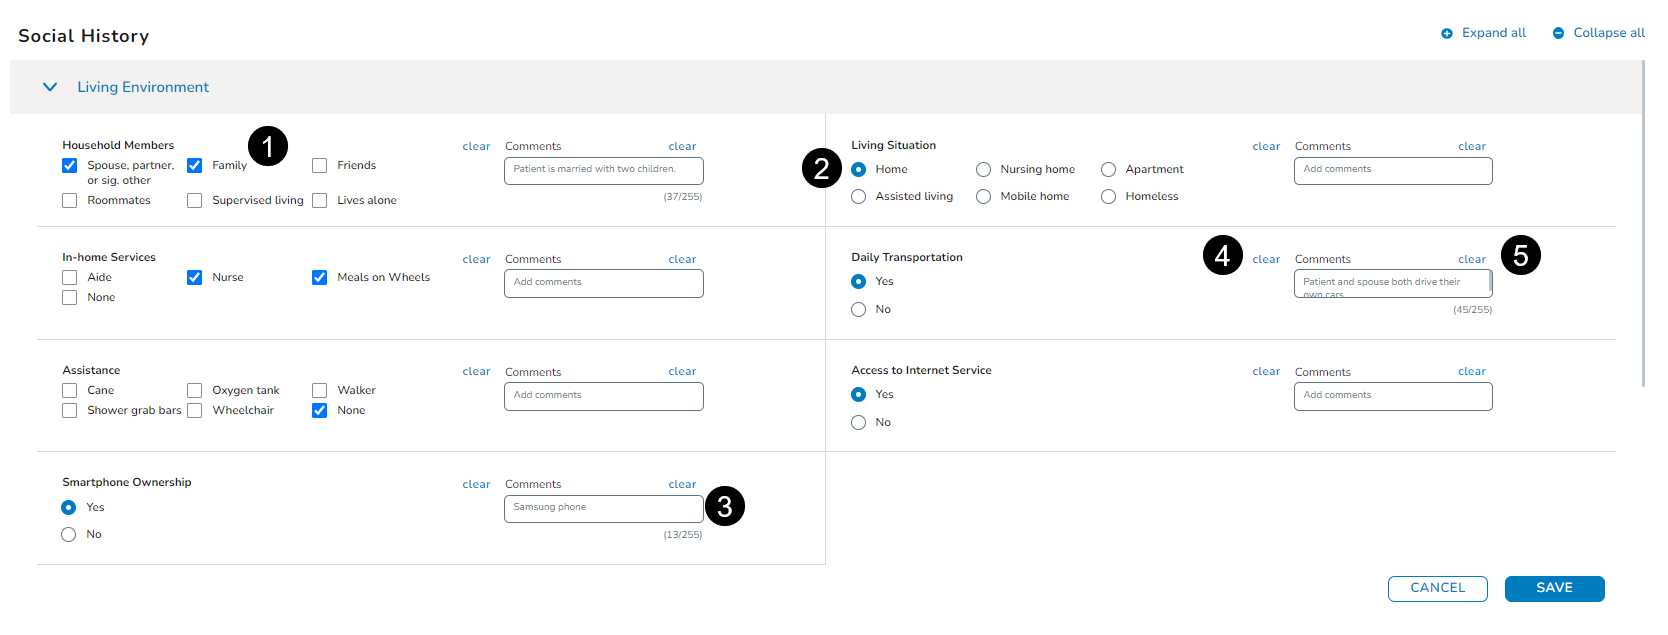
Living Environment
-
This area provides a space to record information regarding a patient’s living situation, such as whom they live with, what type of home they live in, and whether they have reliable transportation.
-
If a section consists of check boxes, you may choose more than one answer (callout 1). If it displays radio buttons, you may choose only one answer (callout 2).
-
You may also enter Comments in a text box, up to 255 characters (callout 3).
-
Clicking Clear will remove your recorded answers or comments (callouts 4 and 5).
-
After entering all relevant information, click the Save button at the bottom of the section.
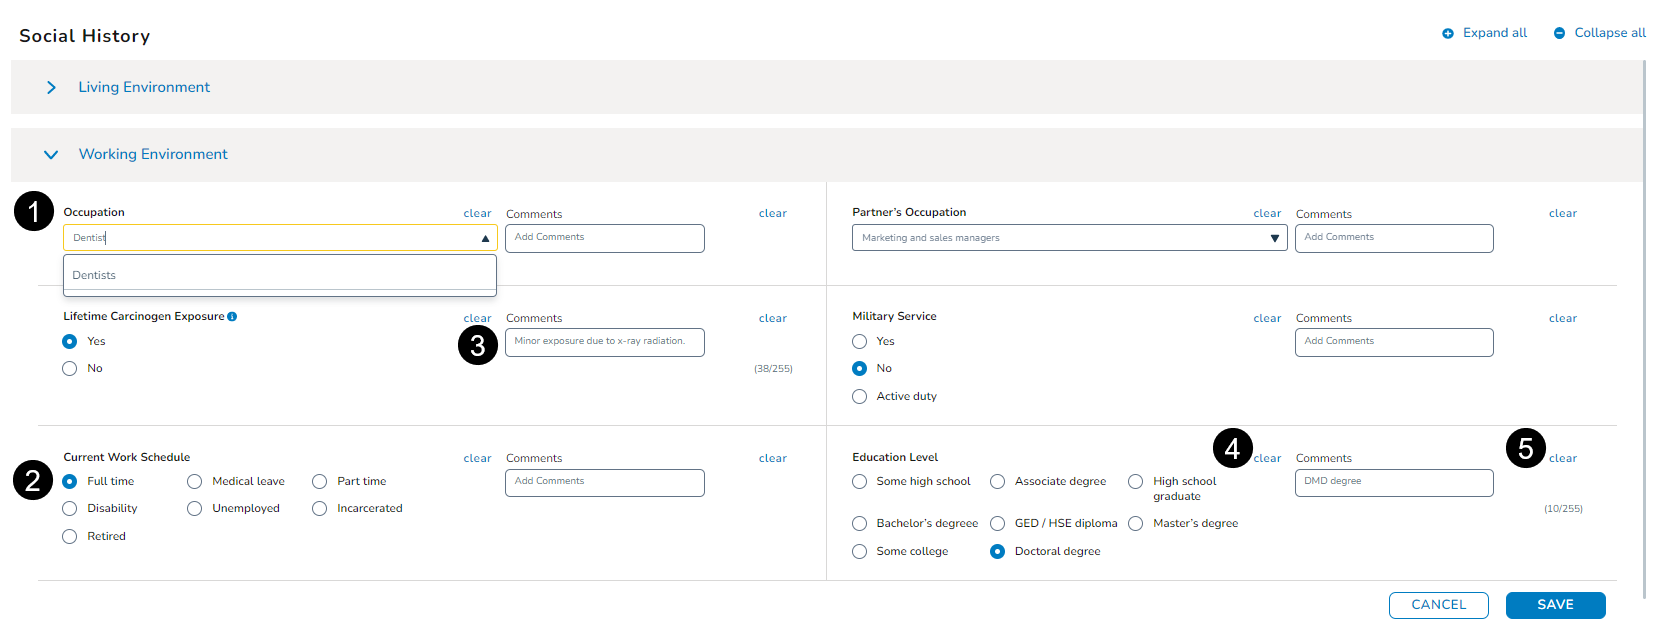
Working Environment
-
This area provides a space to record information regarding a patient’s professional life, including their occupation, work schedule, and level of education.
-
Use the drop-downs to locate the correct information or type in the field to search for it (callout 1).
-
If a section consists of radio buttons, choose only one answer (callout 2).
-
You may also enter Comments in a text box, up to 255 characters (callout 3).
-
Clicking Clear will remove your recorded answers or comments (callouts 4 and 5).
-
After entering all relevant information, click the Save button at the bottom of the section.
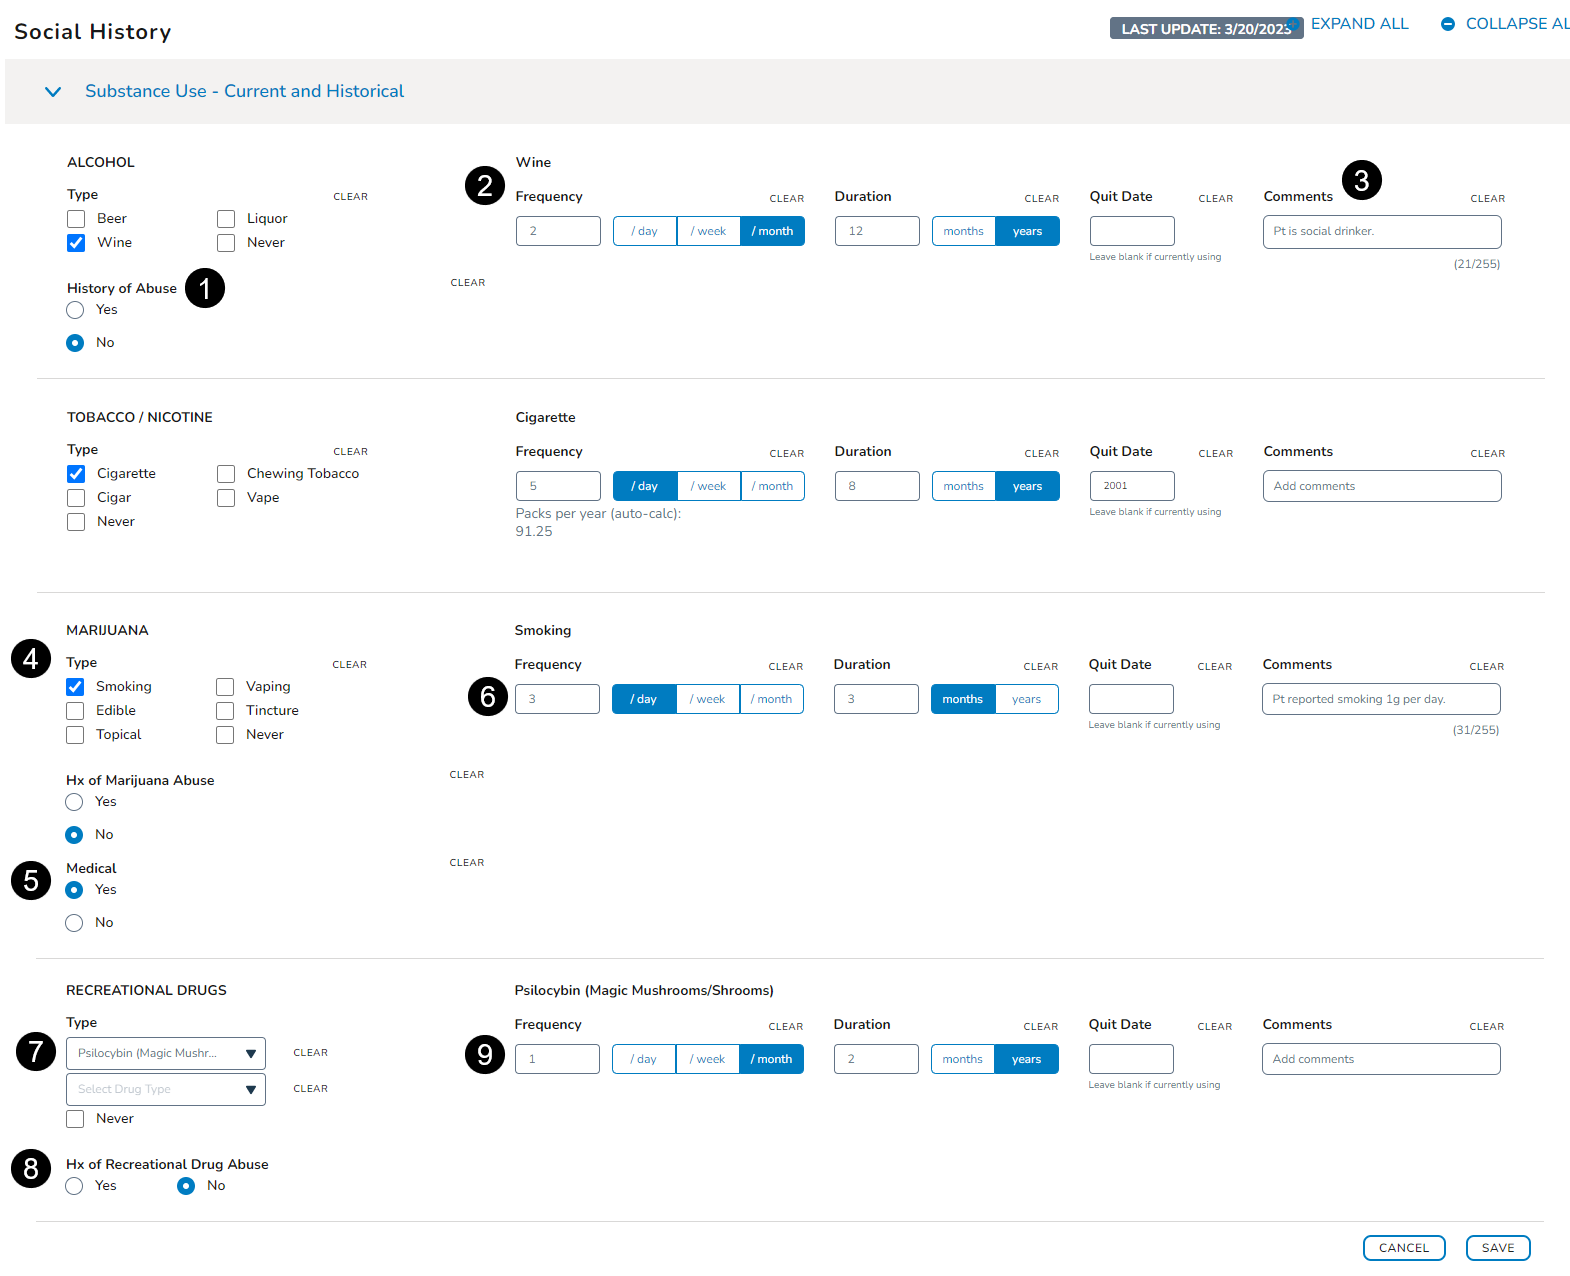
Substance Use - Current and Historical
-
This area provides a space to record information regarding a patient’s substance use whether they consume alcohol, tobacco, or other drugs.
-
If a section consists of checkboxes, you may choose more than one answer. If it displays radio buttons, you may choose only one answer.
-
When capturing this information, your choice may display additional options to complete. For example, selecting Wine under the Alcohol section prompts the system to also collect information regarding any history of abuse (callout 1), frequency of use (callout 2), and any Comments, up to 255 characters (callout 3).
-
For the Marijuana section, you can record in what form it’s consumed (callout 4), if it’s for medical purposes (callout 5), and how often (callout 6).
-
Lastly, you can also record if a patient uses recreational drugs and if so, what type.
-
Use the dropdown to locate the correct information or type in the field to search for it (callout 7).
-
Record any information regarding any history of abuse (callout 8), frequency of use (callout 9), and any Comments.
-
After entering all relevant information, click the Save button at the bottom of the section.
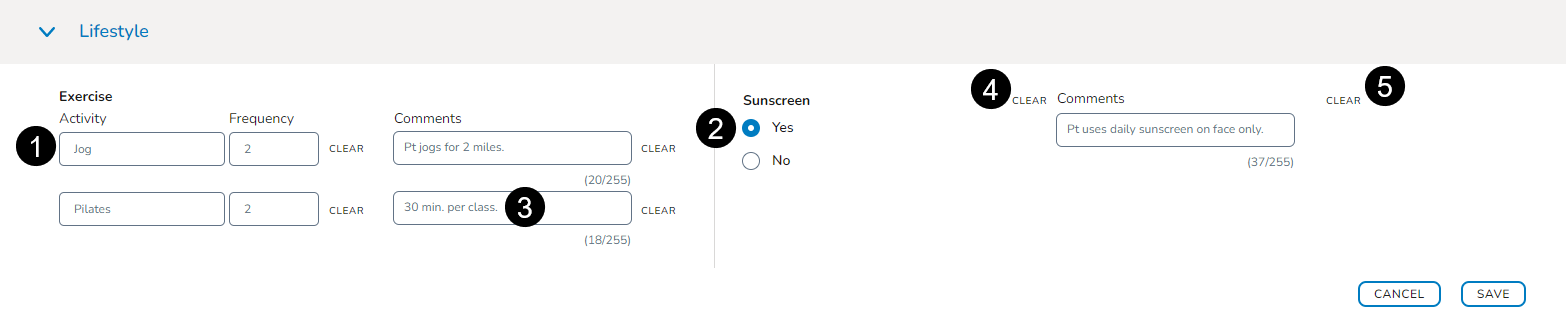
Lifestyle
-
This area provides a space to record information regarding a patient’s exercise and sunscreen habits.
-
Use the text boxes to type in the correct information (callout 1).
-
If a section consists of radio buttons, choose only one answer (callout 2).
-
You may also enter Comments in a text box, up to 255 characters (callout 3).
-
Clicking Clear will remove your recorded answers or comments (callouts 4 and 5).
-
After entering all relevant information, click the Save button at the bottom of the section.
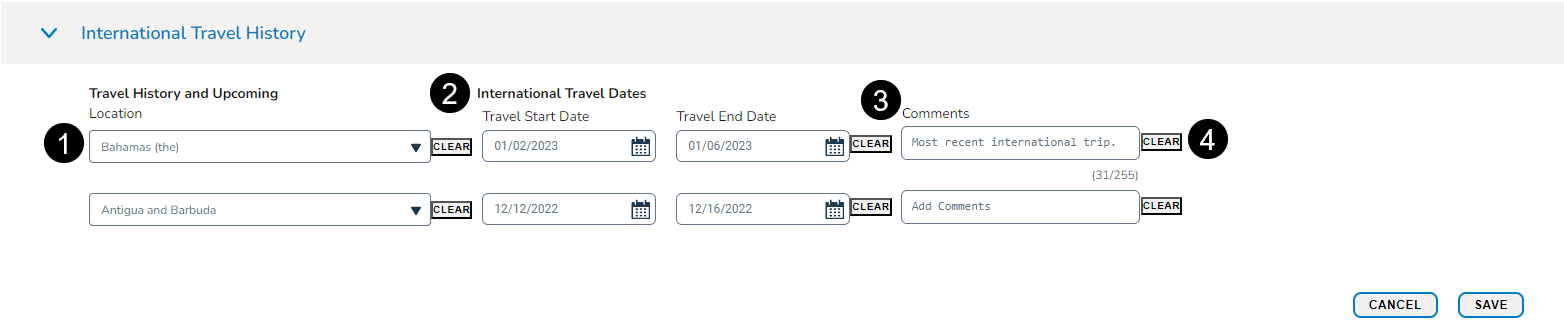
International Travel
-
This area provides a space to record information regarding a patient’s travel history and upcoming trips.
-
Use the dropdowns to choose an international location or type directly in the field to search for it (callout 1).
-
To capture dates, type them into the field using the MM/DD/YYYY format or click the calendar widget to select a date (callout 2).
-
You may also enter Comments in a text box, up to 255 characters (callout 3).
-
Clicking Clear will remove your recorded answers or comments (callout 4).
-
After entering all relevant information, click the Save button at the bottom of the section.
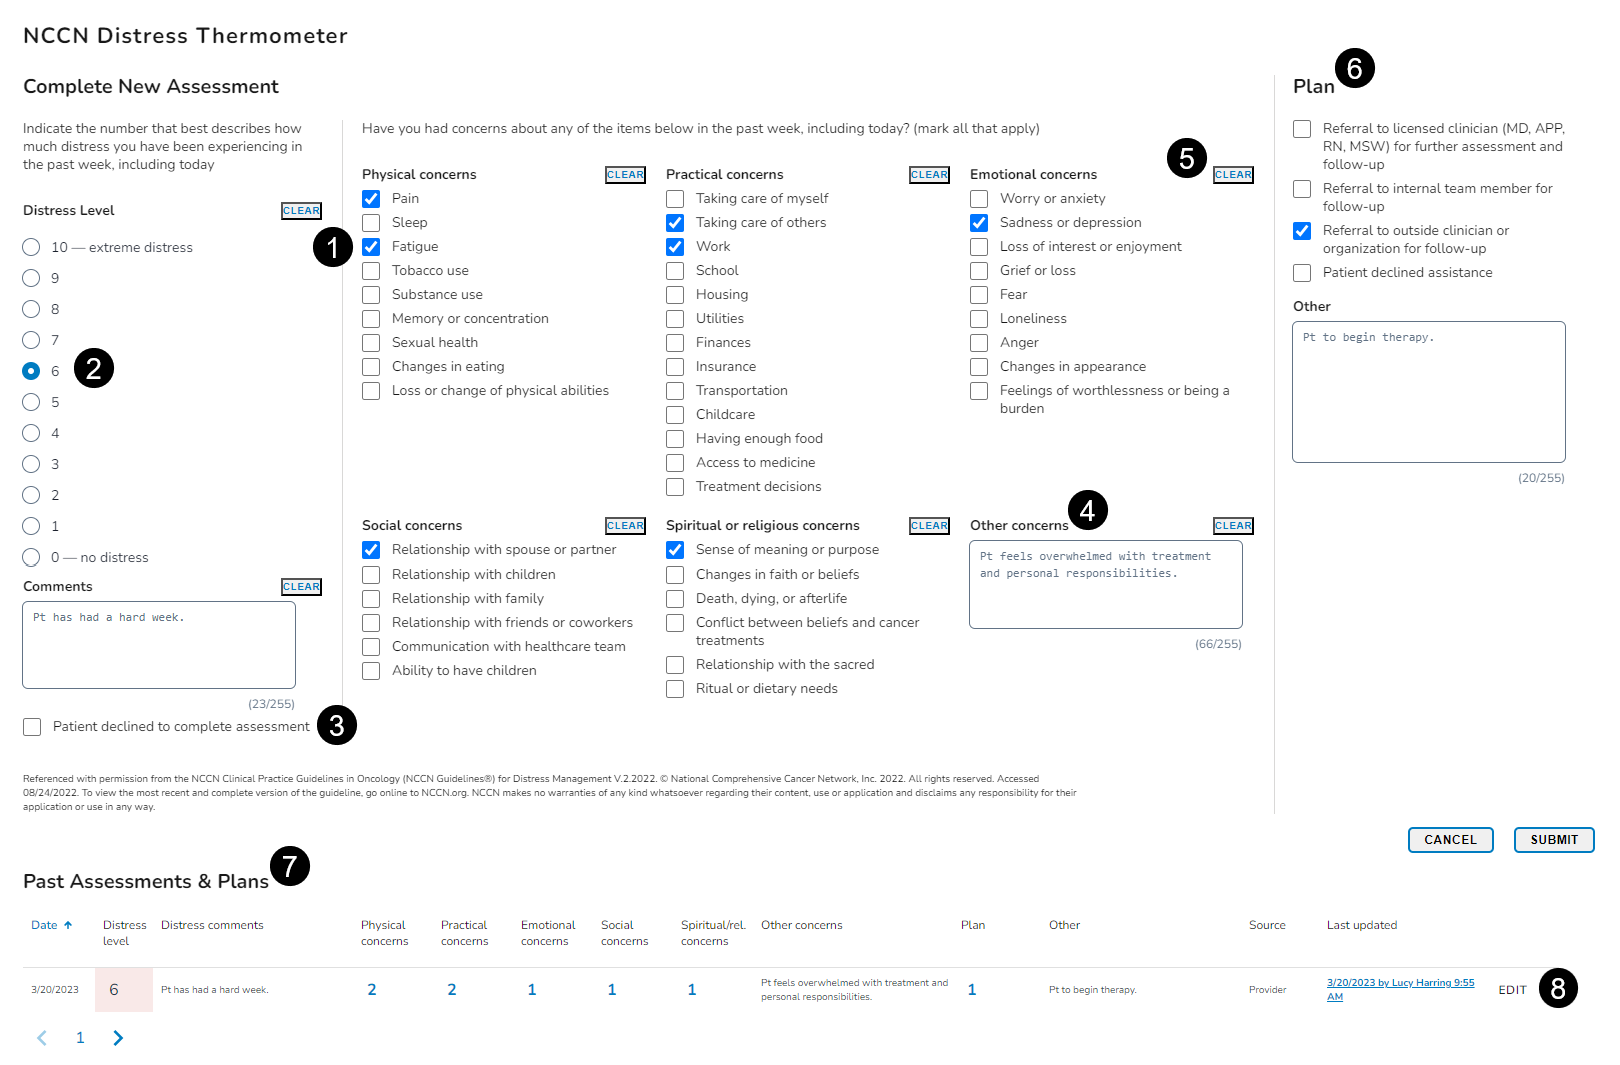
Distress Thermometer
-
Use the NCCN Distress Thermometer to identify and address any patient's concerns that are making it harder for them to cope with their illness. The NCCN Distress Thermometer is a Health-Related Social Needs (HRSN) screening tool and will be used to meet the Enhancing Oncology Model (EOM) HRSN requirement.
-
Use the checkboxes beneath each section to choose one or more answers (callout 1). Use the radio buttons to choose only one answer (callout 2).
-
If the patient declines the assessment, you can record that as well (callout 3).
-
You may enter Comments in the provided text boxes (callout 4).
-
Clicking Clear will remove your recorded answers or comments (callout 5).
-
Use the Plan section to record any next steps (callout 6).
-
After entering all relevant information, click the Save button at the bottom of the section.
-
Saved assessments will appear under the Past Assessments & Plans area (callout 7).
-
The patient’s distress score calculated by the system will appear there as well. The distress level will be graded from 0 (no distress) to 10 (extreme distress).
-
You can see the grade from each section that totals the distress score and the plan to mitigate the score.
-
Changes can be made at any time to recalculate the score by clicking Edit (callout 8).
-
This action will display the saved answers so they may be updated as needed.