Ontada Health Patient Portal Release Notes
April 18 | Patient Portal 3.3.3.1
My Care Plus Retiring
Following the successful launch and implementation of the Ontada Health Patient Portal, Ontada will retire the legacy patient portal, My Care Plus, this spring.
Starting Friday, April 26, 2024, patients and practice users will no longer be able to access www.mycareplusonline.com.
The site will be automatically redirected to Ontada Health and users will see a banner message stating that My Care Plus is no longer available, as pictured below:
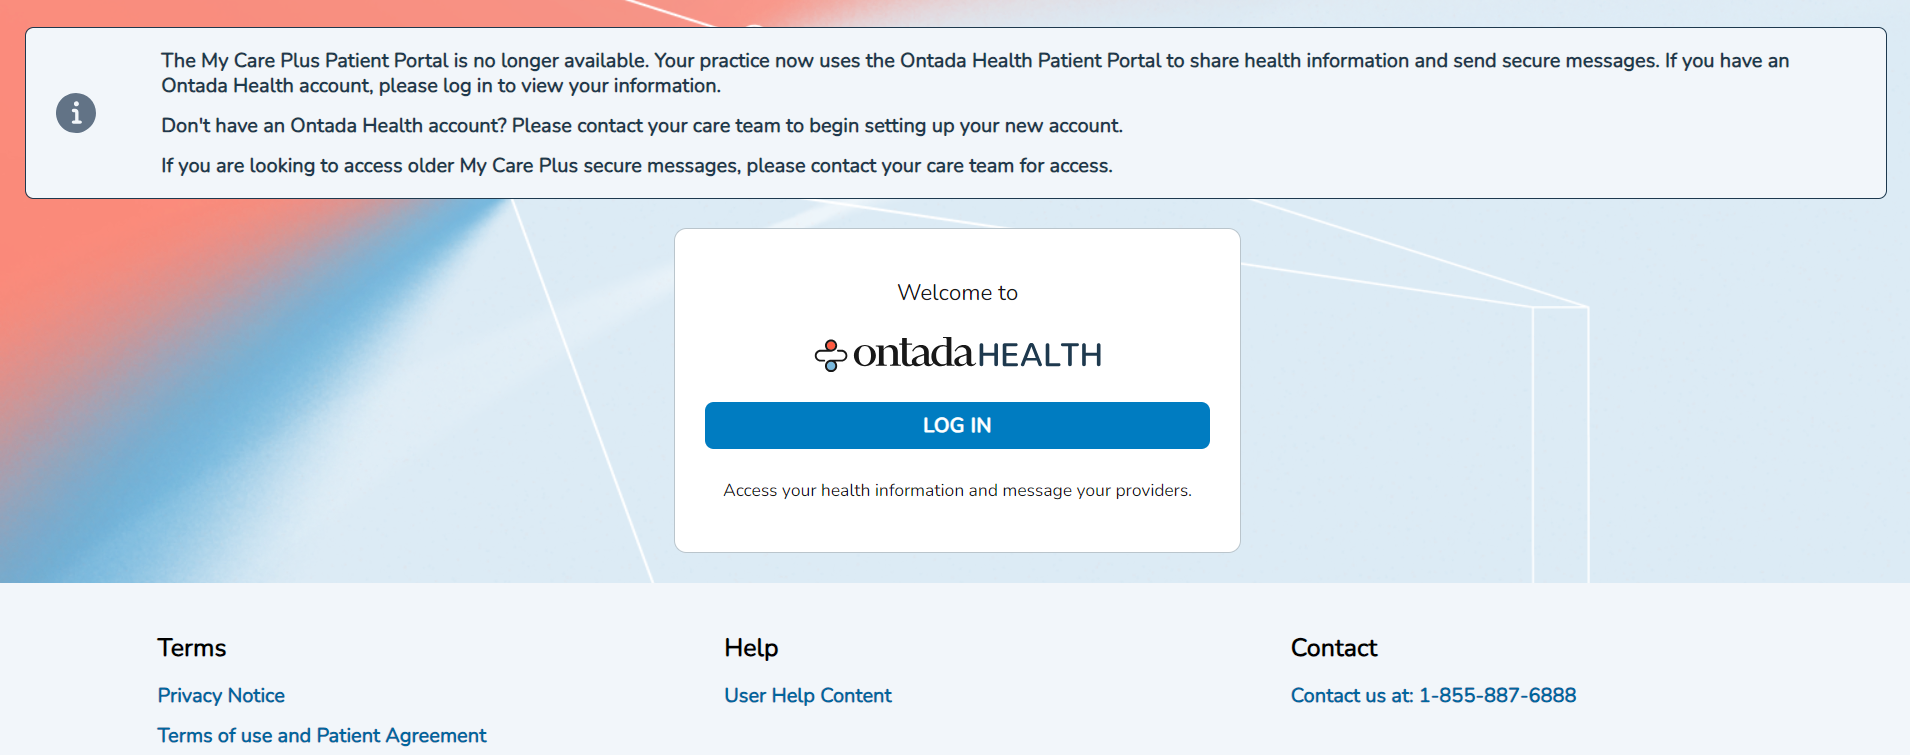
Before My Care Plus is retired, you should encourage patients to enroll in Ontada Health to continue access to their current and historical health records.
For additional information, review our Frequently Asked Questions resource.

Use Support Tools to access My Care Plus messages for patients
Users with permission to access Support Tools will be able to download a patient’s My Care PlusSM messages when necessary. Follow the steps outlined in the February 14 release notes to grant permission to this feature for one or multiple users simultaneously.
This enhancement ensures that users can seamlessly access and share crucial information from the My Care Plus patient portal even after it is decommissioned, facilitating continuity of care and information exchange.
How to access this feature
-
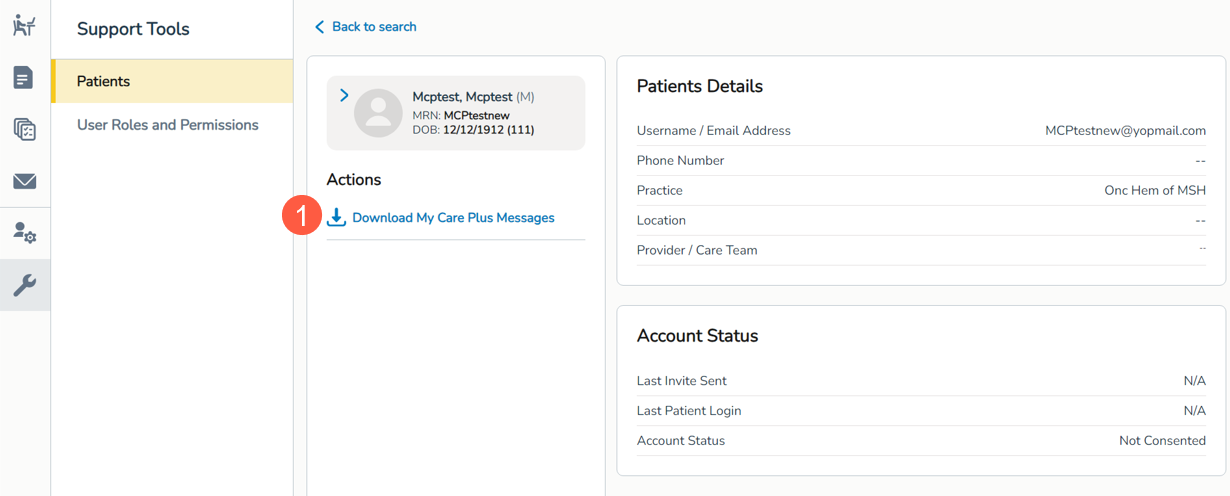
Go to the Support Tools queue.
-
Locate a patient and open their portal details.
-
Click the Download My Care Plus Messages option under Actions (callout 1) to launch the download to your computer where you can open, save, and share the messages as needed.
Flexible Health Records Viewing
Patients and caregivers can now tailor their health records viewing experience. This enhancement offers patients and caregivers a more personalized experience within the portal.
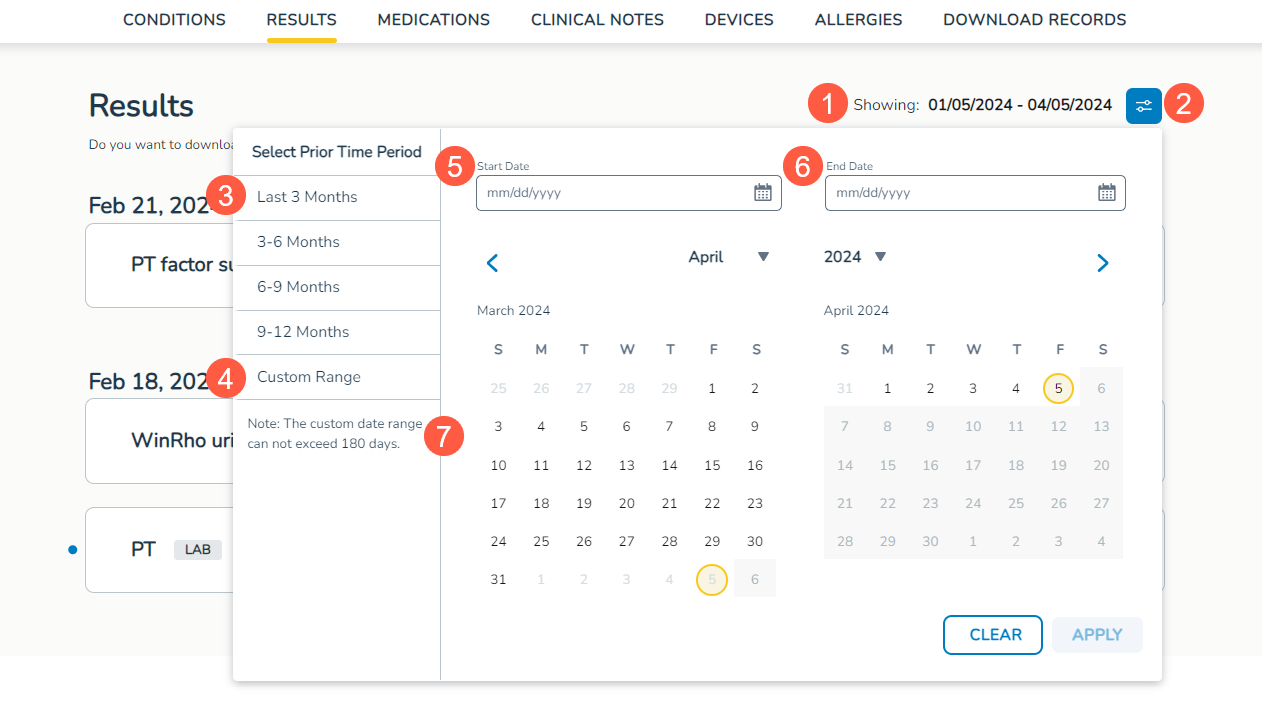
How to select a custom timeframe
-
On the Health Records > Results page, the current timeframe of results will continue to display in the upper-right corner of the page (callout 1). The default date range remains as the last 3 months.
-
Click on the date range icon (callout 2) to open the window where a custom date range can be selected.
-
In the left-hand navigation, choose from preset timeframes such as the last 3 months, 3-6 months, 6-9 months, or 9-12 months (see callout 3 for example).
-
Alternatively, choose a custom timeframe (callout 4) and select a Start Date and End Date (callouts 5-6) using the provided calendars.
-
A note within the window reminds users that custom date ranges cannot exceed 180 days (callout 7).
-
Upon applying the selection, the dates displayed in the upper-right corner will reflect the chosen timeframe, and results on the page will automatically adjust to display data within the specified range.